
| Orig. Posting Date | User Name | Edit Date |
| Jan 14, 2016 09:44AM | Hunter2 | |
| Nov 29, 2015 05:58AM | CooperTune | |
| Nov 28, 2015 04:28PM | Hunter2 | |
| Nov 18, 2015 11:32PM | Hunter2 | |
| Nov 18, 2015 09:34AM | Hunter2 | |
| Nov 18, 2015 05:18AM | CooperTune | |
| Nov 17, 2015 10:36AM | Hunter2 | Edited: Nov 17, 2015 01:20PM |
| Nov 17, 2015 10:34AM | Hunter2 | |
| Mar 27, 2015 07:35AM | Hunter2 | |
| Mar 26, 2015 10:37PM | TK | |
| Mar 26, 2015 08:54AM | Spitz | Edited: Mar 26, 2015 08:54AM |
| Mar 26, 2015 08:23AM | Hunter2 | |
| Dec 9, 2014 08:18AM | Hunter2 | |
| Dec 4, 2014 04:38PM | Hunter2 | |
| Dec 2, 2014 08:36PM | Hunter2 | |
| Dec 2, 2014 05:51PM | DRMINI | Edited: Dec 2, 2014 05:52PM |
| Dec 2, 2014 04:39PM | Hunter2 | |
| Dec 2, 2014 01:57PM | DRMINI | |
| Dec 2, 2014 12:48PM | velopackrat | |
| Dec 2, 2014 10:10AM | Hunter2 | Edited: Nov 17, 2015 10:21AM |

|
Total posts: 6469
Last post: Sep 29, 2022 Member since:Nov 2, 2006
|
Cars in Garage: 4
Photos: 1354 WorkBench Posts: 2 |
|
OK, we got the new Hastings rings. My partner in crime got them gapped and pistons installed.
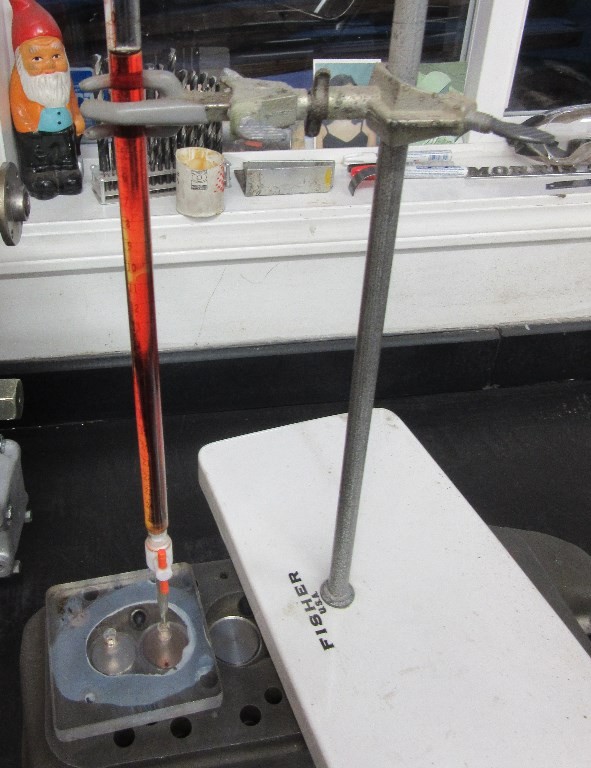
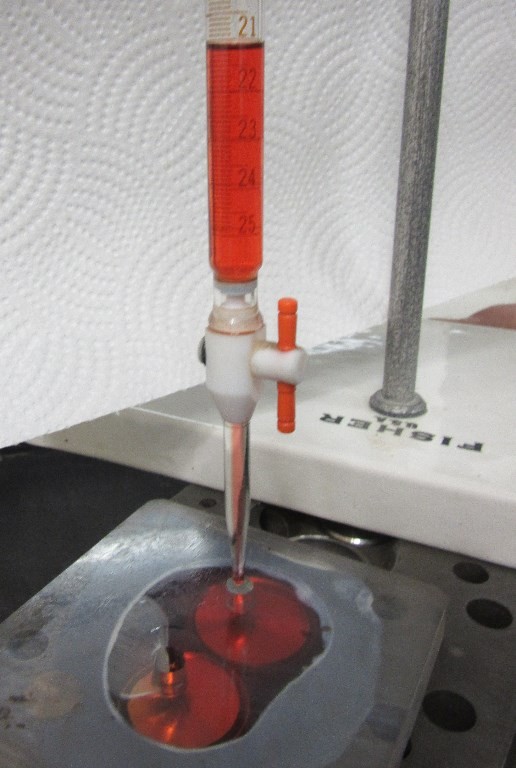
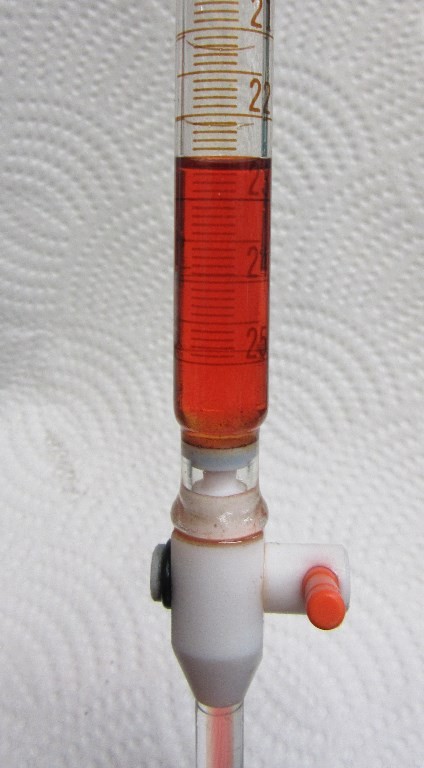
Using Cupcake's donated Burrete, the ring to block deck volume was 11.5 ccs.
With unmilled face on 12G940 head but new hardened exhaust seats & new valves volume is 22.5 ccs vs. stock 21.4 ccs.
Result looks like compression ratio is bang on 9.75:1 without skimming the head and it is dead straight.
|
|
Total posts: 4134
Last post: Oct 13, 2020 Member since:Oct 8, 2011
|
Cars in Garage: 0
Photos: 0 WorkBench Posts: 0 |
|
Rick, I have a pile of cyl heads I'm planning on having done. Valves, guides, hard seats, maybe a little porting and chamber work. After spending hours opening a 21 CC head to 22 CCs and paying around $250 for a custom gasket I was thinking. A 295 cyl head with a little work would have a very large chamber and the ports could flow with a std 940 head. The 5 port alloy head I installed last week saved me with it's 24 CC chamber.
Looks good, I'm taking lots of pictures as I work the engines in the shop. With no Zip to send them to I'll have to learn to post myself. Steve (CTR)
|
|
Total posts: 6469
Last post: Sep 29, 2022 Member since:Nov 2, 2006
|
Cars in Garage: 4
Photos: 1354 WorkBench Posts: 2 |
|
Assembly coming along...now where are those piston rings?
|
|
Total posts: 6469
Last post: Sep 29, 2022 Member since:Nov 2, 2006
|
Cars in Garage: 4
Photos: 1354 WorkBench Posts: 2 |
|
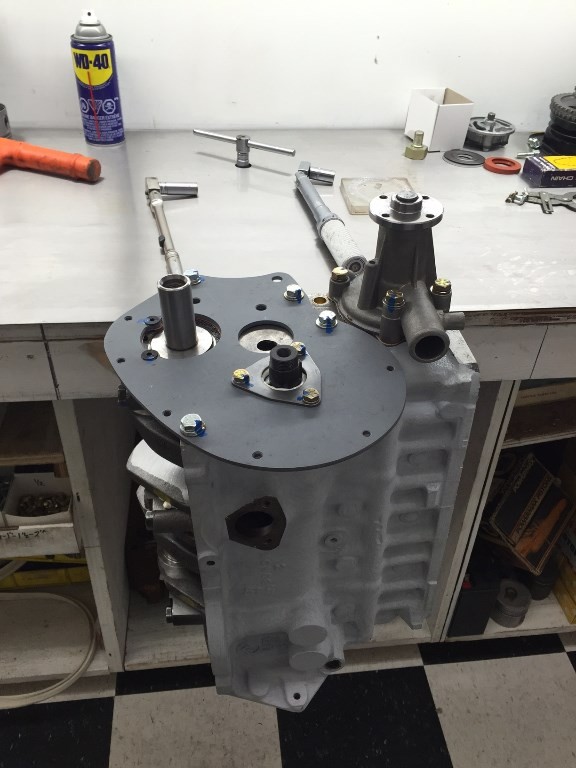
Cams in with correct clearance. Cranks in & mains torqued up, got clearance. All Mousy's work.
Visitors from the east arriving tomorrow, something about scooping a Classic Mini refugee from the western Pacific off the local docks.
|
|
Total posts: 6469
Last post: Sep 29, 2022 Member since:Nov 2, 2006
|
Cars in Garage: 4
Photos: 1354 WorkBench Posts: 2 |
|
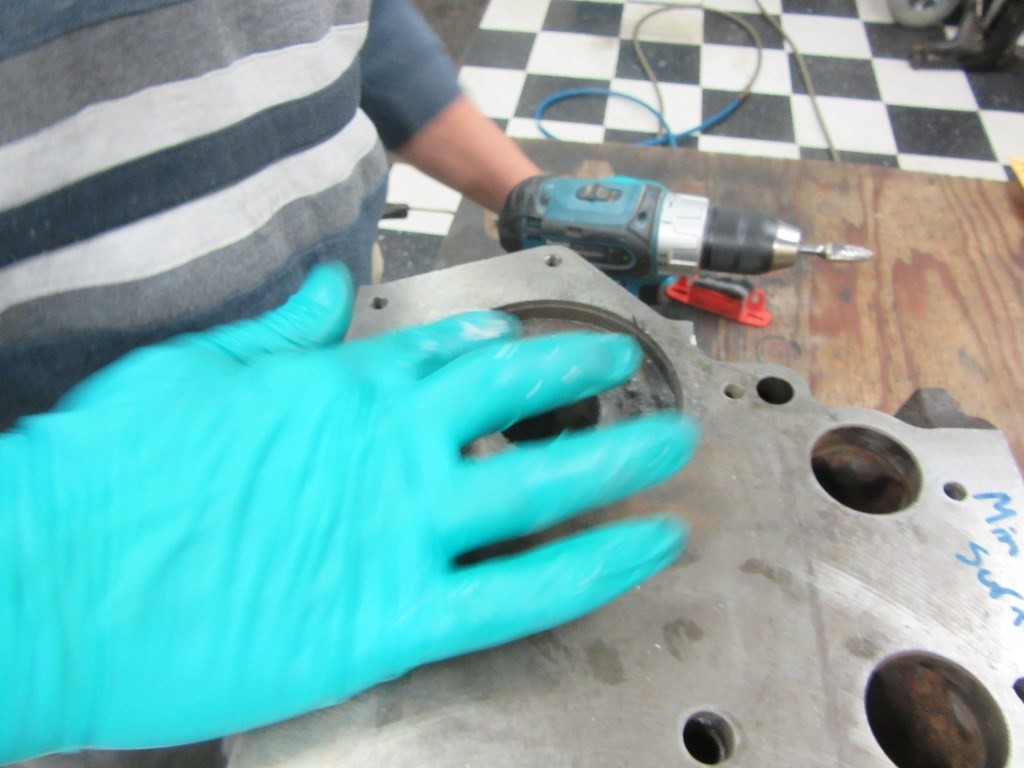
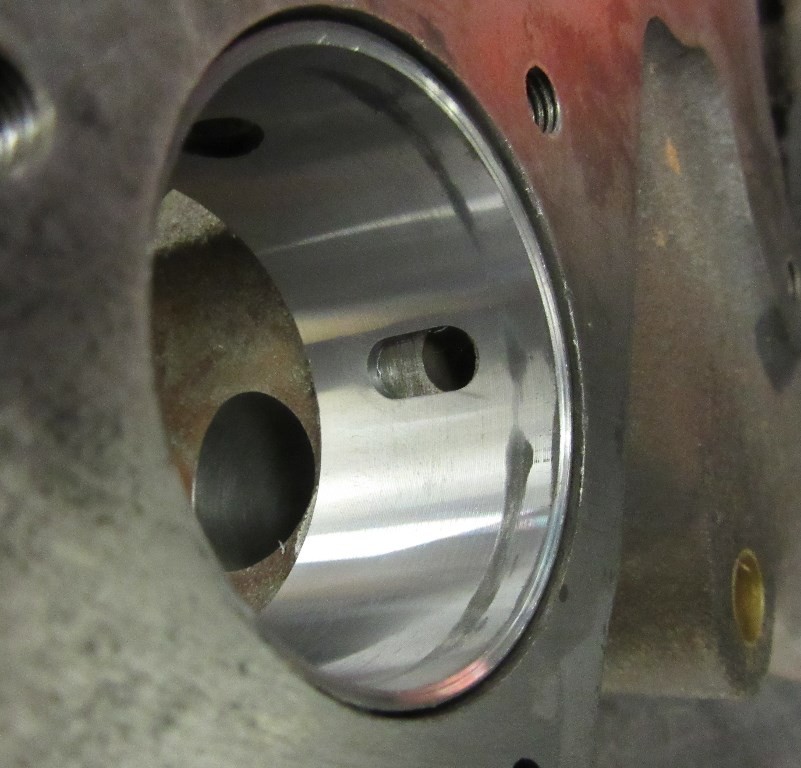
Stopped cold within minutes last night when neither of the cams would enter the bearings...small ends seemed ok, definitely not larger ends. Two blocks separated by decades, mine the Austinn America, my partners the late Rover SPI that went to Japan...my cam by Swiftune, his by Colt Cams. Some honing there to do.
So we didn't get to the crank/rods/pistons install and get out the burette for piston dish measurement let alone the head chambers.
I am concerned that getting the measurements right is a must as my block was built years ago to go racing (and didn't even run) and when we checked main/rod clearances, my piston crowns were 13 thou down the bore, my partners more than 20 thou. That 13 thou puts me in the 10:1 range or a little better depending on any combustion chamber loss due to hardened exhaust seats I had installed...though the 12G940 head does not appear to have been otherwise milled. You may notice the felt marker words for the machine shop - min surface on block.
At this point there will likely be similar words for the machine shop on the head...and we may need to remove some material from the chambers. We'll see.
So we did something useful...MG Metro reddish on my partner's block, masking and two coats of primer on my block...and reviewed inventory of parts on hand.
|
|
Total posts: 4134
Last post: Oct 13, 2020 Member since:Oct 8, 2011
|
Cars in Garage: 0
Photos: 0 WorkBench Posts: 0 |
|
Looking really nice have you CCed the head and checked piston to deck yet? On a recent build I had to remove a full CC
from each chamber to get to 10 to 1. Do you know what chamber size you have now? The last head I did came out 22.5
the one before that was 21 even. Both heads are non by passing MG metro big valve. The 22.5 had not been surfaced before
I took .007 off it for clean up only. The other had been surfaced and I wish I had checked thickness before porting. I'm
thinking about starting a pile of 295 heads. Keep the pictures coming. Steve (CTR)
|
|
Total posts: 6469
Last post: Sep 29, 2022 Member since:Nov 2, 2006
|
Cars in Garage: 4
Photos: 1354 WorkBench Posts: 2 |
|
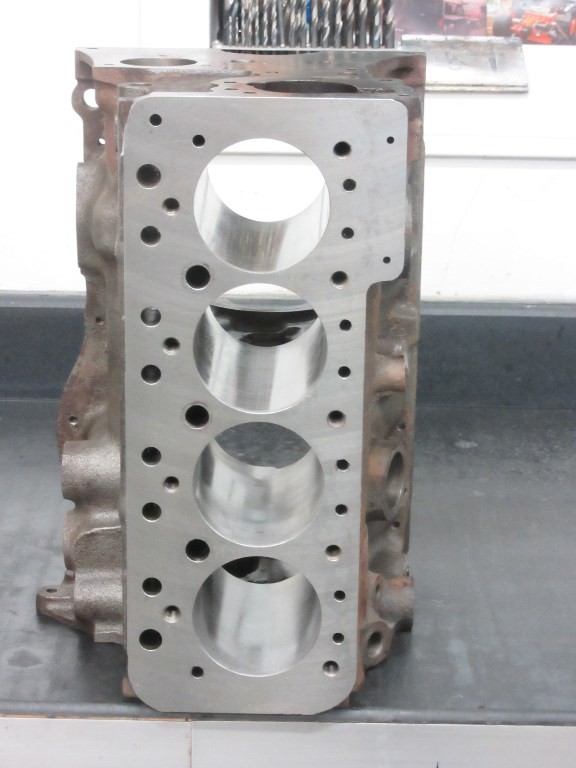
Nothing quite like a naked block ready for assembly...
The Austin America block was built up years ago to go racing...but the brother of the builder (passed young) said he didn't think they ever got the engine running...which fit with what I was surprised to see - clean piston crowns, honing in bores - when the head came off the ugliest power unit you are ever likely to find outside in the Pacific Northwet.
Crack tested, hot tanked twice, bores re honed (lightly), face cleaned up minimally...
|
|
Total posts: 6469
Last post: Sep 29, 2022 Member since:Nov 2, 2006
|
Cars in Garage: 4
Photos: 1354 WorkBench Posts: 2 |
|
Can't believe 11 months have gone by...but time for renos at home, planning for Mini Meet, our big community day and OZ visitors...then family holiday and more renos, so here we are as of last night:
Got back to the engine build last night...oil flow to filter and into out of pump improved with dremel as per GR in OZ followed by good wash, gallery rod out, brake clean, wipe & blow dry. Block looks really good!
Next up oil gallery plugs in both blocks and frost plugs in mine but not yet in my partner's block (it was primed and will be painted ala MG Metro with clear over plated frost plugs vs. my whole power unit will be metallic green).
Both blocks had gone out for main journal/cap sizing and align hone with my block having the lightest facing, the other block needing some meat off to bring new Rover std. pistons closer to top of bore. Interestingly, my main bearing journals on new A+ crank were 1 thou oversize - the increased clearance needed, so polishing got the job done (rod journals were OK).
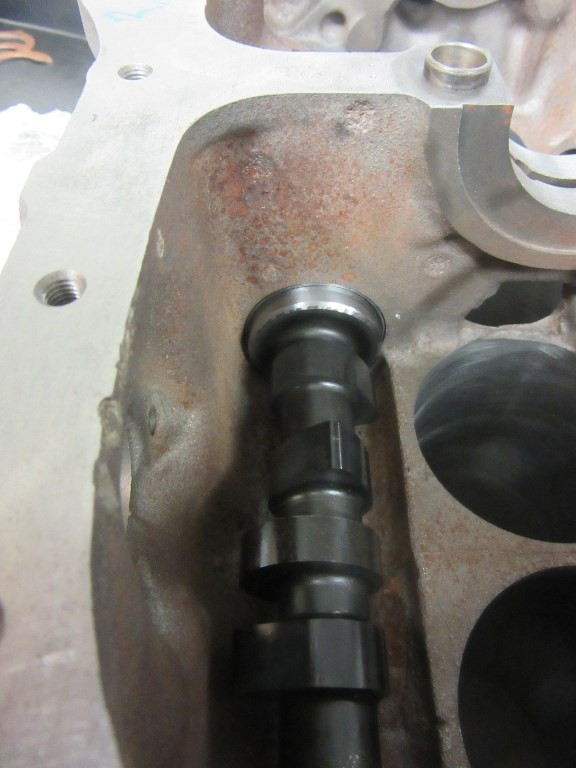
Last operation of the night was cam bearing align and install.
Tonight...will install cranks, cams, pistons & rods...rechecking clearances. Then cc combustion chambers before determining what material needs to come off head faces to end up near 10:1 CR.
Will also take base/clear paint supplies to see if we need a darker primer on my power unit. Trying to replicate OZ Sherwood Green Metallic (got a match with a Ford paint so that was made up).
|
|
Total posts: 6469
Last post: Sep 29, 2022 Member since:Nov 2, 2006
|
Cars in Garage: 4
Photos: 1354 WorkBench Posts: 2 |
|
Thanks TK...been a bit of a doodle to zero in on the colour & paint source.
Not much of the original paint still in decent condition on the 42 year old power unit.
|
|
Total posts: 1124
Last post: Jan 12, 2024 Member since:May 13, 2002
|
Cars in Garage: 0
Photos: 0 WorkBench Posts: 0 |
|
|
|
Total posts: 13978
Last post: Jan 15, 2024 Member since:Jan 22, 2003
|
Cars in Garage: 4
Photos: 381 WorkBench Posts: 1 |
|
Sort of like this?
Coming along nicely....going to be a great engine
"Everybody should own a MINI at some point, or you are incomplete as a human being" - James May
"WET COOPER", Partsguy1 (Terry Snell of Penticton BC ) - Could you send the money for the unpaid parts and court fees.
Ordered so by a Judge
|
|
Total posts: 6469
Last post: Sep 29, 2022 Member since:Nov 2, 2006
|
Cars in Garage: 4
Photos: 1354 WorkBench Posts: 2 |
|
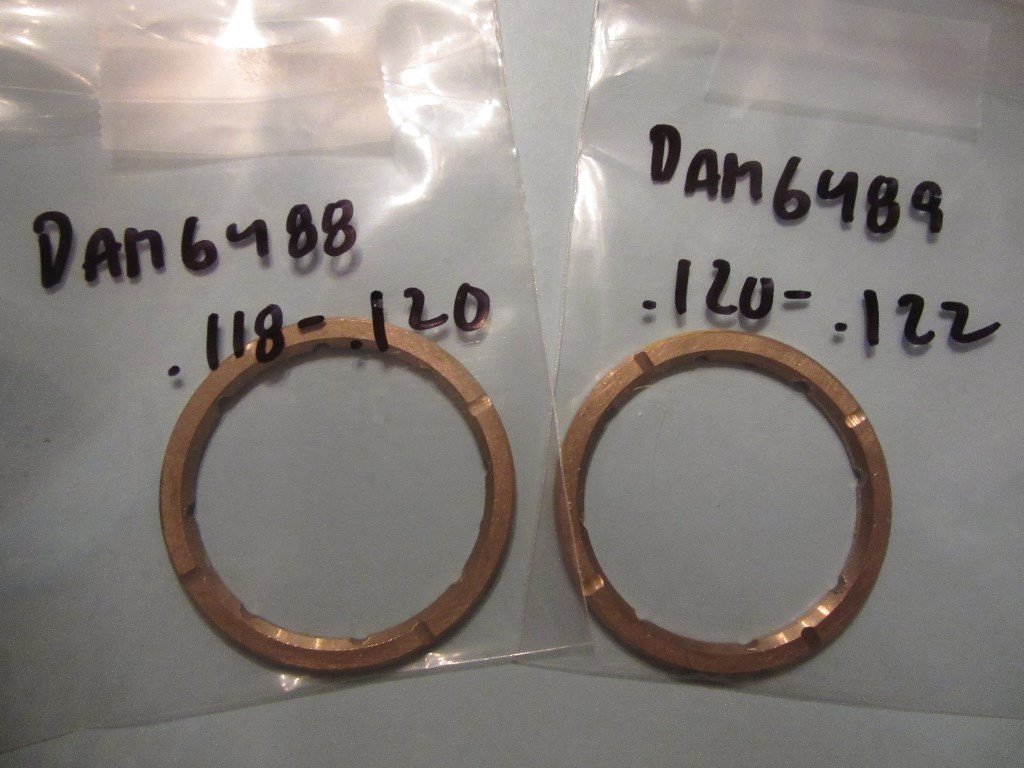
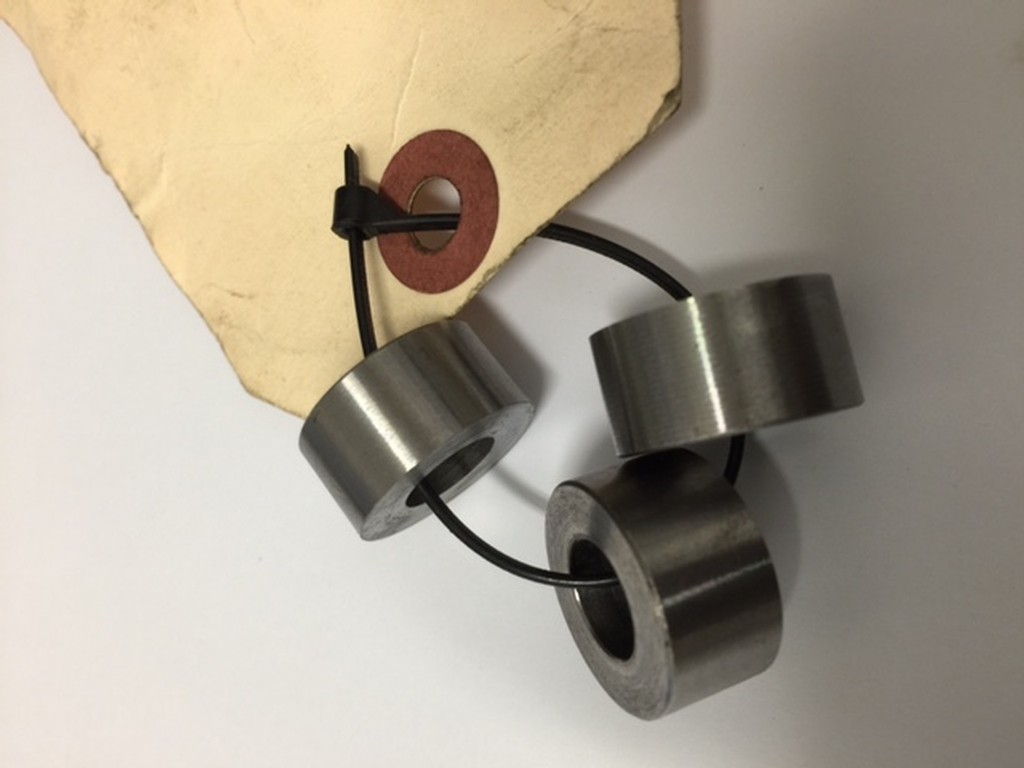
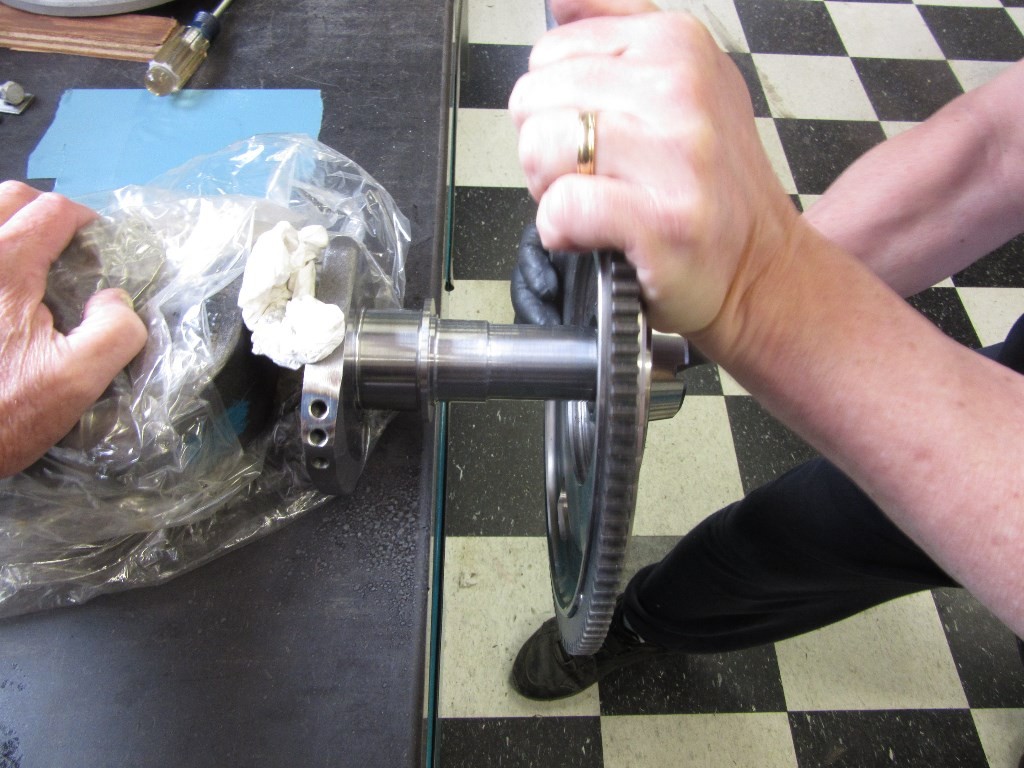
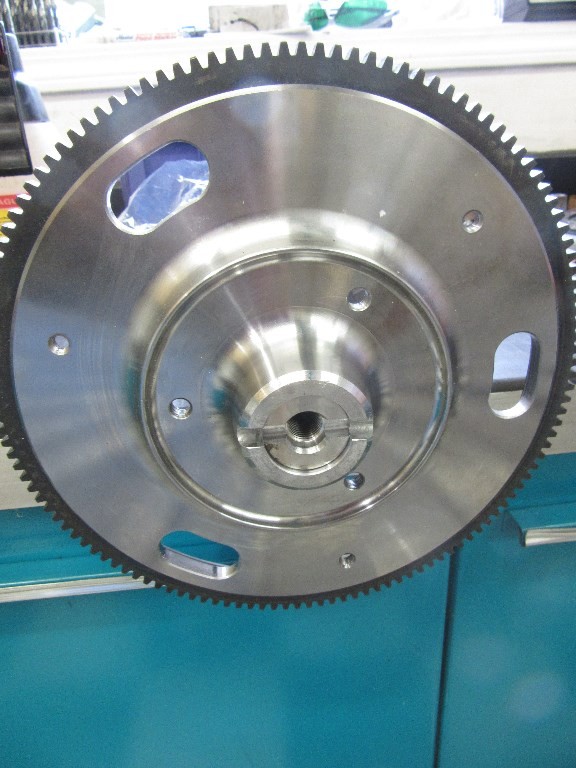
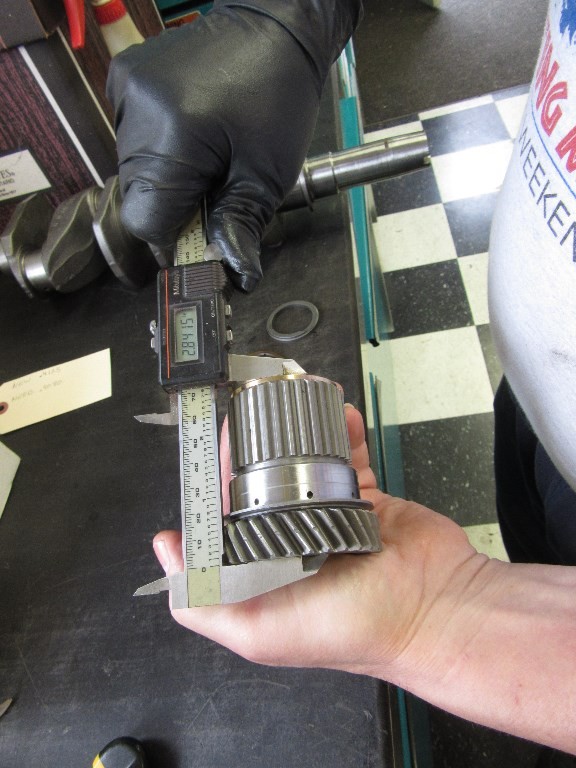
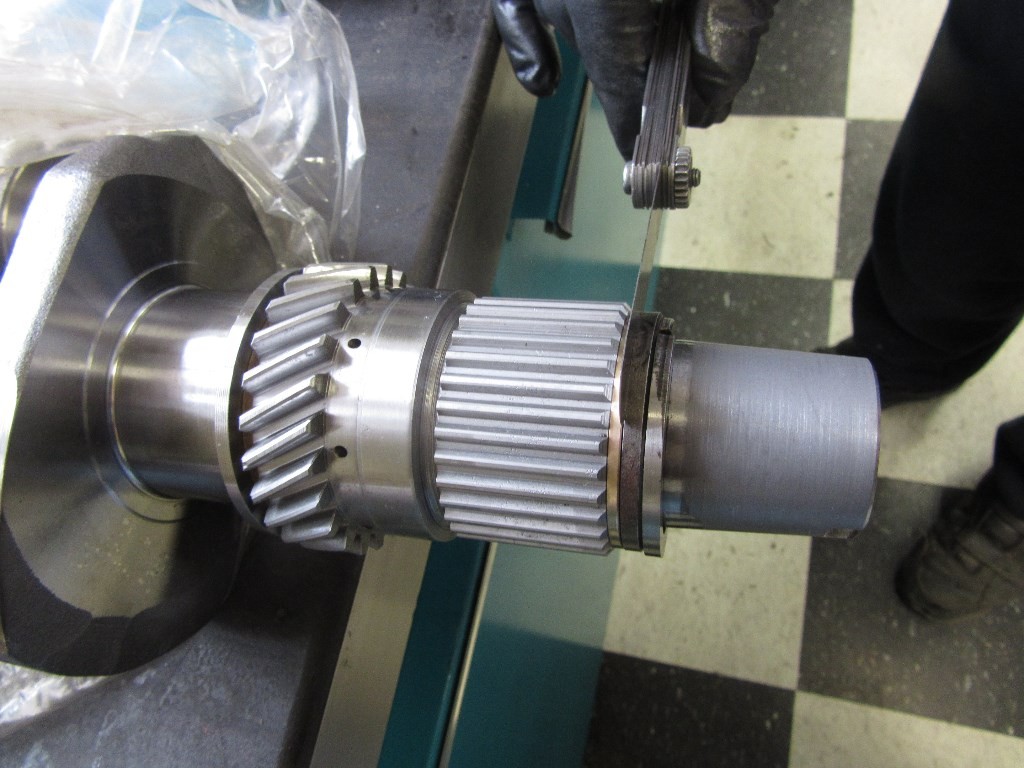
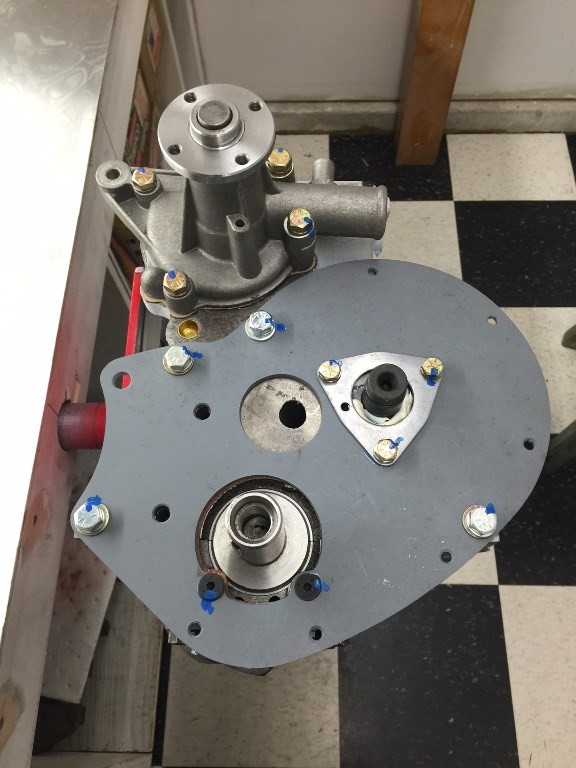
Not speedy...machined spacers for new MM lightened flywheel setup back and primary gear thrusts to get clearance right are in hand...rotating bits going for balancing very, very soon (he said hopefully).
Flywheel is lapped to new crank, primary clearance needed to be ID'd and addressed, flywheel/pressure plate clearance measured,...all bits now on hand.
Must find some Leyland Australia metallic(?) green engine paint.
|
|
Total posts: 6469
Last post: Sep 29, 2022 Member since:Nov 2, 2006
|
Cars in Garage: 4
Photos: 1354 WorkBench Posts: 2 |
|
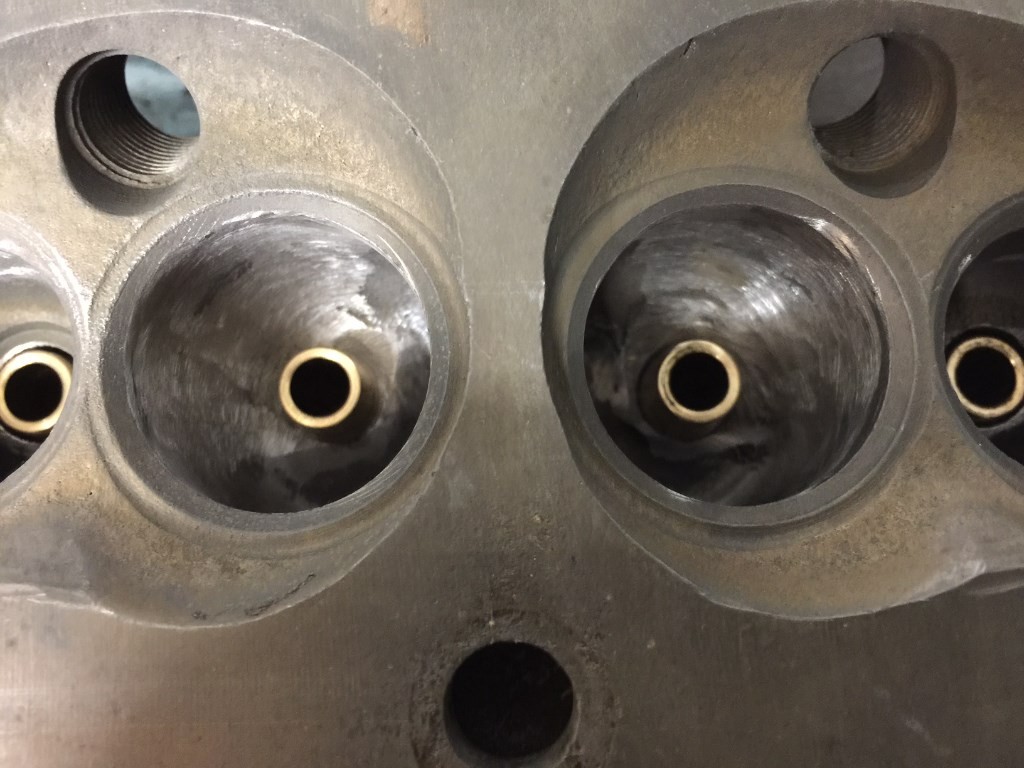
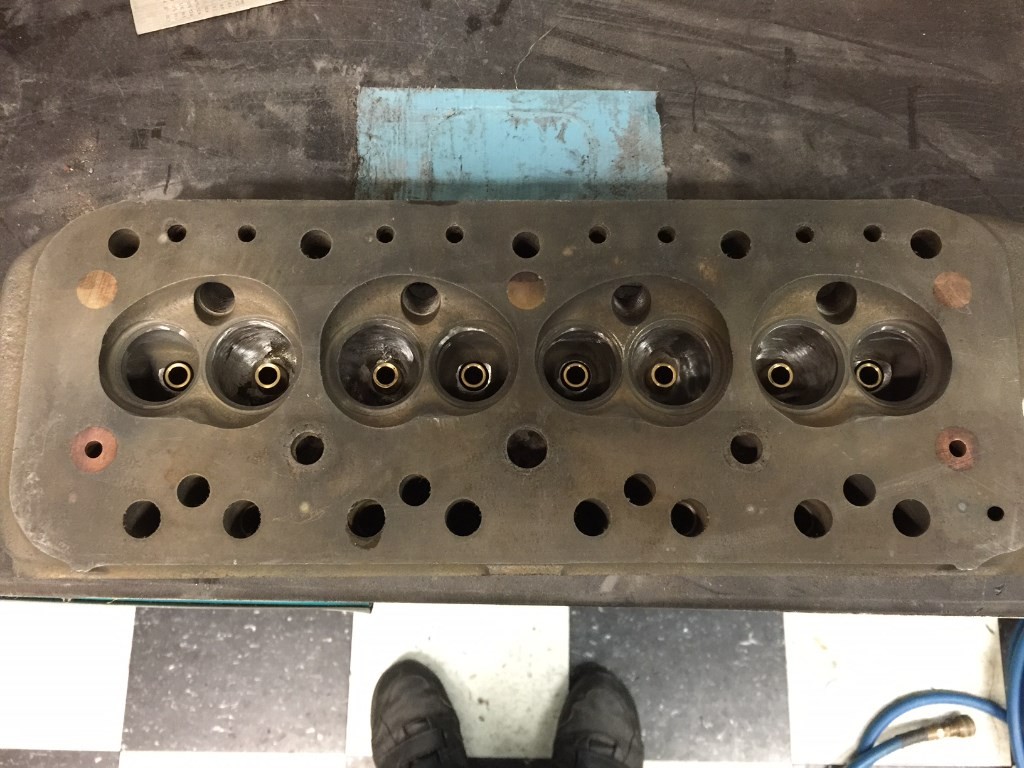

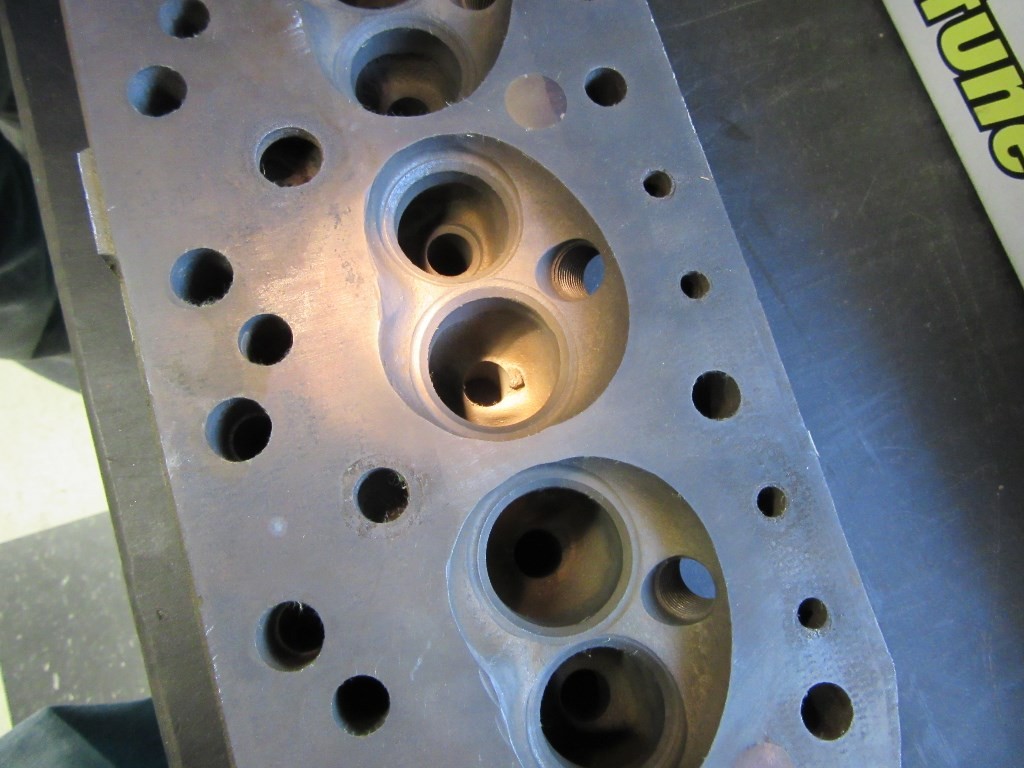
Extra casting lumps & bumps out and new guides installed...ream/hone, then hardened exhaust seats, seats cut, head faced....
Have most everything needed for engine now (almost all off my own parts shelf) with an HIF44 to check over and dizzy to settle on.
Then when the 1098 power unit is split, we'll have a 4-synchro tranny to go through!
(You will notice the light flash of rust after rinsing on coming out of the molasses bath)
|
|
Total posts: 6469
Last post: Sep 29, 2022 Member since:Nov 2, 2006
|
Cars in Garage: 4
Photos: 1354 WorkBench Posts: 2 |
|
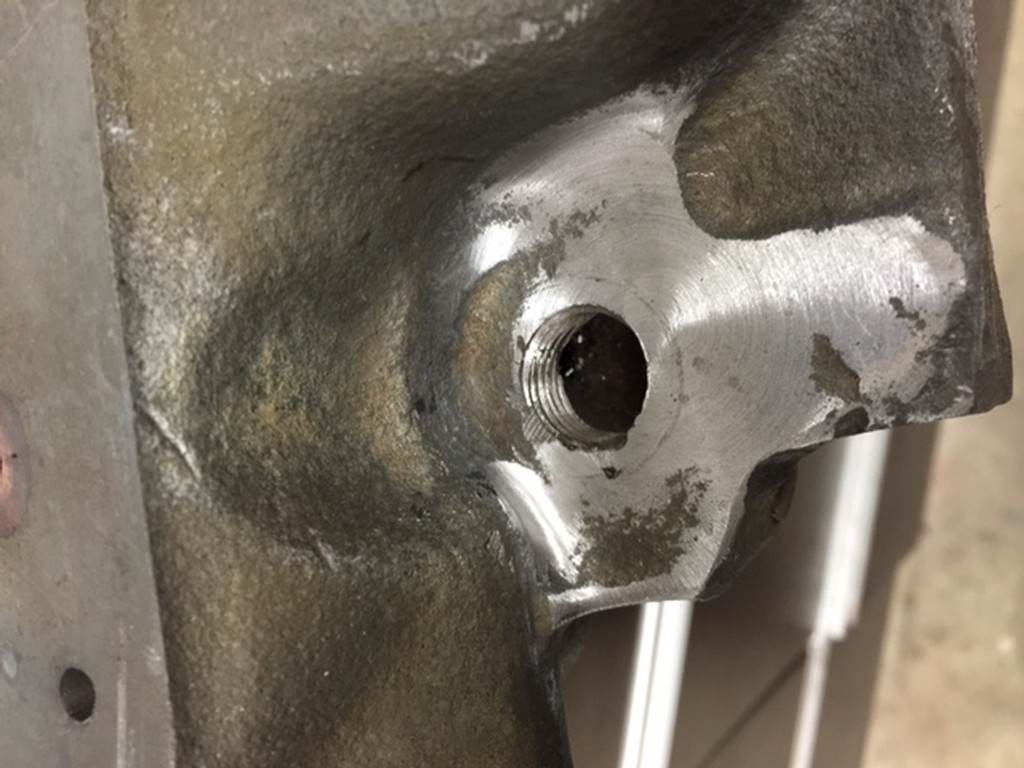
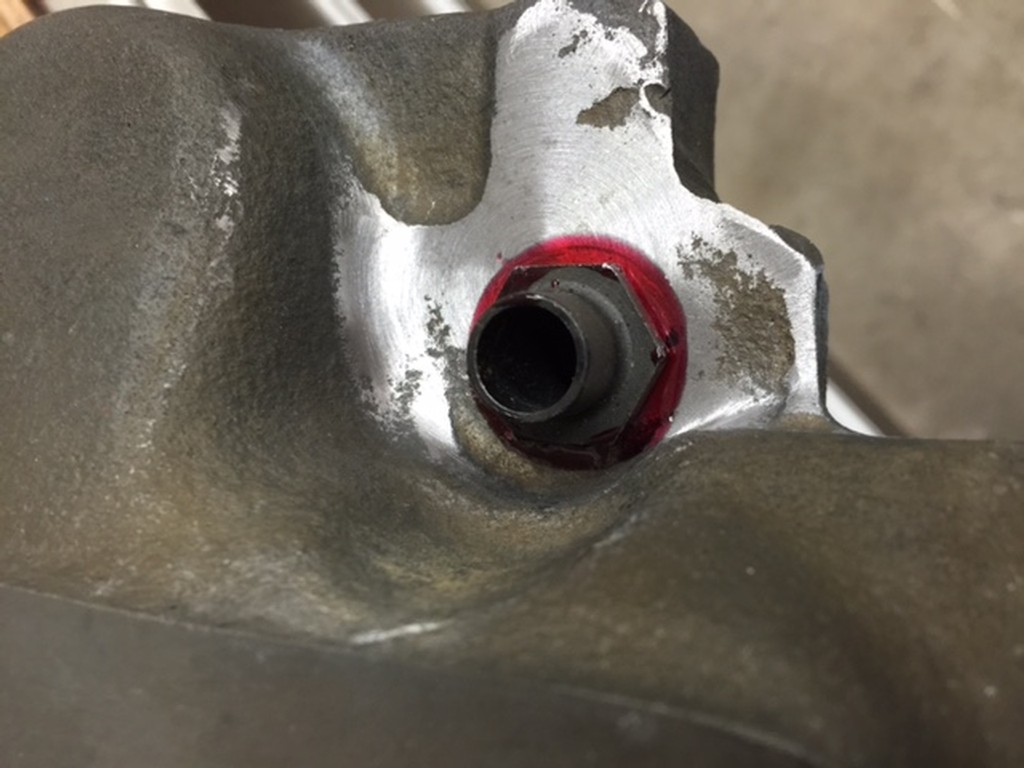
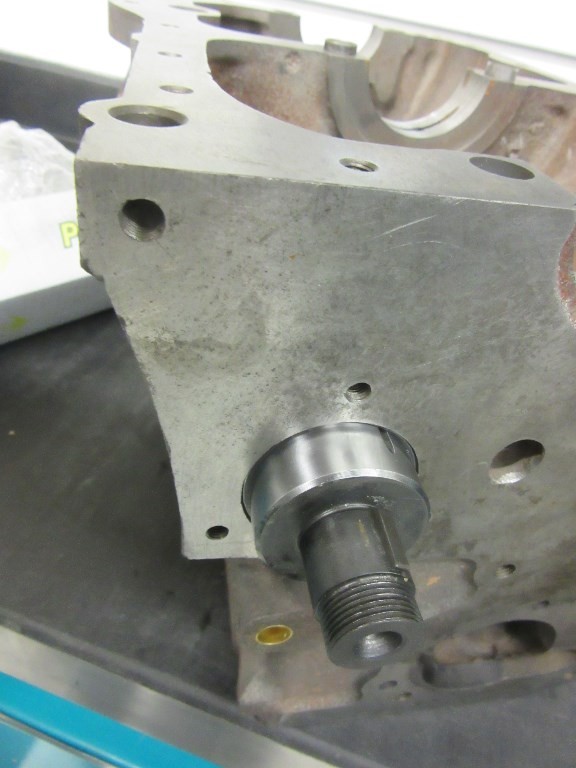
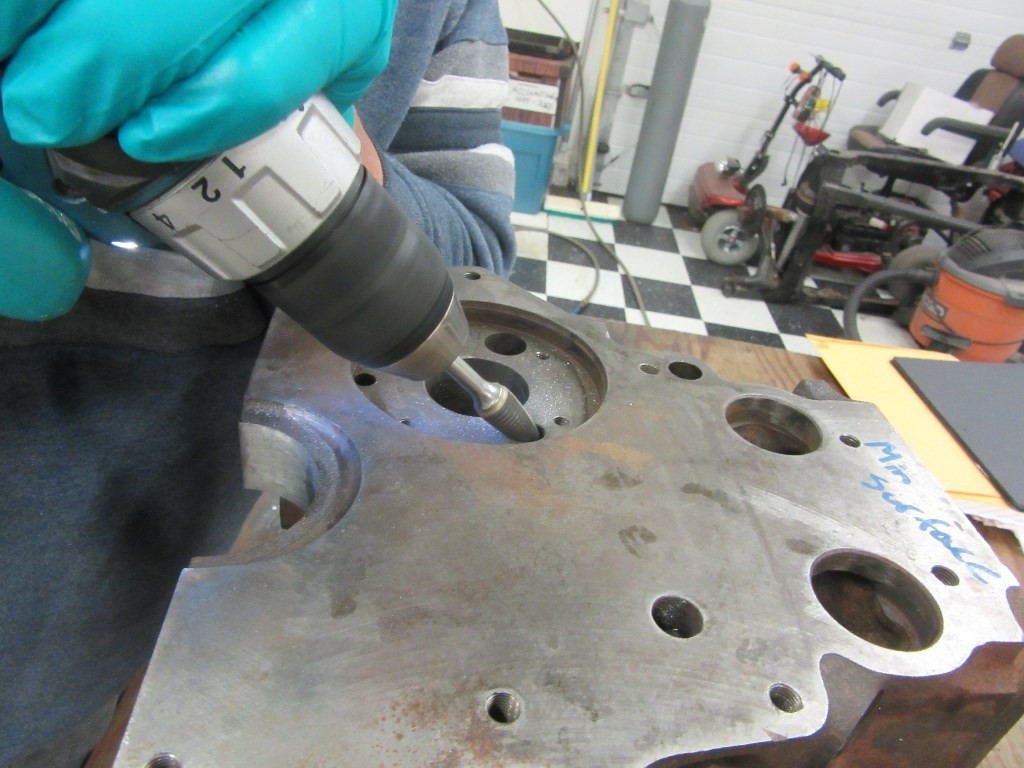
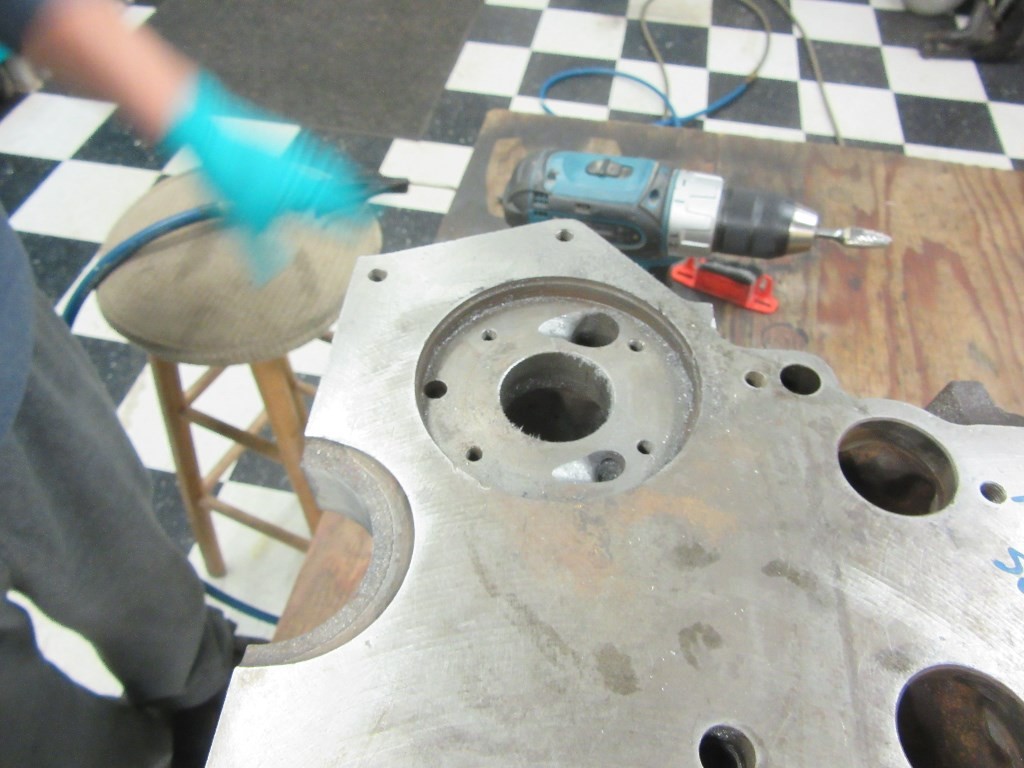
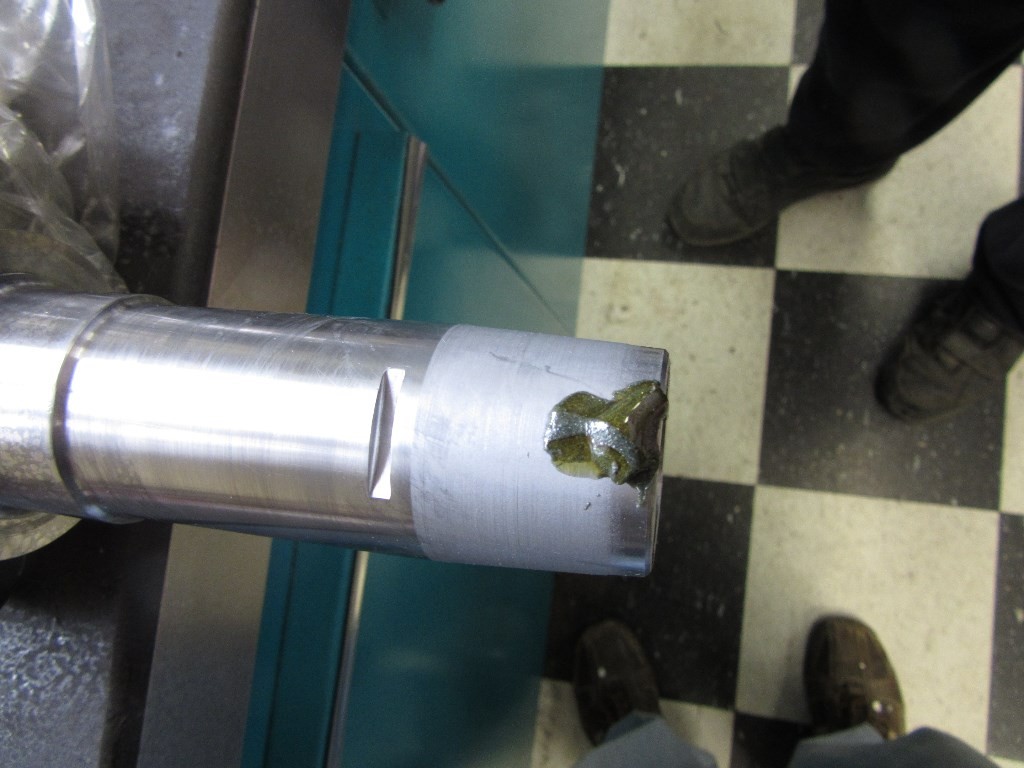
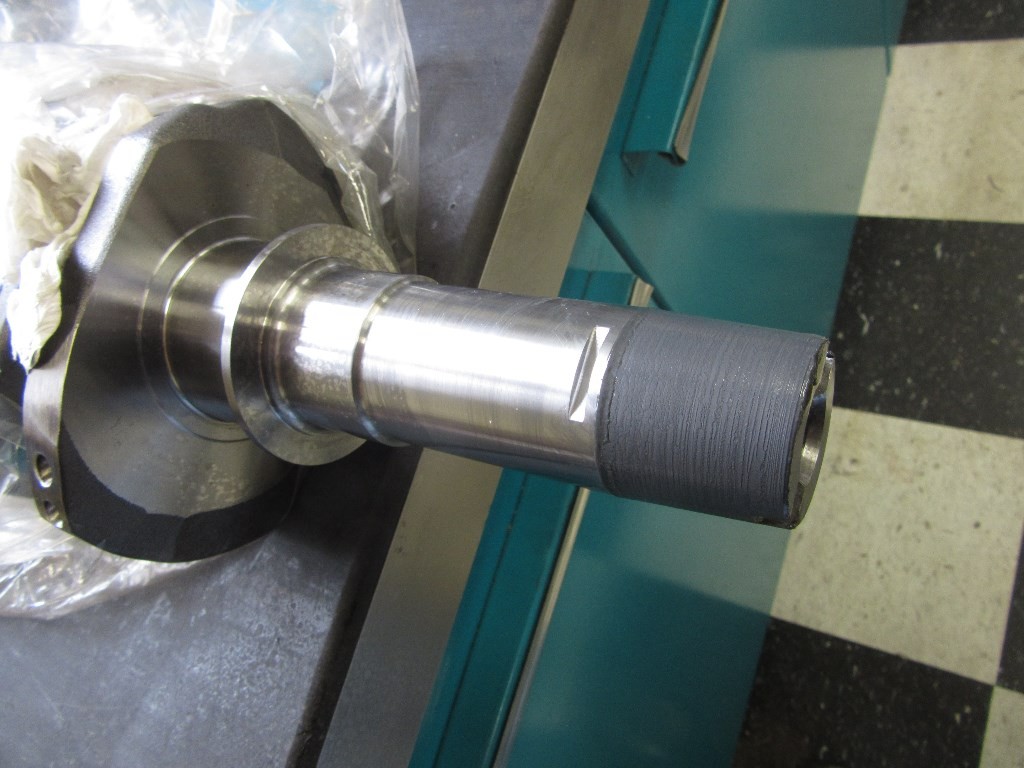
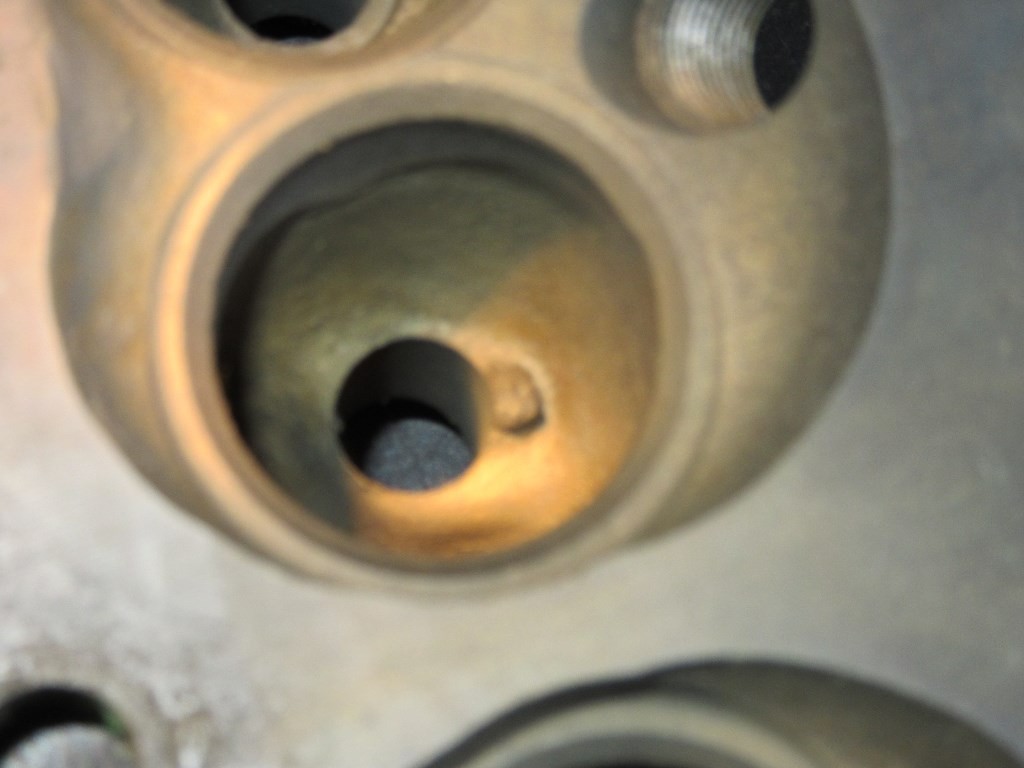
Well Mousy dug in and cleaned up the welding debris from the bypass pipe, drilled and tapped for iron spigot...now locktited in place.
|
|
Total posts: 6469
Last post: Sep 29, 2022 Member since:Nov 2, 2006
|
Cars in Garage: 4
Photos: 1354 WorkBench Posts: 2 |
|
Excellent Kevin!
|
|
Total posts: 8645
Last post: Dec 16, 2020 Member since:Oct 27, 2000
|
Cars in Garage: 0
Photos: 0 WorkBench Posts: 0 |
|
Thanks Kevin! Anything OZ needed for puddin stirrer rebuild...gaskets or...??
Hi Rick,
I rebuilt one this year for a Moke.
The main wear was in the tin cover, where the ball of the shifter sits.
I built the spherical recess up with SBA45 silver solder, then used a die grinder with a ball shaped stone to shape it so the shifter fitted but had no slack.
It took an hour or so to do, but it's worth it. It got rid of that `stick in a bowl of spaghetti' feeling.
I then packed it with some molygrease.
Kevin G
1360 power- Morris 1300 auto block, S crank & rods, Russell Engineering RE282 sprint cam, over 125HP at crank, 86.6HP at the wheels @7000+.
|
|
Total posts: 6469
Last post: Sep 29, 2022 Member since:Nov 2, 2006
|
Cars in Garage: 4
Photos: 1354 WorkBench Posts: 2 |
|
Thanks Kevin! Anything OZ needed for puddin stirrer rebuild...gaskets or...??
|
|
Total posts: 8645
Last post: Dec 16, 2020 Member since:Oct 27, 2000
|
Cars in Garage: 0
Photos: 0 WorkBench Posts: 0 |
|
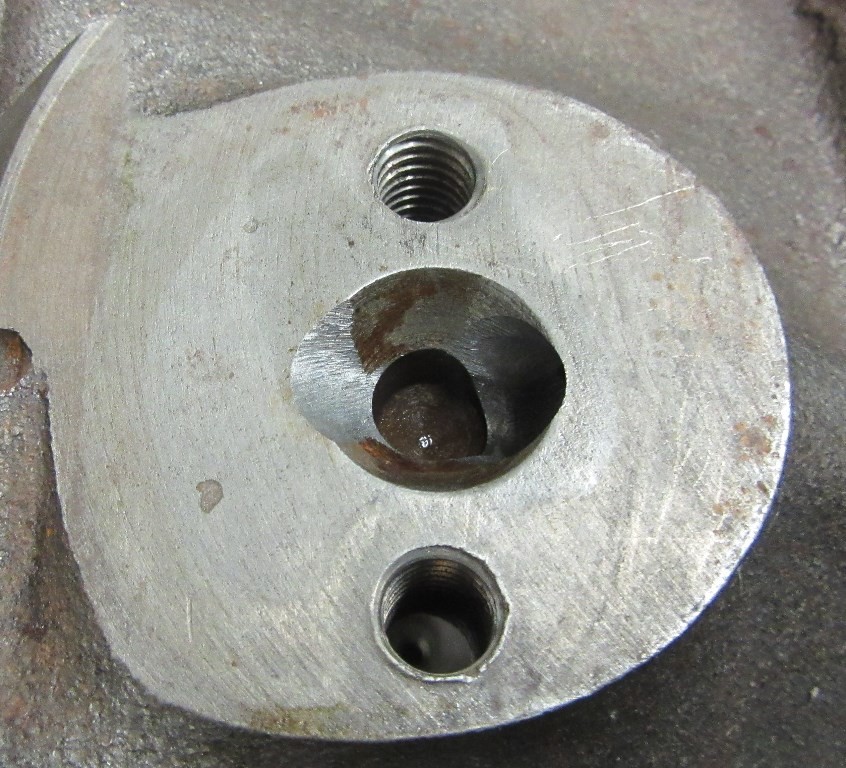
I clamp the head on the mill and drill the spigot out 9/16", then in same setup run a 5/8-18 UNF tap into it. I dunno if the original pitch was 18 or 16tpi but this works fine, as it is only a few threads deep.
Then I machine up a new brass spigot with 5/8-18 thread. Loctite it in. No more rusting...
Kevin G
1360 power- Morris 1300 auto block, S crank & rods, Russell Engineering RE282 sprint cam, over 125HP at crank, 86.6HP at the wheels @7000+.
|
|
Total posts: 247
Last post: Sep 1, 2019 Member since:Jun 26, 2012
|
Cars in Garage: 0
Photos: 0 WorkBench Posts: 0 |
|
Sounds like it will be a sweet little motor.
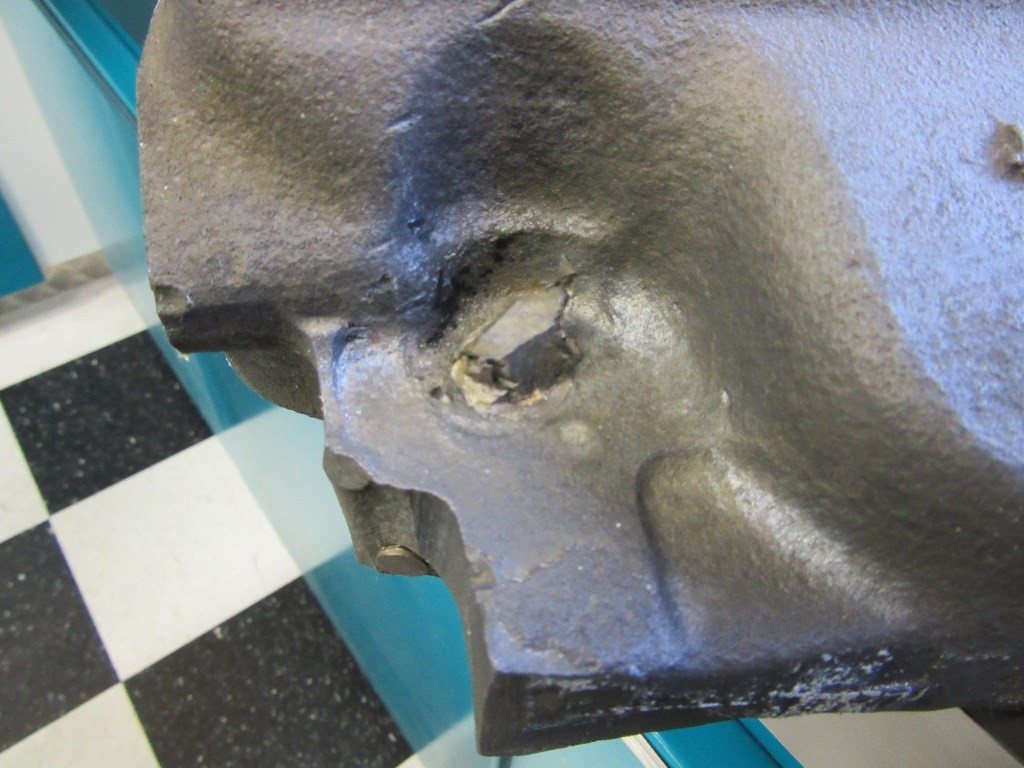
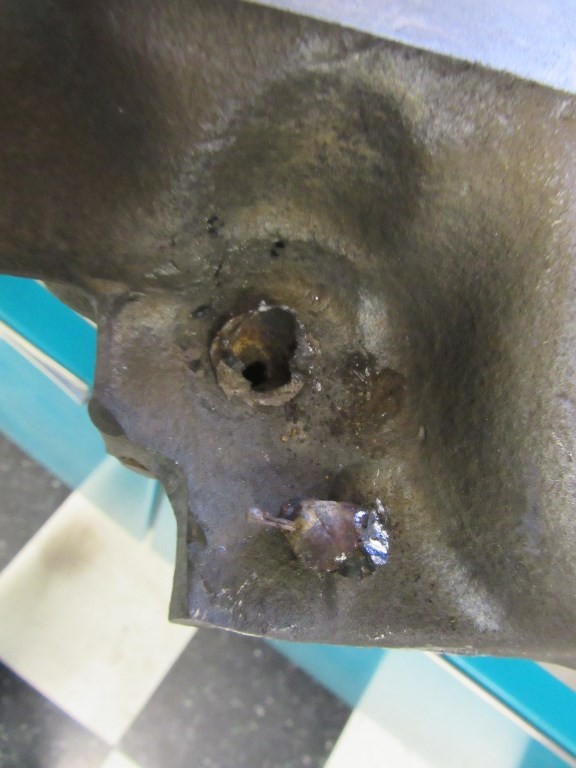
Those bypass outlets never come out easily. Harbor freight sells a pneumatic mini hacksaw thing that works a charm. Whack the rusty spigot off amost flush, then make an internal vertical cut at 6 and 12 o'clock - but try to not cut into the block threads. With the mostly cut through walls, a side hit with a chisel will loosen the rusty spigot. Then it unscrews no problem.
|
|
Total posts: 6469
Last post: Sep 29, 2022 Member since:Nov 2, 2006
|
Cars in Garage: 4
Photos: 1354 WorkBench Posts: 2 |
|

Back on track with 1293cc build for the Australian Mini Window Van. Why? Because the Van needs more grunt to climb through the mountains in western North America, particularly with a load. For example, we climbed the 5,000 foot ascent over Logan Pass into the Bighorn Basin in Wyoming and over the Kootenay Pass in B.C. sllooowwwwlllllyyyyyy. The flat bits to the east were no problem.
Why 1293? Well we received a Mini gift that had been sitting for years and was going to scrap if no one was interested. The shell was a rotted mess from which we plucked some useful bits. The big surprise was the apparent lost cause of a power unit. It was rusty, filthy and not inspiring.
BUT...when I pulled the head, I was looking at shiny piston crowns and bores with honing clearly visible and my heart skipped a beat. Then I remembered that the brother of the deceased chap, who had put the bits together years before, had said "I don't think he ever got it to run."
On splitting the tranny, we were looking at brand new gears...which went into a friends tranny build...the rest of the power unit to the parts shelf. The 10/30 crank went on to someone else, the pistons and rods stayed together etc.
Facing the reality of the stock 1098 with 1 1/4" SU, I got to looking at the bits. The 20 over pistons were good, lands & pins OK. I had a new A+ crank, new A+ rods, new SW-5 cam, oil pump & lifters, new clutch bits, new top hat bushes for the pre A+ primary gear that would be used with the rebuilt OZ tranny, new ARP head studs & rod bolts, new bearings.... So just needed to muster up a few more bits then get going.
The crack tested 12G940 head that came off the shelf was treated to the molasses/water bath (as some might remember) after the local machine shop tried twice to chemically strip the rust. The bath worked. A few days ago we got the welded plug in the bypass opening out and will tap it for the Whitworth threaded iron spigot from an iron water pump. There needs to be a little cleanup of casting flaws, then new bronze guides, reamed and honed for the new standard valves, after which hardened exhaust seats will go in, the seats will be cut and the head faced before paint. The head will get new standard springs and 1.3:1 roller tip rockers.
The block (which was crack tested & cleaned at the machine shop) will get a light honing, face looks good, new gallery & freeze plugs, new cam bearings, new main, bolts new main and rod bearings, new thrusts etc.
The OZ 4-synchro will get rebuilt with whatever it needs & a pressurized layshaft and 3.44:1 FD (in lieu of the stock 3.65), pot joint output shafts (have pot joints & drive shafts), keeping the clutch cover & tranny case together. Have asked OZ friends what additional gaskets and any other unique bits I might need for the 'puddin stirrer' tranny.
Still to be decided - carburettor & distributor (have Pertonix bits coil, dizzy pack). Will go with Freeflow exhaust in the interest of keeping gas speeds up and ease of connecting to RC40.
Need OZ metallic green engine paint too for the essentially standard 1275 build with the overbore and some improved components like rockers, cam. duplex gears/chains.
Target is to have the new power unit build in with engine bay cleaned up in the spring and ready for MMW 2015 here at home.
Looking forward to the shop time!


