
Found 37 Messages

|
Total posts: 440
Last post: May 2, 2017 Member since:Sep 24, 2013
|
Cars in Garage: 0
Photos: 0 WorkBench Posts: 0 |


UPDATE:
Just picked up the car from the shop after having the following done.
1. Stage 1 kit installed. They didn't install the carb needle yet as they wanted me to drive it for a bit to see how everying worked before adding more variables. So far the car is amazing. Exhaust is SO quiet compare to old rusted POS that was there before. Much more power in the higher RPMs in 3rd and 4th. I was able to go up a local hill (1 mile or so long incline) in 4th gear w/o loosing speed!
2. Radiator fan: Flipped to the correct direction. Drove the car in the sun, on the highway, in 80 degree weather and the temp barely went above the "O" in normale.
3. Need to raise the ride height! I picked up 3 ushers yesterday for a wedding and it was a terrible ride. SO MUCH SCRAPPING. Luckily just on the 1/2 mile of local roads until i got on the highway which was very smooth.
Over all the car is 1000% more driveable than a year ago. Brakes are sorted, engine is purring like kitten.
Don't worry, the horn stopped working for some reason. :-)
Thanks All
'73 Innocenti Mini (non-export)
Morristown, NJ
|
|
Total posts: 9544
Last post: Apr 24, 2024 Member since:Aug 14, 2002
|
Cars in Garage: 0
Photos: 0 WorkBench Posts: 0 |
|
Thats a nice little piece. Didnt know they sold them.
Took the words right out of my mouth keyboard!
Modifying the tailpipe is on my "try this next...." list.
.
"Hang on a minute lads....I've got a great idea."
|
|
Total posts:
Last post: Apr 24, 2024 Member since:Jul 26, 2000
|
Cars in Garage: 0
Photos: 16 WorkBench Posts: 0 |
|
Thats a nice little piece. Didnt know they sold them.
|
|
Total posts: 7075
Last post: Nov 5, 2019 Member since:Apr 25, 2000
|
Cars in Garage: 0
Photos: 0 WorkBench Posts: 0 |
|
No worries!
" Should make the car stop trying to kill me if the windows are rolled up."
...
Trouble is, I STILL get exhaust coming in, but only over 60kph (about 40mph) unless I CLOSE all the windows. So, guess what's on my "to do" list once it warms up enough to work on the Mini (AND I send in my income tax!). I suspect I have my head-manifold gasket on backwards!
I installed this (RC40-005 ) and slipped it over the end of the RC40 tailpipe to extend my side-exit non-upswept tailpipe to just beyond the bumper. All I needed to do was to cut it around 5 or 6 inches shorter and added a pair of slots for the clamp; it works great.
 The peasants are revolting...
 ![]()
"Gone with the Wind" - a brief yet moving vignette concerning lactose intolerance
|
|
Total posts: 1368
Last post: Jul 20, 2023 Member since:Jul 15, 2008
|
Cars in Garage: 0
Photos: 117 WorkBench Posts: 1 |
|
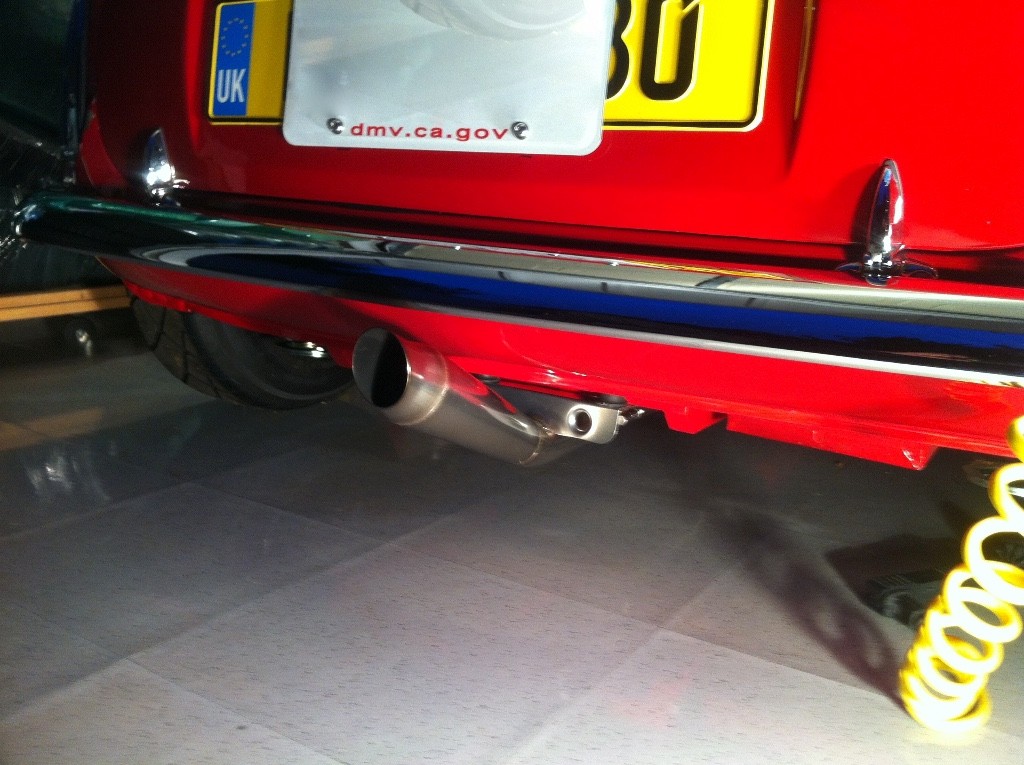
The upswept centre exit shown has 4 things going against it:
- centre exit. 'nuff said.
- upswept - takes the tip out of the air sram under the car and dumps the exhaust up the boot.
- tapered - the exhaust slows down as it exits the tailpipe.
- choked - the last bit messes up any smooth flow coming out the tip.
But it is shiny!
You forgot #5... it fills my muffler with rainwater. It's also a sucker for anything my grandkids wish to hide. It's not unusual for golfballs, green plastic solders and other "mystery" items to canon out the tailpipe upon startup.
|
|
Total posts:
Last post: Apr 24, 2024 Member since:Jul 26, 2000
|
Cars in Garage: 0
Photos: 16 WorkBench Posts: 0 |
|
I just reread an article that Calver did on exhaust performance and the problems with most out there. Turns out the that good ol RC40 twin box is the best performing...even slightly better then the single box RC40 even. Tapers, extra large tail sections and the likes all have ill effects on performance. This was done on a single motor, on the same dyno and at the same time.
|
|
Total posts: 9544
Last post: Apr 24, 2024 Member since:Aug 14, 2002
|
Cars in Garage: 0
Photos: 0 WorkBench Posts: 0 |
|
The "wind behind the car" Spitz refers to is a low-pressure area that the exhaust, dust etc. get carried along in. (See "drafting" behind trucks or in NASCAR). Our shiny little bricks pull a good-sized draft for their size.
The second issue is that a Mini, being pretty stubby and blunt on the front pushes a lot of air. Some goes over the roof, but much of it geets pused to the side, wher it created a low-pressure eddy on each side just behind the A-pillar. When it is raining, watch the water droplets dance around but not get swept away.
( Side issue: on sliders, if you open the front parts a little and the rear parts the same amount, and tilt your seat back so your head is about in line with the B-pillar, you get a nice fresh breeze across your face. Much better than winders, where it doesn't work. I wish my car had sliders.)
Now, when you open the windows (sliders or winders) this low pressure area sucks air out of the cabin, making a low pressure situation inside the cabin. The faster you go, the more it sucks, literally. So. if you're pulling a wad of exhaust, the negative pressure in the car pulls it inside. We all know Minis are not airtight, so the exhaust gets in.
The upswept centre exit shown has 4 things going against it:
- centre exit. 'nuff said.
- upswept - takes the tip out of the air sram under the car and dumps the exhaust up the boot.
- tapered - the exhaust slows down as it exits the tailpipe.
- choked - the last bit messes up any smooth flow coming out the tip.
But it is shiny!
To be honest, I've tried several variants (as mentioned) and arrived at the side exit. But my mistake was going for the tapered tailpipe. Vanity!
.
"Hang on a minute lads....I've got a great idea."
|
|
Total posts: 13978
Last post: Jan 15, 2024 Member since:Jan 22, 2003
|
Cars in Garage: 4
Photos: 381 WorkBench Posts: 1 |
|
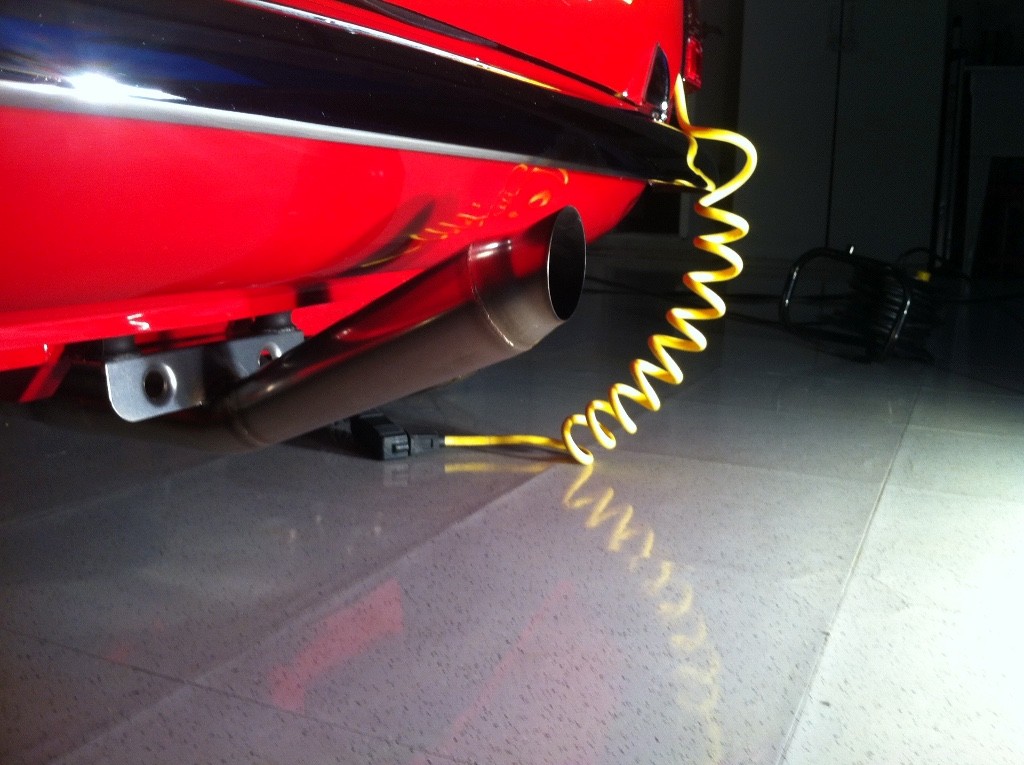
I think that upswept tail pipe is your problem.....it'll let the fumes/exhaust run right along with the car "wind"
I have one centre mount with a low profile muffler and a level pipe extending far enough out.....no exhausat inside. I didn't install this one....but happy with it's result.
"Everybody should own a MINI at some point, or you are incomplete as a human being" - James May
"WET COOPER", Partsguy1 (Terry Snell of Penticton BC ) - Could you send the money for the unpaid parts and court fees.
Ordered so by a Judge
|
|
Total posts: 1368
Last post: Jul 20, 2023 Member since:Jul 15, 2008
|
Cars in Garage: 0
Photos: 117 WorkBench Posts: 1 |
|
Center exit exhausts bleed fumes back into the car, and sit lower, neither of which is desirable.
What are you saying? You mean stinging eyes and a slight light-headedness isn't normal? I thought that was just part of the Mini experence. And don't get me started on speed bumps. My grandson lost his baseball somewhere in the garage the other day. I found it wedged between the muffler and the floor. No kidding.
Seriously, I do get alot of exhaust in the cabin, expecially with the rear windows open. It's hard to believe that a side-exit pipe would be any different, but perhaps so.
|
|
Total posts: 8382
Last post: Jan 13, 2022 Member since:Feb 7, 2006
|
Cars in Garage: 0
Photos: 0 WorkBench Posts: 0 |
|
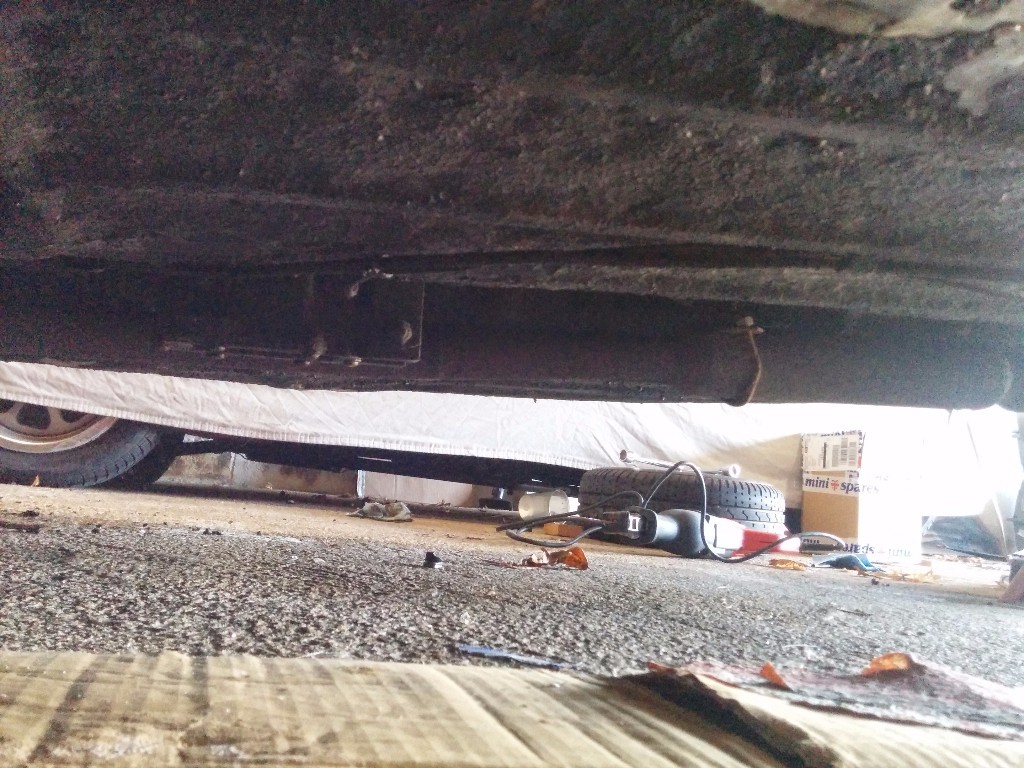
Great photos.
it is really nice to do things correctly, sadly, that is not what happened to your car.
Buy an inlet manifold that will work with your present carb and a header. Buy a new header. Buy a new intake/exhaust gasket. Buy a complete RC-40 twin box system, that exits in the stock location on the left rear of the mini. Buy the Cooper S style exhaust mount kit with the bracket using two rubber bobbins at the rear, the bracket and mount that fit the front of the rear subframe, and you will have a complete system that will stay tight to the car, not get ripped off, not leak, and not transmit noise to the interior. That home made mount midway beside the seat belt mounts is not needed.
Center exit exhausts bleed fumes back into the car, and sit lower, neither of which is desirable.
Respectively i disagree Mur. I have run several Mini's over the years that came with center exhausts added by the previous owner/s and as long as the body seals are good with the engine in tune and they protrude past the lower valance they are no worse than a side exit exhaust. When fitting a new system to a Mini whether side or center mounted i have the muffler shop make up the connecting pipe from the header to the silencer with small bend(s) installed to help with the normal clearance issues.
If in doubt, flat out. Colin Mc Rae MBE 1968-2007.
Give a car more power and it goes faster on the straights,
make a car lighter and it's faster everywhere. Colin Chapman.
|
|
Total posts: 9544
Last post: Apr 24, 2024 Member since:Aug 14, 2002
|
Cars in Garage: 0
Photos: 0 WorkBench Posts: 0 |
|
No worries!
" Should make the car stop trying to kill me if the windows are rolled up."
Don't I wish. When I bought my Mini, I drove it from Toronto to Ottawa (about 250 miles, 5 hours). Waht I didn't know was the condition of teh exhaust system. On the car was a centre exit, double tailpipe type muffler hooked uo to the stock exhaust system for a 998. First problem was the engine had been swapped for a 1275 high compression one which sported the 998 cast iron manifold and a worn out HS-4 carb. (The dizzy was also tired and worn, and brobably came from the 998 too.) Just ahead of the muffler, for some strange reason the pipe was reduced in diameter to about 1", increasing back-pressure. Just ahead of that was 1/4" or so hole in the top of the pipe, pointed straight at the holes for the handbrake cable etc.
About the only thing that kept me awake I think was the many experiments done to try to get fresh air into the cabin and to myself. (Even the radio was not working!) I went through all sorts of replacement variations, including a custom bent main exhaust pipe. Lying under the car, I traced a template onto a scrap of masonite, then took it to a Midas Muffler Shop. along with a piece of 1.75" galvanized steel fence-post. Intrigued, the muffler guys did the bending and swaging for a box of doughnuts. At another point, I made my own down-pipe, even hand-forming the bell-flare.
Eventually I did buy the Free-flow header and an alloy intake manifold. Later, as funds permitted, I bought a stainless RC40 single box, side exit exhaust system.(Stainless because of import duties and shipping from England at the time - I wanted it to last as long as I do!)
All nice!
Trouble is, I STILL get exhaust coming in, but only over 60kph (about 40mph) unless I CLOSE all the windows. So, guess what's on my "to do" list once it warms up enough to work on the Mini (AND I send in my income tax!). I suspect I have my head-manifold gasket on backwards!
.
"Hang on a minute lads....I've got a great idea."
|
|
Total posts: 440
Last post: May 2, 2017 Member since:Sep 24, 2013
|
Cars in Garage: 0
Photos: 0 WorkBench Posts: 0 |
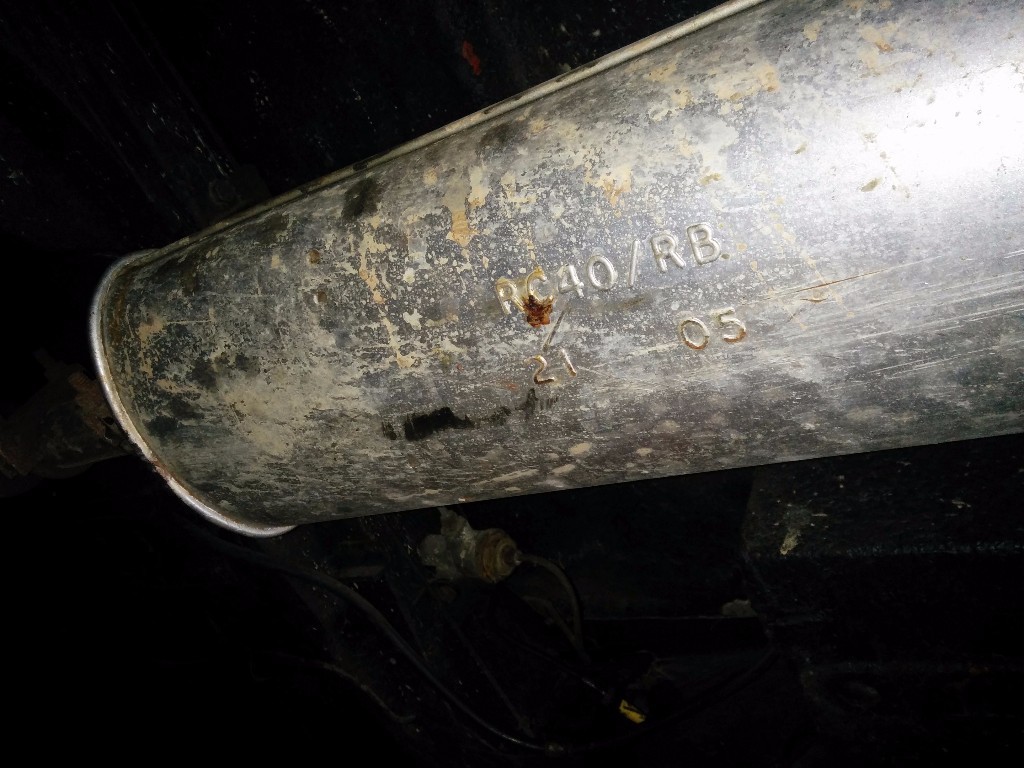
I'll just get the kit, the only thing i don't need is the muffler, but the cost is nearly the same as parts or as a kit. Weeeeeeeeeeeeee new exhaust.
The muffler isn't a standard, off the shelf one - the RC40 is a system, including the muffler - a design where all parts are diesigned to work together for optimum.
The muffler in your pics appears to have a hole in it. Or did you already buy a new RC40 muffler?
Sorry, i didn't see the hole in the muffler itself...I will re-examine this weekend. I was just saying the the muffler had RC40 stamped on it, so i assumed it was aftermarket. At this point it doesn't matter as i bought a new kit C-STN17. Should make the car stop trying to kill me if the windows are rolled up.
'73 Innocenti Mini (non-export)
Morristown, NJ
|
|
Total posts: 9544
Last post: Apr 24, 2024 Member since:Aug 14, 2002
|
Cars in Garage: 0
Photos: 0 WorkBench Posts: 0 |
|
I'll just get the kit, the only thing i don't need is the muffler, but the cost is nearly the same as parts or as a kit. Weeeeeeeeeeeeee new exhaust.
The muffler isn't a standard, off the shelf one - the RC40 is a system, including the muffler - a design where all parts are diesigned to work together for optimum.
The muffler in your pics appears to have a hole in it. Or did you already buy a new RC40 muffler?
.
"Hang on a minute lads....I've got a great idea."
|
|
Total posts: 440
Last post: May 2, 2017 Member since:Sep 24, 2013
|
Cars in Garage: 0
Photos: 0 WorkBench Posts: 0 |
I'll just get the kit, the only thing i don't need is the muffler, but the cost is nearly the same as parts or as a kit. Weeeeeeeeeeeeee new exhaust.
'73 Innocenti Mini (non-export)
Morristown, NJ
|
|
Total posts: 5840
Last post: Nov 1, 2019 Member since:Nov 12, 1999
|
Cars in Garage: 0
Photos: 0 WorkBench Posts: 0 |
|
Basically, what you want comes in the stage one kit, C-STN18. You can shop around to find the parts singly, used, etc. but that will allow you to see it all at one time.
|
|
Total posts: 5840
Last post: Nov 1, 2019 Member since:Nov 12, 1999
|
Cars in Garage: 0
Photos: 0 WorkBench Posts: 0 |
|
Great photos.
it is really nice to do things correctly, sadly, that is not what happened to your car.
Buy an inlet manifold that will work with your present carb and a header. Buy a new header. Buy a new intake/exhaust gasket. Buy a complete RC-40 twin box system, that exits in the stock location on the left rear of the mini. Buy the Cooper S style exhaust mount kit with the bracket using two rubber bobbins at the rear, the bracket and mount that fit the front of the rear subframe, and you will have a complete system that will stay tight to the car, not get ripped off, not leak, and not transmit noise to the interior. That home made mount midway beside the seat belt mounts is not needed.
Center exit exhausts bleed fumes back into the car, and sit lower, neither of which is desirable.
|
|
Total posts: 440
Last post: May 2, 2017 Member since:Sep 24, 2013
|
Cars in Garage: 0
Photos: 0 WorkBench Posts: 0 |
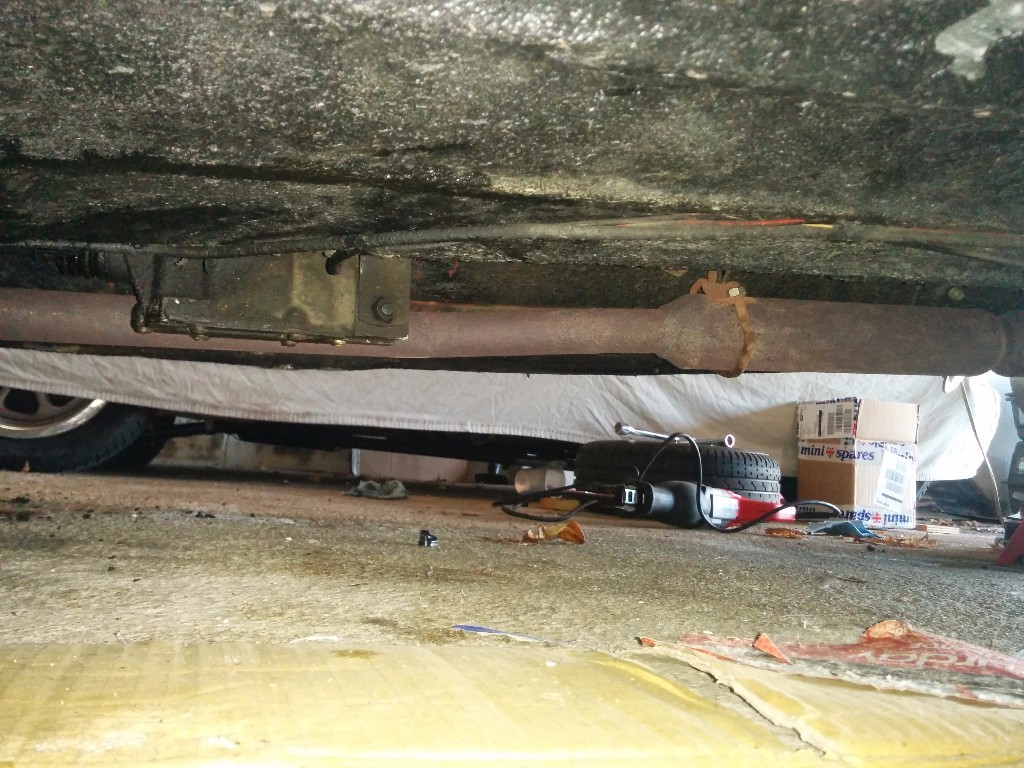

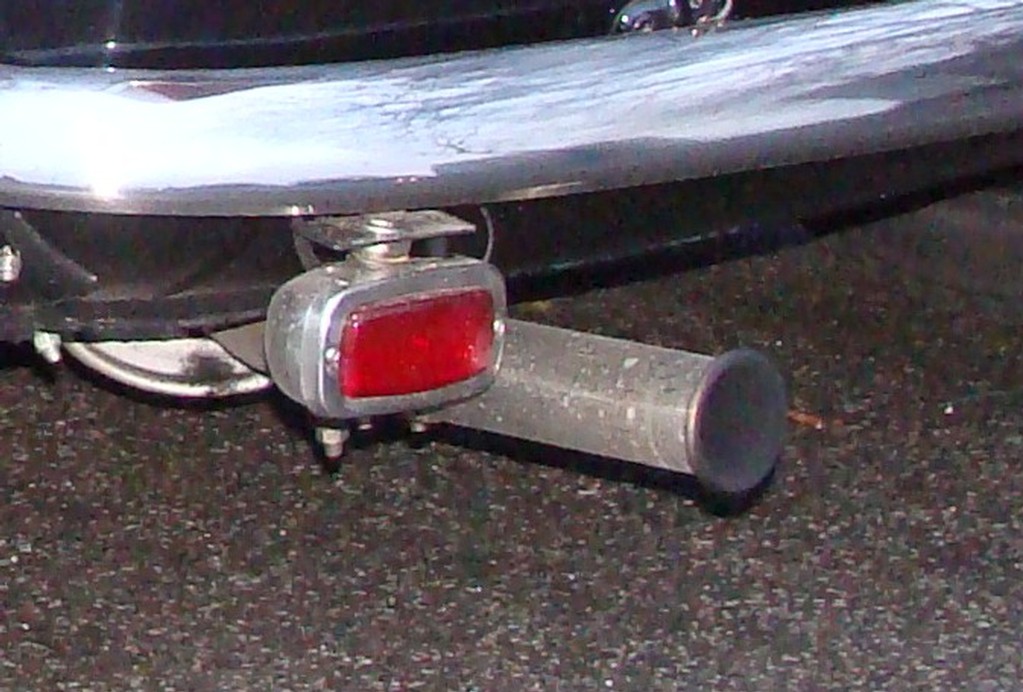
Mur and DonMoffet
I am all for doing this right. I don't feel like taking it on myself, so i am having my mechanic (new guy) handle it for me while he does the allignment. I just need to buy the right parts. So it looks like this is my shopping list,
and then one more peice to go to my muffler. Here is a photo of what i have now. Looks like some sort of cat or pre-muffler? I guess i can do without, right. Do i need to also get a new gasket? I just need helping making a shopping list. This is still new to me. Brakes i am nearly an expert, exhaust, new territory.
'73 Innocenti Mini (non-export)
Morristown, NJ
|
|
Total posts: 9544
Last post: Apr 24, 2024 Member since:Aug 14, 2002
|
Cars in Garage: 0
Photos: 0 WorkBench Posts: 0 |
|
For an exhaust header, I'd agree with Mur on the Freeflow type . Though one-piece, it can be worked in down from the top (if you hold your mouth just right) and disconnect the engine steady "dog-bone") so you can rock/lever the engine.
Cutting the exhaust branches off your cast iron intake is also do-able and not as hazardous as he claims. I did it once with hacksaws and files (before angle grinders!). An angle grinder would make it a cinch.
If you do go with a single pipe, one trick to connecting the bell flare to the cast iron header is to put the pipes loosly together then use a floor jack to press the flare against the header outlet. Once you get it lined up, and pushed tight, it is a breeze to get that 2-piece= bolts, nuts & washers clamp ( item 10 ) on and tightened.
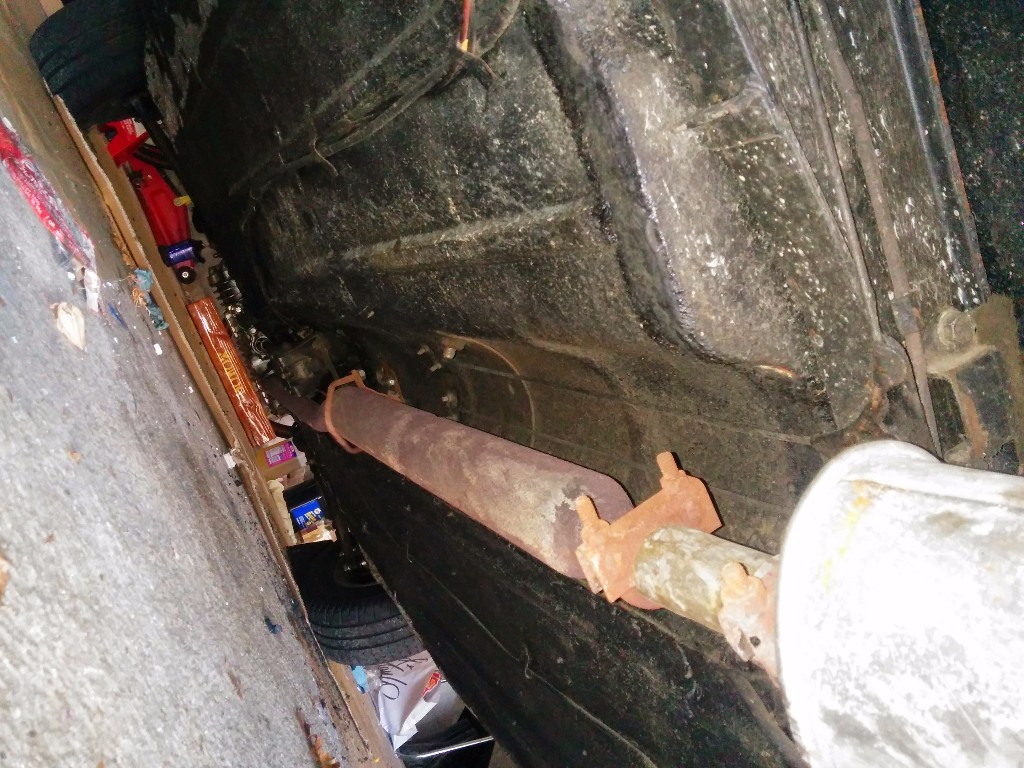
You should also have a brace (see parts marked "A" in th diagram) from the transmission or diff housing to the pipe (missing on your car) that keeps the 'down' portion of the down-pipe aligned with the exhaust manifold. A header should also have such a brace. Your split in the pipe was caused by the pipe flexing there. Good engine mounts and steadies and the pipe brace keep this from happening. Even an 850 gets really LOUD inside the car when the pipe brakes breaks off completely. (BTDT!)
.
"Hang on a minute lads....I've got a great idea."
|
|
Total posts: 5840
Last post: Nov 1, 2019 Member since:Nov 12, 1999
|
Cars in Garage: 0
Photos: 0 WorkBench Posts: 0 |
|
Stop messing about. Buy a header and the correct pipes to connect to the RC-40 exhaust. I suggest the free flow type, not the lcb as we are working with a small bore, c-str816. You will also need an inlet manifold that clears the header. The good part here is that you will gain 5 horsepower, at the wheels, and gain the joys of a leak free exhaust system.
You need to affix the lower part of the header to the bottom of the differential housing to expect any longevity. All of your motor mounts need be in great shape, and then to top things off you need to learn how to drive smoothly. Transitioning on and off of the throttle is something that a lot of people can't grasp, and done poorly it will crack a mini exhaust system in minutes.
To do this totally on the cheap, find an original Cooper 3 into 1 header, fix the pinholes, smashes and other damage. Use about 17 hacksaw blades and cut the exhaust portion off of your combined intake and exhaust manifold. Use a good antibacterial ointment on the various cuts and scrapes you will get. Things should heal in about six weeks. With hard work and luck you could end up with a mostly leak free, except for the leaks, exhaust, and the same power increase.
|
|
Total posts: 440
Last post: May 2, 2017 Member since:Sep 24, 2013
|
Cars in Garage: 0
Photos: 0 WorkBench Posts: 0 |
I am going to tacklet the exhaust leak next. I think i need part #30 or #2. It looks like the flexible adapter is no longer available.

'73 Innocenti Mini (non-export)
Morristown, NJ
Found 37 Messages


