
| Orig. Posting Date | User Name | Edit Date |
| May 9, 2017 11:11AM | thebluepotato | |
| May 9, 2017 11:00AM | Alex | |
| May 9, 2017 10:55AM | thebluepotato | |
| May 9, 2017 10:40AM | malsal | |
| May 9, 2017 08:50AM | exiledbrit | |
| May 9, 2017 02:41AM | thebluepotato | |
| May 9, 2017 01:38AM | nkerr | |
| May 8, 2017 03:28PM | Alex | |
| May 8, 2017 03:15PM | thebluepotato | Edited: May 8, 2017 03:16PM |

|
Total posts: 288
Last post: Jun 9, 2020 Member since:May 13, 2010
|
Cars in Garage: 1
Photos: 17 WorkBench Posts: 1 |
|
Steve
THE BFH and EBFH were freely wielded during the production on a Mini shell, any footage on YouTube will confirm this. Door apertures were belted every which way to get them to roughly the right size & shape, as were other bits of the shell. A friend who went round Longbridge towards the end of production tells tales of 2"x4" beams being used to 'massage' the shape of door frames to achieve an acceptable fit.
Doors also need to be fitted to the shell, not the shell to the doors, which is why it is a false economy to buy doors from another car or reskinned door from somewhere like The Minidoor Company as they almost certainly won't fit...

-------------------------------------------------------------------------------
Check out my Classic Mini Podcast - Classic Mini Breakdown, www.classicminibreakdown.com
Basil - 1974 Mini 1000 /// THE BLOG: www.thebluepotato.net/blog
-------------------------------------------------------------------------------
|
|
Total posts: 10237
Last post: Apr 9, 2024 Member since:Mar 24, 1999
|
Cars in Garage: 0
Photos: 0 WorkBench Posts: 0 |
|
Steve
THE BFH and EBFH were freely wielded during the production on a Mini shell, any footage on YouTube will confirm this. Door apertures were belted every which way to get them to roughly the right size & shape, as were other bits of the shell. A friend who went round Longbridge towards the end of production tells tales of 2"x4" beams being used to 'massage' the shape of door frames to achieve an acceptable fit.
Doors also need to be fitted to the shell, not the shell to the doors, which is why it is a false economy to buy doors from another car or reskinned door from somewhere like The Minidoor Company as they almost certainly won't fit...
|
|
Total posts: 288
Last post: Jun 9, 2020 Member since:May 13, 2010
|
Cars in Garage: 1
Photos: 17 WorkBench Posts: 1 |
|
-------------------------------------------------------------------------------
Check out my Classic Mini Podcast - Classic Mini Breakdown, www.classicminibreakdown.com
Basil - 1974 Mini 1000 /// THE BLOG: www.thebluepotato.net/blog
-------------------------------------------------------------------------------
|
|
Total posts: 8382
Last post: Jan 13, 2022 Member since:Feb 7, 2006
|
Cars in Garage: 0
Photos: 0 WorkBench Posts: 0 |
|
If in doubt, flat out. Colin Mc Rae MBE 1968-2007.
Give a car more power and it goes faster on the straights,
make a car lighter and it's faster everywhere. Colin Chapman.
|
|
Total posts: 58
Last post: Aug 8, 2017 Member since:Jul 25, 2016
|
Cars in Garage: 0
Photos: 0 WorkBench Posts: 0 |
Steve
|
|
Total posts: 288
Last post: Jun 9, 2020 Member since:May 13, 2010
|
Cars in Garage: 1
Photos: 17 WorkBench Posts: 1 |
|
-------------------------------------------------------------------------------
Check out my Classic Mini Podcast - Classic Mini Breakdown, www.classicminibreakdown.com
Basil - 1974 Mini 1000 /// THE BLOG: www.thebluepotato.net/blog
-------------------------------------------------------------------------------
|
|
Total posts: 654
Last post: Dec 20, 2017 Member since:Sep 24, 2011
|
Cars in Garage: 0
Photos: 0 WorkBench Posts: 0 |
|
Once you have found the new position for the Latch on the C pillar you will have to drill new holes in the C pillar there to screw in to. Be careful on the hole diameter so the sheet metal screws will have good thread engagement, and use a posi-drive screw driver to turn the screws (NOT a philips, that will strip out their heads).
N
|
|
Total posts: 10237
Last post: Apr 9, 2024 Member since:Mar 24, 1999
|
Cars in Garage: 0
Photos: 0 WorkBench Posts: 0 |
|
No two windows are absolutely identical, their method of construction dictates this.
I've recently rebuilt a pair of windows using brand new glass in good used frames. On swapping them over with the ones I installed 2-1/2 years ago, I had to reposition the catch bracket quite a long way downwards to get it to close properly without the gap you've shown. Be careful while testing a new window as well, mine was pulling up hard against the paint as well as not sealing.
Unscrew the catch, get an assistant to push the window closed and see where he catch naturally wants to fall when in the closed position - you may be quite surprised at how far out it is.
|
|
Total posts: 288
Last post: Jun 9, 2020 Member since:May 13, 2010
|
Cars in Garage: 1
Photos: 17 WorkBench Posts: 1 |
|
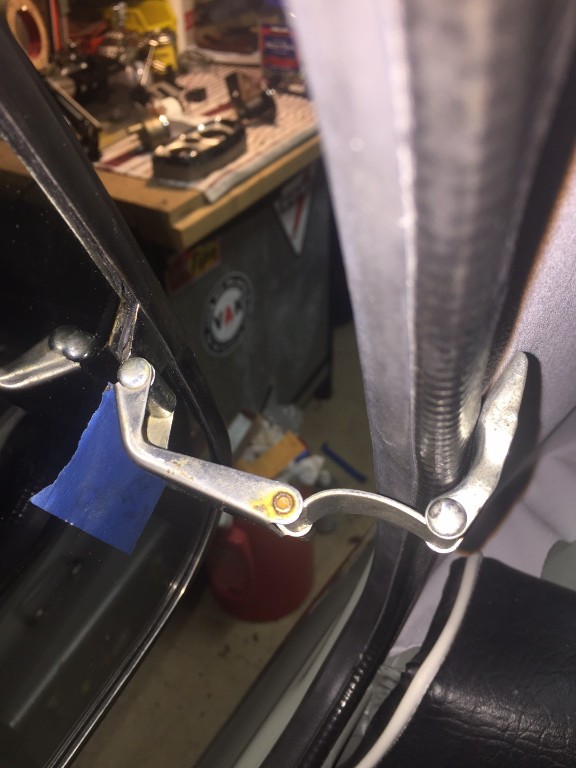
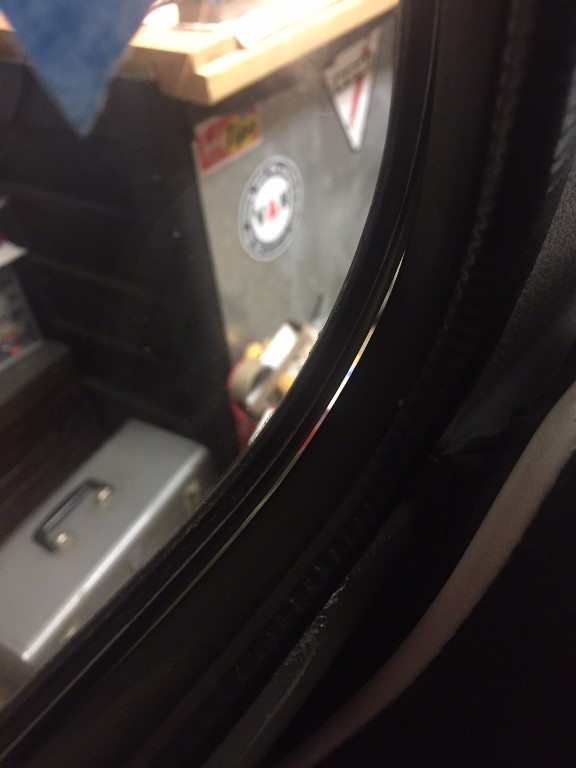
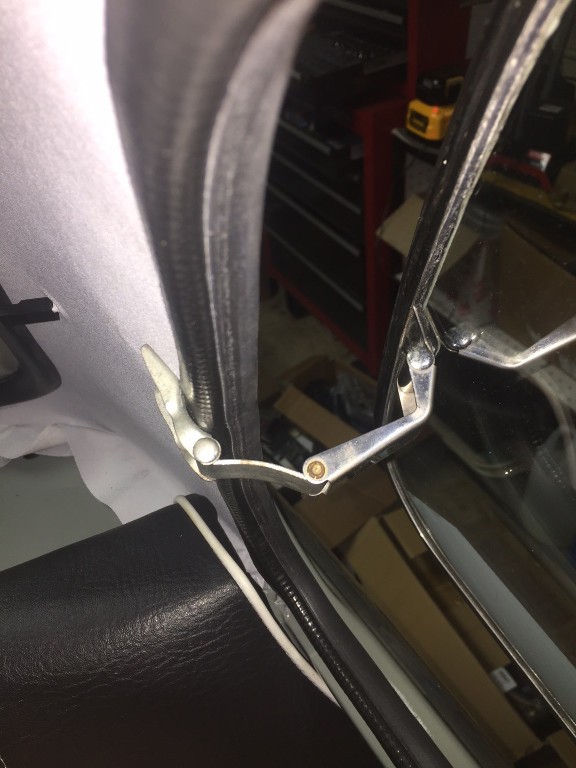
The only think I can see why this is happening is that on the RHD replacement window, there is more of a curve with the latch strap part (see pic 2) vs the one that is latching more tightly - with a straighter latch strap part (pic 3).
Anyone have any ides on why I am getting a gap? Is there a way to adjust the RHD latch in order to close up that gap in the rear corner?
Maybe move the RHD latch mounting point (with two screws) a bit further back in car, or maybe insert a small shim under the latch mounting point to raise the clamp "bite"?
Just need an engineer here to thinking about the hinge points and how to make it "pull" in more when closing.
-------------------------------------------------------------------------------
Check out my Classic Mini Podcast - Classic Mini Breakdown, www.classicminibreakdown.com
Basil - 1974 Mini 1000 /// THE BLOG: www.thebluepotato.net/blog
-------------------------------------------------------------------------------


