")
MINI Cooper Expansion Tanks - what are the issues and solutions?
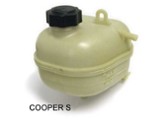
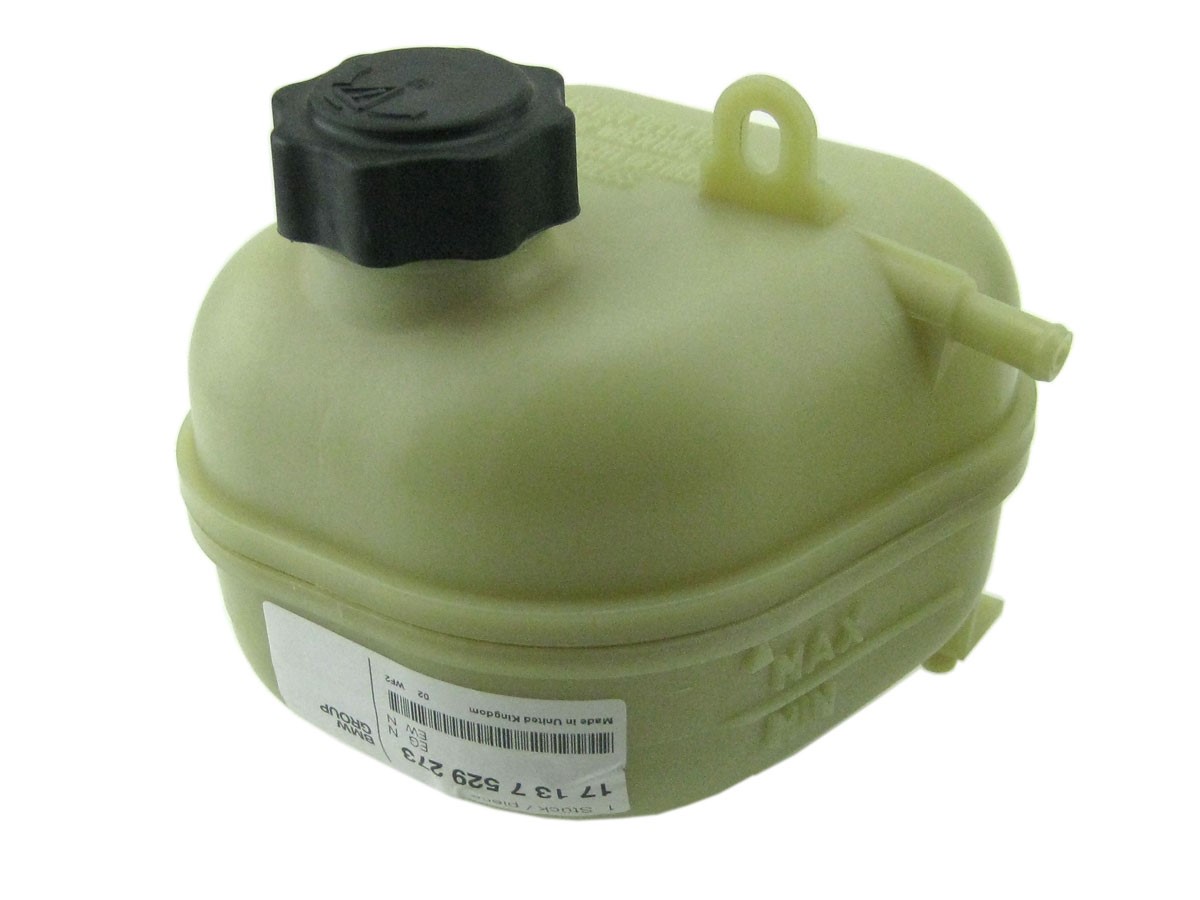
Unfortunately, one of the weaker links in first generation MINI’s is the plastic coolant expansion tank. The cooling water expansion tank, as MINI would call it, is close to the exhaust manifold and can see fairly severe conditions. It is fairly common now to find expansion tanks that have failed or cracked along the seam and are slowly leaking coolant. Dried coolant on the sides of the tank, or dried residue on the exhaust manifold heat shield are bad signs and show it is time to replace it. You may even be getting an occasional odor of coolant in the cabin. Even without these obvious signs, the tank should be thoroughly inspected. Even though it can be difficult to inspect while it still on the car, as the back seam is not visible without unbolting it, it should still be done. An inspection mirror can help. These leaks can be a small problem at first, but can quickly become serious if the tank bursts or the leak increases causing the engine to run low on coolant – serious engine damage is possible.
Luckily it’s an easy job to replace and the parts are not very expensive. MINI Cooper Expansion Tanks are available and some models have aftermarket plastic versions available as well. It is not necessary to fully drain the cooling system, but the expansion tank itself does have to be drained of coolant. A turkey baster or oversized syringe works well to remove the coolant in the tank to minimize spilling. In a pinch, you can even use a bulb-style anti-freeze tester (hydrometer) to suck up the coolant for proper disposal.
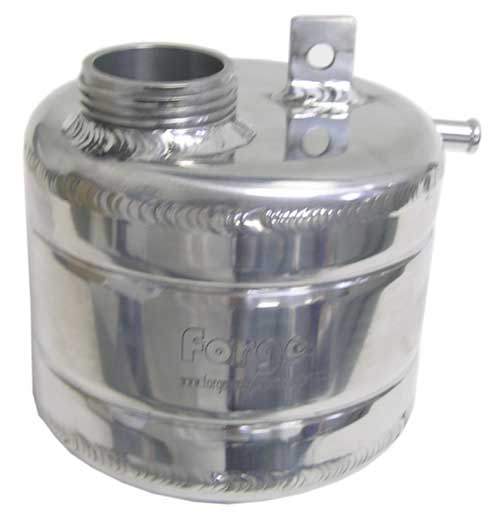
Another option is to upgrade to a MINI Cooper expansion tank made of polished aluminum that will solve this problem for the long term. It looks nice under the hood and doesn’t have a plastic seam to fail. The robust metal expansion tank for the first generation MINI Cooper S (R52 and R53) attaches to the existing mounting points without modification, so it is no more work to switch out than an OEM tank. You can use your existing cap or purchase a new one to go with the new expansion tank.
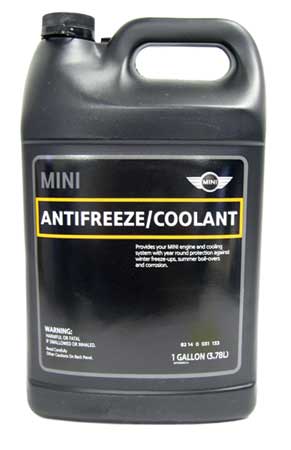
The lost or removed coolant should be replaced when the project is finished. MINI Cooper Antifreeze is available that matches the chemistry of the original coolant (OEM MINI coolant is blue) and is compatible with everything in the cooling system. This coolant comes full-strength and should be diluted with an equal part of distilled water before use. Distilled water is available at most supermarkets (never use spring water, mineral water or tap water as the minerals will deposit where you don’t want them).
The expansion tank is attached to the firewall with an upper 10mm nut holding the tank onto a threaded stud; the bottom of the tank has molded-in plastic feet that fit into recesses in a bracket. After removing the nut, tilt the tank forward at the top and lift up to free those feet. Two hoses are attached to the tank – typically a lower one on the bottom and an upper one on the right side as you are facing the engine. Getting access to the hose clamps can be quite challenging using conventional tools, but is fairly easy using a cable type hose clamp pliers like the OTC-4525 that allows very flexible access to remove spring or pinch-style hose clamps. Pliers will work if needed. The power steering reservoir can be unbolted and moved to the side to get more access if needed, but remember there is a vent in the lid of the power steering reservoir that will leak fluid if you tip it over. 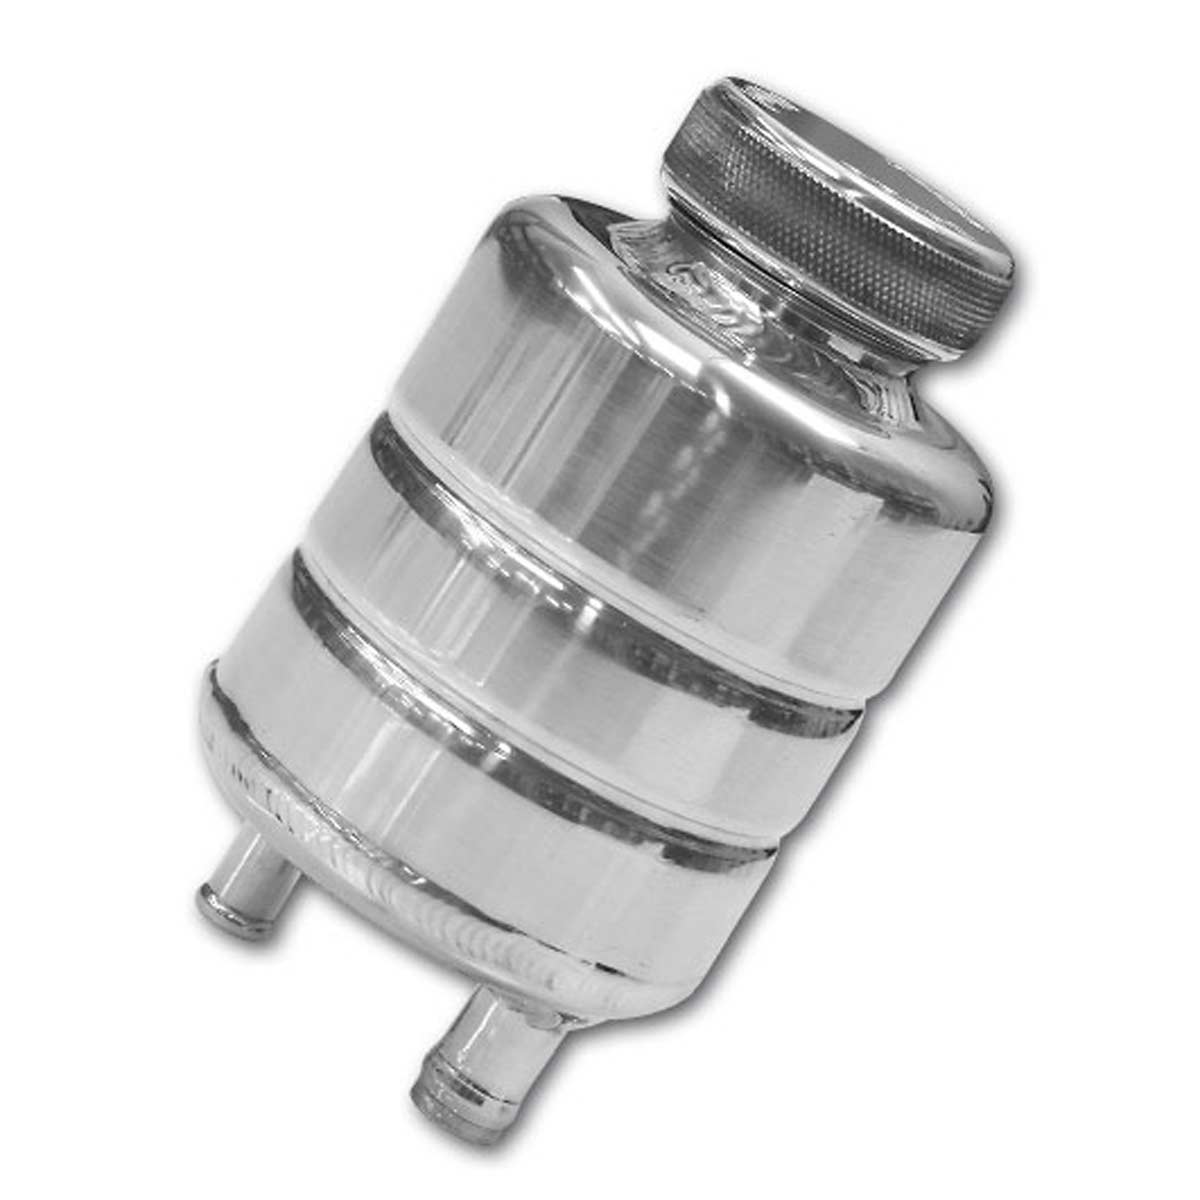
If you upgrade to the polished aluminum expansion tank, a matching MINI Cooper power steering reservoir made of polished aluminum is also available.
Tools that make the job easier:
A cable-type flexible hose clamp pliers like OTC-4525
Turkey baster, syringe or other suction device
Supplies needed: MINI Cooper Antifreeze 1 Gallon