
| Orig. Posting Date | User Name | Edit Date |
| Jul 8, 2018 03:17AM | Dan Moffet | |
| Jul 5, 2018 06:56AM | Dan Moffet | |
| Jul 5, 2018 03:01AM | MiniCord | |
| Jul 4, 2018 12:07PM | Dan Moffet | |
| Jun 23, 2018 03:06PM | h_lankford | |
| Jun 23, 2018 11:36AM | Alex | |
| Jun 23, 2018 08:22AM | Dan Moffet |

|
Total posts: 9539
Last post: Apr 13, 2024 Member since:Aug 14, 2002
|
Cars in Garage: 0
Photos: 0 WorkBench Posts: 0 |
|
Image Gallery
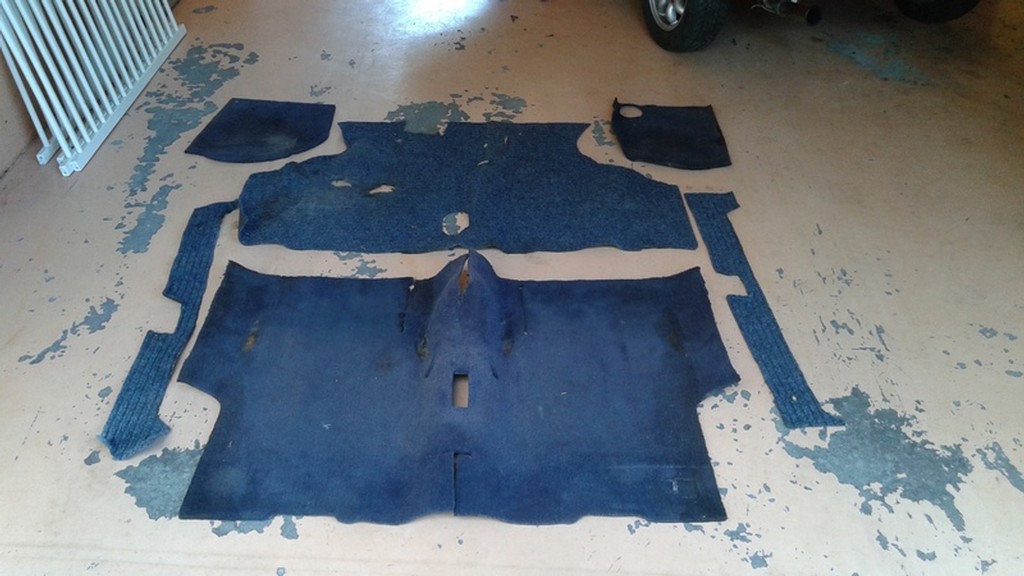
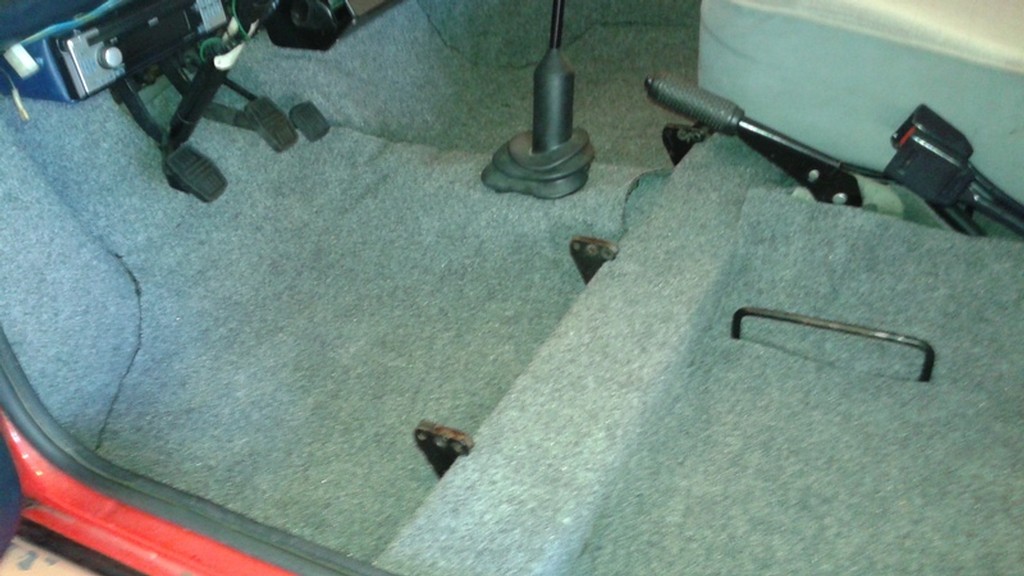
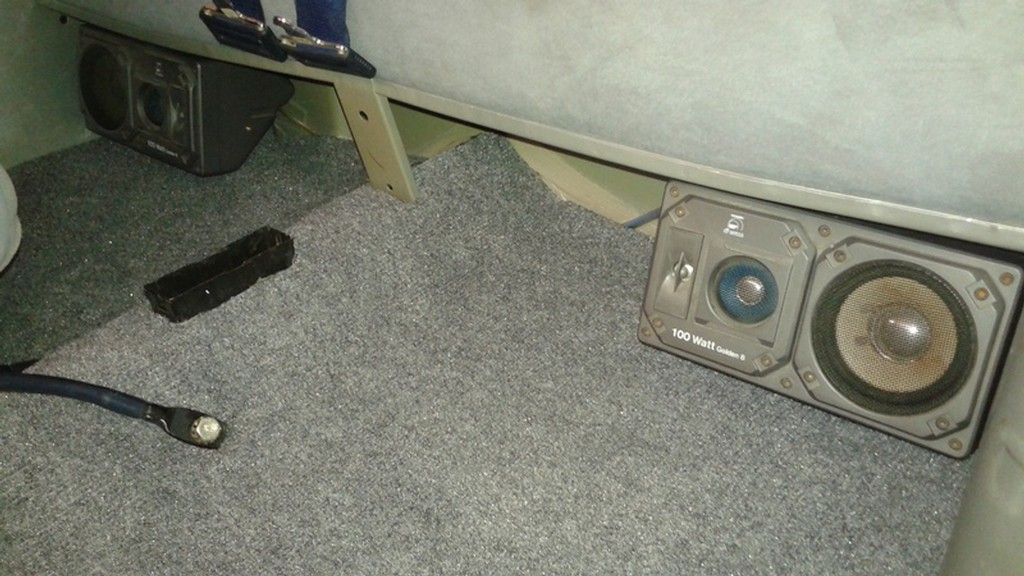
Attached are 3 photos - one of the old carpet sections laid out and two of the new installation.
The material I used was a 6'x8' outdoor carpet from Home Depot - the kind you leave out on your porch or patio all year. Surprisingly, it ended up almost identical to the existing carpet material on the rear parcel shelf.
For underlay, I used a roll of exercise/work mat I bought years ago - 4'x6', similar to those interlocking playroom pads, but a plain gray colour.
The speakers under the parcel shelf came with the car when I bought it. They were originally stuck to the rear parcel shelf with velcro, and had a habit of wandering around. I didn't like the way they stuck up so moved them to the floor under the parcel shelf years ago where they wandered around down there out of sight and out of mind. Since they have gray plastic housings (which are mostly air inside) I decided to screw them to the underside of the seat shelf.
I just noticed I forgot to put the ashtray back in!
.
"Hang on a minute lads....I've got a great idea."
|
|
Total posts: 9539
Last post: Apr 13, 2024 Member since:Aug 14, 2002
|
Cars in Garage: 0
Photos: 0 WorkBench Posts: 0 |
|
I'll give that a try ( sometime before fall!). There is "Ottawa Fastener Supply" near me in Bells Corners which has a huge selection of metric and imperial bits, bobs and doodads. They have a wide assortment of O-rings and you can buy just the number you need, not a whole pack. Lots of really good power tools, industrial tools etc. too.
.
"Hang on a minute lads....I've got a great idea."
|
|
Total posts: 1179
Last post: Jan 22, 2021 Member since:Jul 31, 2008
|
Cars in Garage: 5
Photos: 107 WorkBench Posts: 3 |
|
Hi Dan,
I had that problem with my heater on the Cooper, the o-rings failed.
A trip to Home Depot found me some suitable sized o-rings, although they were thicker they did the job.

|
|
Total posts: 9539
Last post: Apr 13, 2024 Member since:Aug 14, 2002
|
Cars in Garage: 0
Photos: 0 WorkBench Posts: 0 |
|
FINALLY got the right rear brakes back together. Between excessive heat wave and two weddings where I was the "sound man" (had to stay clean!) it took awhile. The hard pipe to the rear cylinder was copper and well fused to the compression fitting into the cylinder. I managed to find (cheaply) a 30" length of 3/16 steel brake line with the correct double flares on both ends, though its compression fittings were imperial. No worries - I cut the pipe to an appropriate length and installed the original fittings from the copper line and just had to do a simple flare for the upper end that connects to the flex pipe. The tedious part was cleaning all the fluid-moistened shmoo off the backplate and miscellaneous pieces. The adjuster was completely free and caused no problem, once I realized which way it comes out of the backplate (duh!) .
Autopsy on the old cylinder: one piston was free but the other seized. Rubber cylinder boots cleaned up OK and were good enough to salvage and put away. Back to carpet work.
Autopsy on the old cylinder: one piston was free but the other seized. Rubber cylinder boots cleaned up OK and were good enough to salvage and put away. Back to carpet work.
.
"Hang on a minute lads....I've got a great idea."
|
|
Total posts: 2037
Last post: Mar 29, 2024 Member since:Aug 29, 2001
|
Cars in Garage: 0
Photos: 0 WorkBench Posts: 0 |
|
Quote:
Originally Posted by Dan Moffet
The brake leak is another matter. Removal of the wheel and drum allowed me to confirm that the wheel cylinder boots were damp inside. Time for new rear cylinders and shoes, I guess.
|
|
Total posts: 10237
Last post: Apr 9, 2024 Member since:Mar 24, 1999
|
Cars in Garage: 0
Photos: 0 WorkBench Posts: 0 |
|
Heater cores have been made for many years now with plastic outlets screwed onto the side of the core, and warp over time. Before splurging on a new core, take to old one out, remove the inlet/outlet piece and check it for flat. It's a bit hit-n-miss with the way they are attached in the first place, and the base goes banana shaped. I've sanded mine back flat again and reaffixed it with some goop with success.
|
|
Total posts: 9539
Last post: Apr 13, 2024 Member since:Aug 14, 2002
|
Cars in Garage: 0
Photos: 0 WorkBench Posts: 0 |
|
So, here I was trying to fit new carpet underlay to the front passenger footwell. My hand leaned gently against one of the heater hoses and a trickle of coolant dribbled onto the underlay. When I got to my feet (this being an on-your-knees activity) I noticed a damp footprint where I had been walking. Looking around, I spotted a small pool of fluid where the mini had been parked before starting the carpet project. It was brake fluid. A check of the nice new master cylinder revealed it was down a little from where I'd filled it just a few weeks ago.
I knew the heater had oozed a bit in past years - I assume the "ooze" spot has grown to the point of needing attention. Very likely a new heater core is needed. A temporary fix was to by-pass the heater altogether and blow the residual coolant out of it.
The brake leak is another matter. Removal of the wheel and drum allowed me to confirm that the wheel cylinder boots were damp inside. Time for new rear cylinders and shoes, I guess.
Bummer. I still haven't had my first Mini derive of the year.
.
"Hang on a minute lads....I've got a great idea."


