
| Orig. Posting Date | User Name | Edit Date |
| Jul 28, 2018 08:37PM | Whee | Edited: Jul 28, 2018 08:37PM |
| Jul 28, 2018 06:23PM | Hunter2 | |
| Jul 27, 2018 10:26AM | Alex | |
| Jul 27, 2018 08:06AM | Spank | |
| Jul 26, 2018 06:19PM | Willie_B | |
| Jul 26, 2018 04:24PM | Dan Moffet | |
| Jul 26, 2018 04:15PM | Whee | |
| Jul 26, 2018 01:17PM | Alex | |
| Jul 26, 2018 09:41AM | malsal | |
| Jul 26, 2018 09:27AM | Alex | |
| Jul 26, 2018 06:52AM | thebluepotato | |
| Jul 26, 2018 06:51AM | jedduh01 | Edited: Jul 26, 2018 06:52AM |
| Jul 26, 2018 06:50AM | 6464 | |
| Jul 26, 2018 06:34AM | thebluepotato | |
| Jul 26, 2018 05:44AM | malsal | |
| Jul 26, 2018 05:41AM | jedduh01 | |
| Jul 25, 2018 08:15PM | Hunter2 |

|
Total posts: 3345
Last post: Mar 8, 2024 Member since:Jul 20, 2002
|
Cars in Garage: 0
Photos: 0 WorkBench Posts: 0 |
|
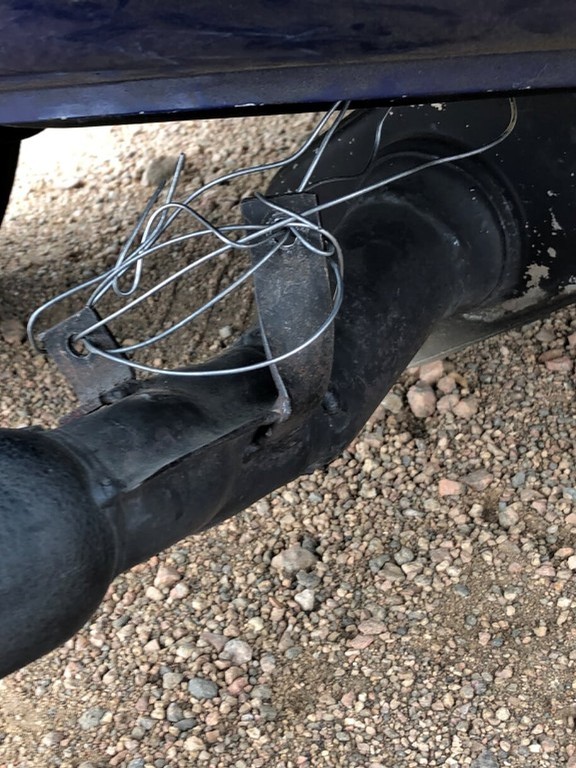

At MMW 2016 in San Diego the Orange Ogre had a middle exhaust hanger failure on the autocross course at Qualacomm. Hauled some heavy wire out of my parts bin so MUR could overcome the failure on site.
Still had enough heavy wire left to hand to the Seven Ent. tech to safety wire the new exhaust hanger on the way home from MMW.
I like the wire backup. I did that too, except mine was a little unplanned and I had to make do with materials at hand last month.
|
|
Total posts: 6469
Last post: Sep 29, 2022 Member since:Nov 2, 2006
|
Cars in Garage: 4
Photos: 1354 WorkBench Posts: 2 |
|
 I always wire (heavy wire) exhaust at both locations on the rear subframe...it works to keep exhaust up...if a hanger fails.
At MMW 2016 in San Diego the Orange Ogre had a middle exhaust hanger failure on the autocross course at Qualacomm. Hauled some heavy wire out of my parts bin so MUR could overcome the failure on site.
Still had enough heavy wire left to hand to the Seven Ent. tech to safety wire the new exhaust hanger on the way home from MMW.
|
|
Total posts: 10237
Last post: Apr 9, 2024 Member since:Mar 24, 1999
|
Cars in Garage: 0
Photos: 0 WorkBench Posts: 0 |
|
Never managed to break one of these.
Maybe because I'm mounting the exhaust with stress on it, maybe the exhaust is just too heavy.
Any tips here?
There's always a part you don't know about that will help !
https://www.minimania.com/part/C-19G3258/Austin-Mini-Exhaust-Mounting-Competition-Rear
|
|
Total posts: 6349
Last post: Oct 22, 2023 Member since:Mar 9, 1999
|
Cars in Garage: 0
Photos: 0 WorkBench Posts: 0 |
|
for some high-quality bobbins that will work for the rear exhaust hangar OR the rod change hangars, I have found these locally that are BRILLIANT. Yes, they are a little smaller and metric threaded posts, but use a couple of washers to make you more comfortable--- they are cheap and they are TOUGH!
WAL 35144 is the stocknumber from Oreily's
https://www.oreillyauto.com/detail/b/walker-5231/exhaust-parts-16469/exhaust-insulator-12221/81fd87cc60d3/walker-system-insulator/35144/4786590
|
|
Total posts: 2523
Last post: Mar 24, 2024 Member since:Dec 1, 2002
|
Cars in Garage: 0
Photos: 0 WorkBench Posts: 0 |
|
Whee, are you using one or two bobbins? Use the above bracket and use 2 bobbins for more support.
"How can anything bigger be mini?"
|
|
Total posts: 9539
Last post: Apr 13, 2024 Member since:Aug 14, 2002
|
Cars in Garage: 0
Photos: 0 WorkBench Posts: 0 |
|
I have only one Mini but have had an assortment of exhaust systems. Working alone with the car on jack stands just high enough to get under. I assembled the exhaust system from the header back then fed it under the car. Then using the dolly jack and an assortment of wood blocks, I would lift the system into position. Then I would attach the hangers and then remove the supports. Hangers only at front and back of subframe plus connection to header and brace to transmission. Solid as a rock with no extra forces on any hanger. Process works for me.
.
"Hang on a minute lads....I've got a great idea."
|
|
Total posts: 3345
Last post: Mar 8, 2024 Member since:Jul 20, 2002
|
Cars in Garage: 0
Photos: 0 WorkBench Posts: 0 |
|
Never managed to break one of these.
Maybe because I'm mounting the exhaust with stress on it, maybe the exhaust is just too heavy.
Any tips here?
|
|
Total posts: 10237
Last post: Apr 9, 2024 Member since:Mar 24, 1999
|
Cars in Garage: 0
Photos: 0 WorkBench Posts: 0 |
|
Never managed to break one of these.
|
|
Total posts: 8382
Last post: Jan 13, 2022 Member since:Feb 7, 2006
|
Cars in Garage: 0
Photos: 0 WorkBench Posts: 0 |
|
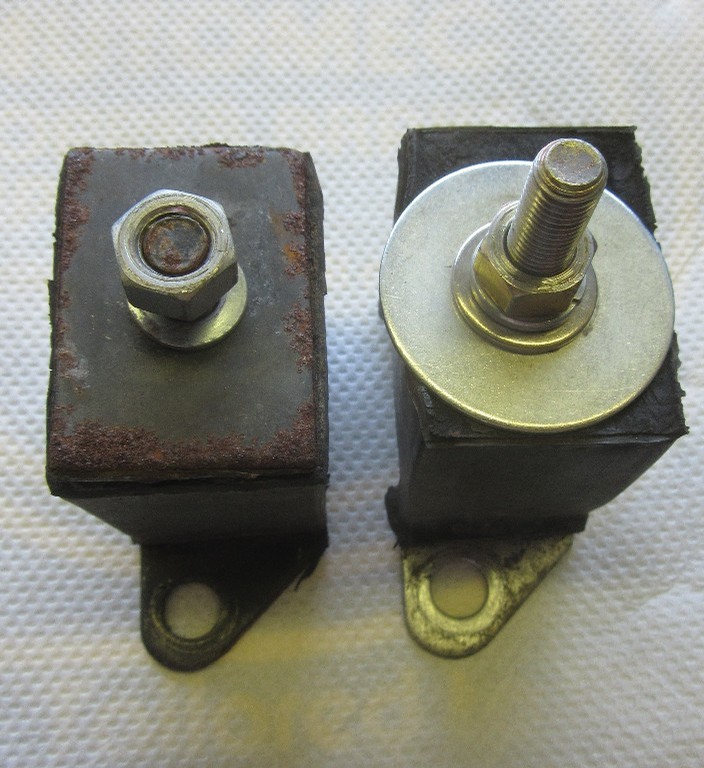
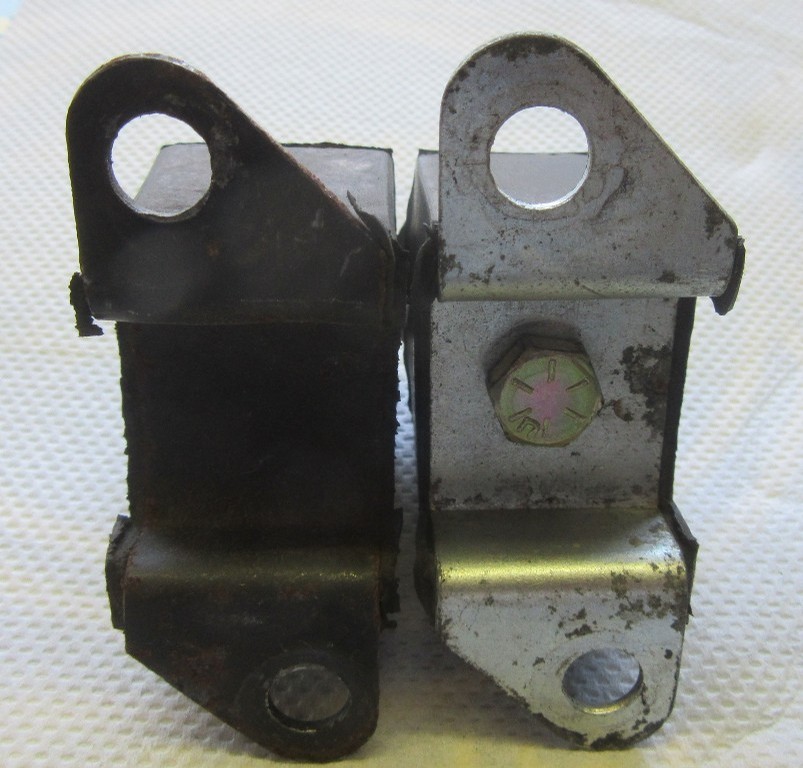
I will get you a pic of mine when i get a chance but it is much the same as Ricks modification.
Justin that rubber is not hard to drill through, like most rubber parts for our Classics lately it is sub standard.
If in doubt, flat out. Colin Mc Rae MBE 1968-2007.
Give a car more power and it goes faster on the straights,
make a car lighter and it's faster everywhere. Colin Chapman.
|
|
Total posts: 10237
Last post: Apr 9, 2024 Member since:Mar 24, 1999
|
Cars in Garage: 0
Photos: 0 WorkBench Posts: 0 |
|
I ordered 2 upper front suspension arm repair kits ( shafts , Bearings , nuts) a whole kit.
Ordered from Moss Motors = Came in a lovely Blue packaged box = Made in UK "OE SPEC"
Sorry MM = Moss delivered in 2 days (being in VA to NC for me) speedy delivery.
Needle Bearings into arms. That went OK
Pre assemble Shafts _ thrust washers on each end - add some torque to then Find there is slop = Torque nuts down on bench on the arm and shaft and clearly .030 of slop Arm moves on the shaft between the tight' thrust washers.
Thrust washers are bottomed out to the shaft = but not close to being tight to the end width of the arm
If that goes in a car there will be constant knocking of the arm shifting ...
The possible solutions.
- Deal with retailer = Moss = to have them send another set that have a VERY high probibility of STILL being machined wrongly.
- Order 2 replacement Shafts only = from another vendor = more $ shipping and time to wait to arrive.
- Modify / Machine /Current shafts to fit as required.
This was my final solution = Since the shafts are somewhat hardened... file + lathe wont do it = used a Grinder has to take the .030 off the ends of the shaft.
End the end = 1-2 hours lost trying to put together something that should have assembled with NO questions.
Really Really! Annoying.
It's possible that the pins are correct and the arms are worn - this is very common with the rear radius arms.
Check the wear faces on the arms.
|
|
Total posts: 288
Last post: Jun 9, 2020 Member since:May 13, 2010
|
Cars in Garage: 1
Photos: 17 WorkBench Posts: 1 |
|
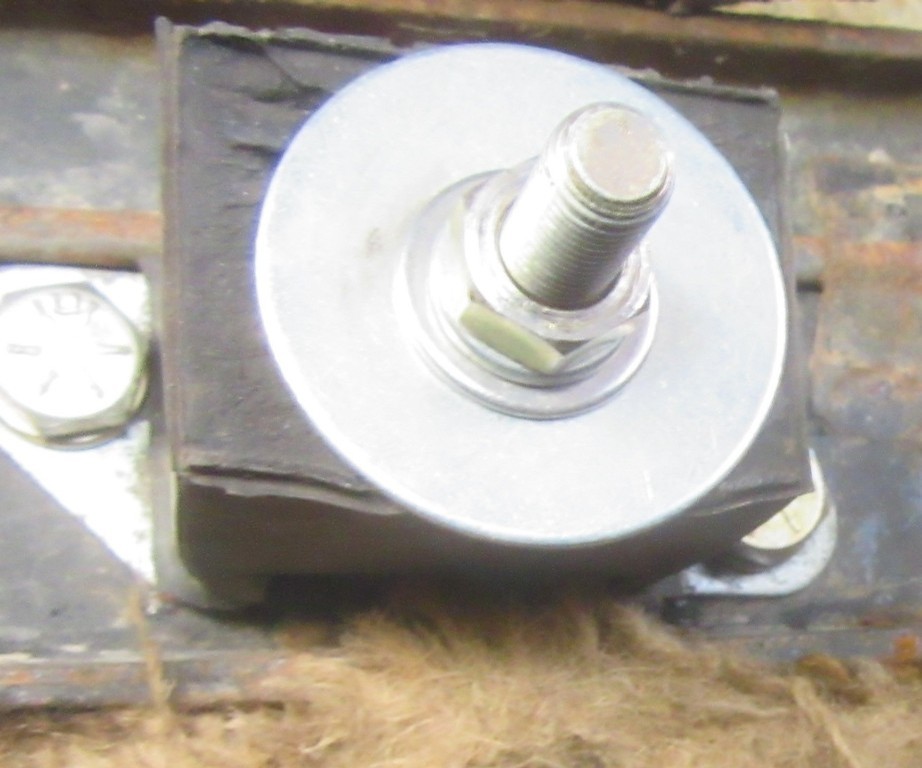
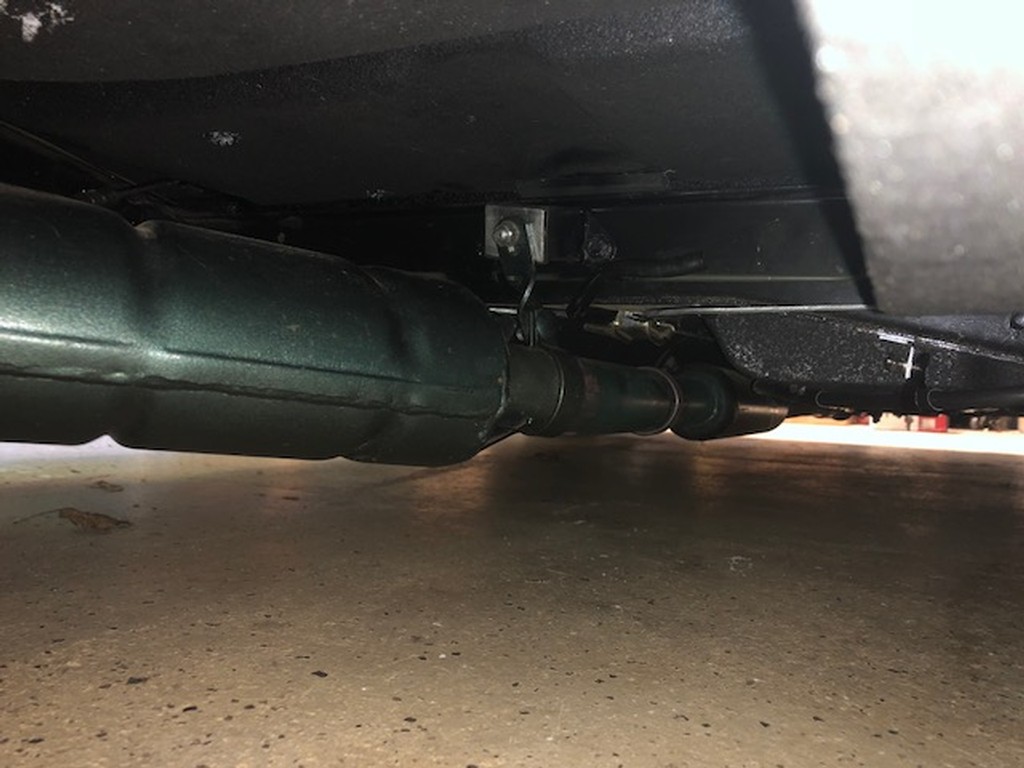 Interesting subject - I was wondering this a few weeks ago and never seen a center hanger pulled like the one on my mini. This is after trying to loosen and adjust over and over again. What you see in my pic is the best way I could do it....I assume that this will just get worse over time and fail?
-------------------------------------------------------------------------------
Check out my Classic Mini Podcast - Classic Mini Breakdown, www.classicminibreakdown.com
Basil - 1974 Mini 1000 /// THE BLOG: www.thebluepotato.net/blog
-------------------------------------------------------------------------------
|
|
Total posts: 1649
Last post: Jun 22, 2022 Member since:Apr 30, 2009
|
Cars in Garage: 0
Photos: 0 WorkBench Posts: 0 |
|
I ordered 2 upper front suspension arm repair kits ( shafts , Bearings , nuts) a whole kit.
Ordered from Moss Motors = Came in a lovely Blue packaged box = Made in UK "OE SPEC"
Sorry MM = Moss delivered in 2 days (being in VA to NC for me) speedy delivery.
Needle Bearings into arms. That went OK
Pre assemble Shafts _ thrust washers on each end - add some torque to then Find there is slop = Torque nuts down on bench on the arm and shaft and clearly .030 of slop Arm moves on the shaft between the tight' thrust washers.
Thrust washers are bottomed out to the shaft = but not close to being tight to the end width of the arm
If that goes in a car there will be constant knocking of the arm shifting ...
The possible solutions.
- Deal with retailer = Moss = to have them send another set that have a VERY high probibility of STILL being machined wrongly.
- Order 2 replacement Shafts only = from another vendor = more $ shipping and time to wait to arrive.
- Modify / Machine /Current shafts to fit as required.
This was my final solution = Since the shafts are somewhat hardened... file + lathe wont do it = used a Grinder has to take the .030 off the ends of the shaft.
End the end = 1-2 hours lost trying to put together something that should have assembled with NO questions.
Really Really! Annoying.
|
|
Total posts: 1723
Last post: Oct 20, 2020 Member since:Jun 18, 1999
|
Cars in Garage: 0
Photos: 0 WorkBench Posts: 0 |
|
|
|
Total posts: 288
Last post: Jun 9, 2020 Member since:May 13, 2010
|
Cars in Garage: 1
Photos: 17 WorkBench Posts: 1 |
|
Just one more instance of the junk parts that are sold nowadays.
-------------------------------------------------------------------------------
Check out my Classic Mini Podcast - Classic Mini Breakdown, www.classicminibreakdown.com
Basil - 1974 Mini 1000 /// THE BLOG: www.thebluepotato.net/blog
-------------------------------------------------------------------------------
|
|
Total posts: 8382
Last post: Jan 13, 2022 Member since:Feb 7, 2006
|
Cars in Garage: 0
Photos: 0 WorkBench Posts: 0 |
|
Just one more instance of the junk parts that are sold nowadays.
If in doubt, flat out. Colin Mc Rae MBE 1968-2007.
Give a car more power and it goes faster on the straights,
make a car lighter and it's faster everywhere. Colin Chapman.
|
|
Total posts: 1649
Last post: Jun 22, 2022 Member since:Apr 30, 2009
|
Cars in Garage: 0
Photos: 0 WorkBench Posts: 0 |
|
My exhaust system did not fall as I always wire it up...and will do so again.
However, this time I will also reuse a delaminated exhaust hanger that has been drilled for a through bolt.
- These middle hanger have been very annoying == Multiple cars + installations = Why do i have to file the bracket inward to fit the subframe captive nuts ? 1/16th - 1/8th on each hole. They're always too wide! to just bolt on! = im talking 4- 5 Installations over the past 1-2 years. New bracket kits come but then all require 'fetteling to fit"
Annoying!
|
|
Total posts: 6469
Last post: Sep 29, 2022 Member since:Nov 2, 2006
|
Cars in Garage: 4
Photos: 1354 WorkBench Posts: 2 |
|
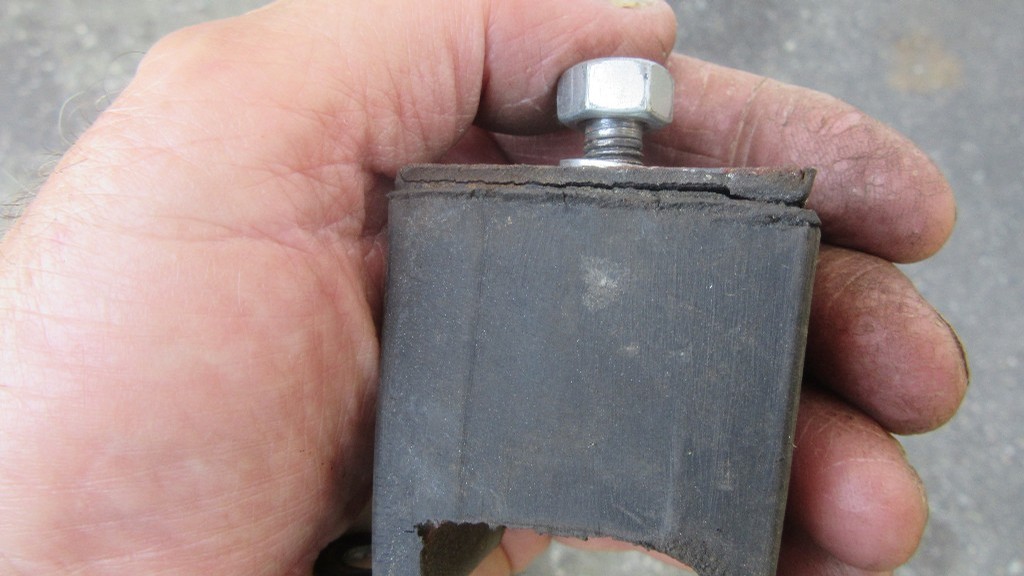
My exhaust system did not fall as I always wire it up...and will do so again.
However, this time I will also reuse a delaminated exhaust hanger that has been drilled for a through bolt.


