
| Orig. Posting Date | User Name | Edit Date |
| May 28, 2020 11:00AM | 66coop | |
| May 20, 2020 12:35PM | RogerOtto | |
| May 20, 2020 10:38AM | jedduh01 | Edited: May 20, 2020 10:39AM |
| May 20, 2020 08:51AM | RogerOtto | Edited: May 20, 2020 09:28AM |
| May 19, 2020 05:06AM | dklawson | |
| May 18, 2020 04:02PM | CooperTune | |
| May 18, 2020 12:46PM | RogerOtto | Edited: May 19, 2020 08:57AM |
| May 18, 2020 12:01PM | scooperman | |
| May 18, 2020 08:22AM | dklawson | |
| May 18, 2020 07:23AM | RogerOtto | |
| May 18, 2020 02:22AM | Alex | |
| May 17, 2020 02:09PM | scooperman | |
| May 17, 2020 11:34AM | Kermy | |
| May 17, 2020 11:07AM | RogerOtto | Edited: May 19, 2020 09:17AM |

|
Total posts:
Last post: Mar 13, 2024 Member since:Jul 26, 2000
|
Cars in Garage: 0
Photos: 16 WorkBench Posts: 0 |
|
Nearly perfect timing on this thread. I need to remove my outer race in the next week or so. I have done this in the past by the heating method. I really can't remember but it actually worked for me. Lucky I guess.
Why I said this was nearly perfect timing was I busted the bearing cage trying to remove the bearing...of course. I was using the hard chisel pry method (not idea) with great success...and then my concentration...and hand slipped and I cracked the cage. Oh well, I'm this far into the rebuild, why not replace everything
Why I said this was nearly perfect timing was I busted the bearing cage trying to remove the bearing...of course. I was using the hard chisel pry method (not idea) with great success...and then my concentration...and hand slipped and I cracked the cage. Oh well, I'm this far into the rebuild, why not replace everything

|
|
Total posts: 256
Last post: Aug 26, 2023 Member since:Nov 26, 2017
|
Cars in Garage: 0
Photos: 0 WorkBench Posts: 0 |
Quote:
Originally Posted by jedduh01
You did remove the locking snapring right?
Unfortunately I am not into welding.
Thanks
Roger Williams
1966 Austin Cooper S
LHD, WET, Personal Export
1966 Austin Cooper S
LHD, WET, Personal Export
|
|
Total posts: 1649
Last post: Jun 22, 2022 Member since:Apr 30, 2009
|
Cars in Garage: 0
Photos: 0 WorkBench Posts: 0 |
|
Image Gallery
Was with Coopertune earlier this year... His way is the cleanest way
Put a thick weld on the inside of the race . = and yesit should drop out of the housing. (the weld shrinks the race)
The idler bearing = Used a bolt.. Welded to the race = then a plate and nut to pull and extract....
I have also used a blind bearing puller but they do still require a good bit of banging.
|
|
Total posts: 256
Last post: Aug 26, 2023 Member since:Nov 26, 2017
|
Cars in Garage: 0
Photos: 0 WorkBench Posts: 0 |
Sad to report that heating the housing to 300 degrees for 10 minutes and slamming on wood did not work!
It sounded so easy!
I was able to get the housing fitted. Apparently the bearing was not fitting into the race properly.
after some wriggling all is well.
so... I am able to continue with the “test” fitting of the engine/gearbox.
I will sort this all out when the engine is put together (by a local mini guy).
thanks for all the suggestions.
Roger Williams
1966 Austin Cooper S
LHD, WET, Personal Export
1966 Austin Cooper S
LHD, WET, Personal Export
|
|
Total posts: 9241
Last post: Aug 17, 2023 Member since:Jun 5, 2000
|
Cars in Garage: 0
Photos: 0 WorkBench Posts: 0 |
|
Quote:
Originally Posted by RogerOtto
Still do not see how a 1-1/8” socket can fit or the 1-1/4” bearing (unless you remove rollers).
The way I removed the bearing race is not for everyone. I did this years ago before I took full advantage of help that was available on this board. What I did was to start from the "other side" of the clutch cover. I marked out where the race would be and drilled two equally spaced pilot holes for a 10-32 (or was it 8-32?) tap, then I bottom tapped those holes. I ran socket cap head cap screws into those tapped holes and tightened them evenly to slowly press the race out. When I was done I closed those tapped holes with set screws coated in gasket sealer. It certainly worked but I would have tried the heat method first if I had known about it. If for some reason you want to try this remember you'll need a bottoming tap... not a plug or tappered tap.
At work I used to use the grease method to remove drill bushings from aluminum plates. It works great. However, the method requires minimal clearance between the ram and the bore of the race/bushing. The bore below and behind the race/bushing has to be packed with heavy, thick grease without any air pockets. Strike the ram firmly with a heavy hammer and the pressure introduced to the grease will push the bushing/race out. Make sure you support the far side of the clutch cover on a wooden block so you don't drive a hole right through the clutch housing.
Doug L.
|
|
Total posts: 4134
Last post: Oct 13, 2020 Member since:Oct 8, 2011
|
Cars in Garage: 0
Photos: 0 WorkBench Posts: 0 |
|
I use my 110 Mig and run a bead around the bore of the outer race flip it over and drop on welding table and the ring falls out.
I pull the rollers and use a Blue Point battery cable puller on the inner. The only one I ever wanted to save was for my Turbo
housing. That one is $65. Steve (CTR)
PS anyone have a short side pot type axle?
I pull the rollers and use a Blue Point battery cable puller on the inner. The only one I ever wanted to save was for my Turbo
housing. That one is $65. Steve (CTR)
PS anyone have a short side pot type axle?
|
|
Total posts: 256
Last post: Aug 26, 2023 Member since:Nov 26, 2017
|
Cars in Garage: 0
Photos: 0 WorkBench Posts: 0 |
just purchased a bearing / battery terminal removal tool from Eastwood (retail store is near me) for
under $10. Looks similar to the tool on the host site. Unfortunately I could not move the bearing.
It still sits behind the c-clip groove (yes I did remove the c-clip).
Also tried scooperman’s suggestion re: the outer race (push out with grease). This did not worked either.
I am reluctant to attempt the dremel suggestion.
Possibly I am being too gentle on both the bearings and the race!
how about my other question re: the dry fit of the housing? What is the most likely hang up preventing me
from fitting the housing against the engine/gearbox? I have a 1/4” x 1/2” gap when I encounter resistance.
Roger Williams
1966 Austin Cooper S
LHD, WET, Personal Export
1966 Austin Cooper S
LHD, WET, Personal Export
|
|
Total posts: 1557
Last post: Apr 12, 2024 Member since:Mar 10, 1999
|
Cars in Garage: 0
Photos: 0 WorkBench Posts: 0 |
|
His point is a 1 1/8" socket won't go over the 1 1/4" bearing. I have done it with the nut but remember having a problem but of course now can't remember the details, maybe it was getting the lock tab bent back far enough with the whole bearing in my way. Pull the individual rollers out of the cage, take off the cage, then you can use a puller, or you can walk it off with the nut now that the socket will go over the bearing hub there is room to get to the nut. If you have some old truck front end shims, after the nut moves the bearing hub out a ways run the nut back and use the C-shaped shims as spacers between the nut and the bearing hub, repeat.
|
|
Total posts: 9241
Last post: Aug 17, 2023 Member since:Jun 5, 2000
|
Cars in Garage: 0
Photos: 0 WorkBench Posts: 0 |
|
Quote:
Originally Posted by RogerOtto
what am I missing?
Your initial post inquired about removing the race from the housing and several methods were suggested by you and others. Alex was talking about how to get the bearing off the input shaft.
In the past I have removed the bearing from the input shaft the way Scooperman suggested. I wish I had known or inquired about this the last time I worked on my Mini's gearbox as would have tried Alex's method.
Doug L.
|
|
Total posts: 256
Last post: Aug 26, 2023 Member since:Nov 26, 2017
|
Cars in Garage: 0
Photos: 0 WorkBench Posts: 0 |
Quote:
Originally Posted by Alex
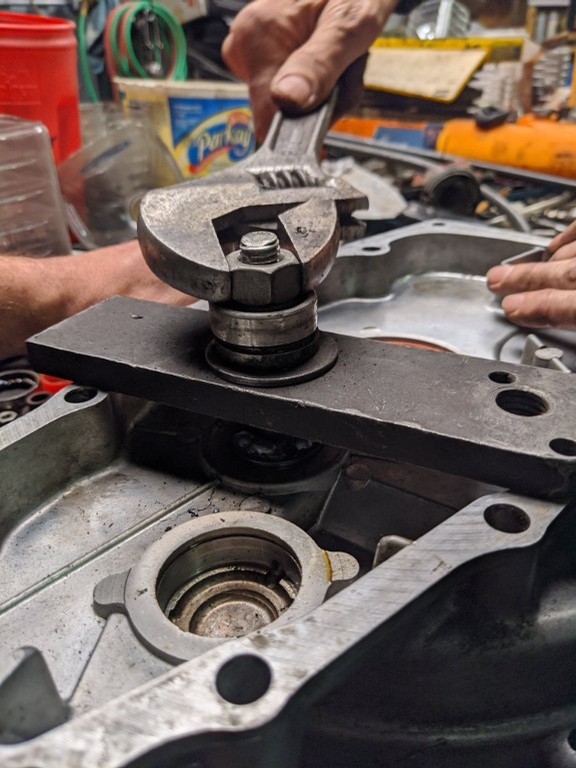
The inner race can be tricky to get a puller onto, so just undo the nut with a 1-1/8" deep socket and it'll wind the race off the shaft.
The inner race can be tricky to get a puller onto, so just undo the nut with a 1-1/8" deep socket and it'll wind the race off the shaft.
what am I missing?
Roger Williams
1966 Austin Cooper S
LHD, WET, Personal Export
1966 Austin Cooper S
LHD, WET, Personal Export
|
|
Total posts: 10237
Last post: Apr 9, 2024 Member since:Mar 24, 1999
|
Cars in Garage: 0
Photos: 0 WorkBench Posts: 0 |
|
A blind bearing puller will hoick the outer race out of the casing nicely, even easier if you give it a bit of warmth before pulling.
The inner race can be tricky to get a puller onto, so just undo the nut with a 1-1/8" deep socket and it'll wind the race off the shaft. It won't come all the way off as you run out of thread, but it comes off enough to get a puller behind it.
The inner race can be tricky to get a puller onto, so just undo the nut with a 1-1/8" deep socket and it'll wind the race off the shaft. It won't come all the way off as you run out of thread, but it comes off enough to get a puller behind it.
|
|
Total posts: 1557
Last post: Apr 12, 2024 Member since:Mar 10, 1999
|
Cars in Garage: 0
Photos: 0 WorkBench Posts: 0 |
|
If you need to remove the outer race, turn a piece of stock to slip fit into race. FIll cavity with grease. Push the tool in. Grease pushes race out.
To get the bearing off the FMS. Use a pair of pliers, grab a roller on the ends, pull it out of the cage. Don't squirm it around, just pull. Then do the next one, then the next, until you have them all out. Then the cage comes off. Then you can use a regular puller.
To get the bearing off the FMS. Use a pair of pliers, grab a roller on the ends, pull it out of the cage. Don't squirm it around, just pull. Then do the next one, then the next, until you have them all out. Then the cage comes off. Then you can use a regular puller.
|
|
Total posts: 333
Last post: Apr 13, 2024 Member since:Jan 22, 2018
|
Cars in Garage: 0
Photos: 0 WorkBench Posts: 0 |
I've cut races out carefully with a Dremel. Yes, the bearing and race are matched. I once assembled an engine with parts from 2 engines. Unfortunately I got parts with a mismatched set. I tightened the casing nuts one flat too much and cracked he casing.
|
|
Total posts: 256
Last post: Aug 26, 2023 Member since:Nov 26, 2017
|
Cars in Garage: 0
Photos: 0 WorkBench Posts: 0 |
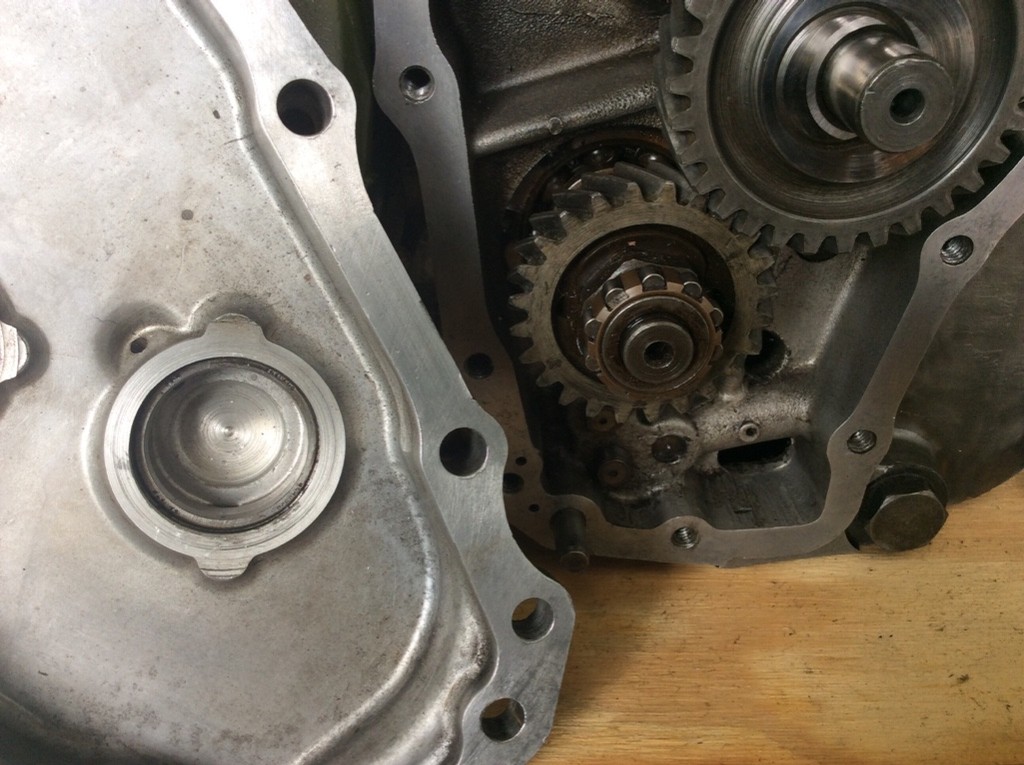 Suggestions on removing this bearing.
Seems there is little space behind the bearing to use a bearing puller.
can this be removed without purchasing a special tool?
I found a NOS bearing in my parts without the race but it is too large for the existing race.
I know they should be matched but I was surprised it did not come close to fitting. Thoughts?
Several sites suggest placing the housing in the oven at 300 degrees for 10 minutes then slam
on a piece of wood to remove the race. Other options?
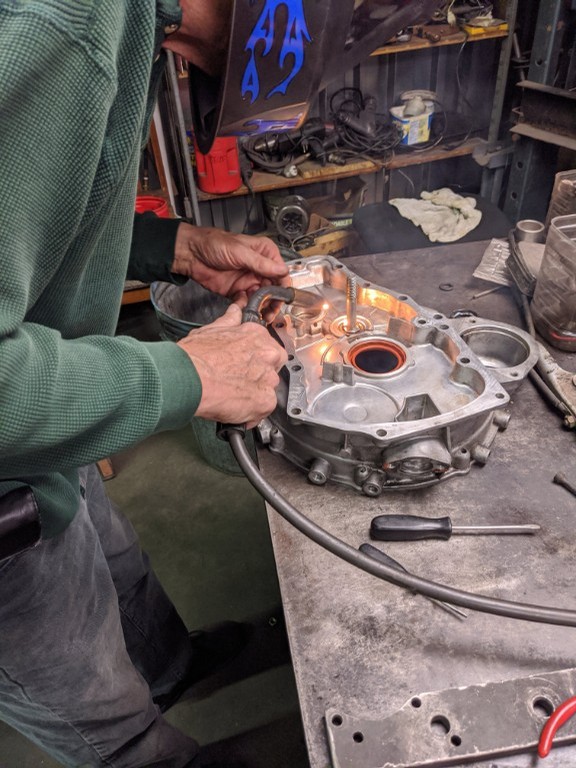
also having some trouble dry fitting the housing onto the engine/trans. I do not have
the studs or bolts on, just the alignment dowels. The housing sticks with about 3/8 to 1/2 inches to go.
Thoughts as as to what is preventing the housing from fitting properly. I did not want to force anything.
input is appreciated.
Roger Williams
1966 Austin Cooper S
LHD, WET, Personal Export
1966 Austin Cooper S
LHD, WET, Personal Export


