

|
Total posts: 9547
Last post: Apr 26, 2024 Member since:Aug 14, 2002
|
Cars in Garage: 0
Photos: 0 WorkBench Posts: 0 |
|
Sure, but roll-over is roll-over, and the zeros all line up!
The car has actually done more than that - I went for years where the speedo would work until the cable warmed up, the WOW! I hit warp speed and the needle would drop to zero! I evem replaced the cable, then one day it decided to just keep working.
.
"Hang on a minute lads....I've got a great idea."
|
|
Total posts: 8382
Last post: Jan 13, 2022 Member since:Feb 7, 2006
|
Cars in Garage: 0
Photos: 0 WorkBench Posts: 0 |
|
Yeah but those are not REAL miles Dan just them kilometer thingies lol.
If in doubt, flat out. Colin Mc Rae MBE 1968-2007.
Give a car more power and it goes faster on the straights,
make a car lighter and it's faster everywhere. Colin Chapman.
|
|
Total posts: 9547
Last post: Apr 26, 2024 Member since:Aug 14, 2002
|
Cars in Garage: 0
Photos: 0 WorkBench Posts: 0 |
|


Of course you could always do it 'au naturel' (driving around until it rolls over itself).
.
"Hang on a minute lads....I've got a great idea."
|
|
Total posts: 473
Last post: Nov 21, 2019 Member since:Jun 29, 2011
|
Cars in Garage: 0
Photos: 0 WorkBench Posts: 0 |
|


|
|
Total posts: 1557
Last post: Sep 26, 2016 Member since:Nov 24, 2012
|
Cars in Garage: 0
Photos: 0 WorkBench Posts: 0 |
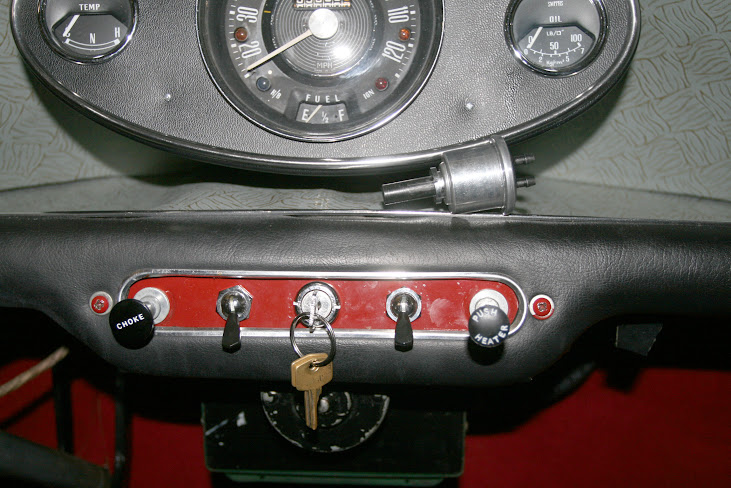
This is related to my speedometer dumb question for my Mk 1.
The PO reported the speedo cable wouldn't turn.
When I changed my outer cv's, it started turning.... but the speedo needle goes the wrong way; counterclockwise!
I've disconnected the cable of course. In the PO's parts box is a used 90 mph speedo. I am a non-S Cooper, 1964.
Pictures of the front and back of the speedo:
|
|
Total posts: 473
Last post: Nov 21, 2019 Member since:Jun 29, 2011
|
Cars in Garage: 0
Photos: 0 WorkBench Posts: 0 |
|
|
|
Total posts: 1456
Last post: Jan 31, 2022 Member since:Sep 8, 2003
|
Cars in Garage: 1
Photos: 186 WorkBench Posts: 0 |
|

Sean Windrum
1996 MGF VVC
1970 1275 GT Racer
66 Austin Countryman
63 997 Cooper (Under Construction)
63 MG 1100
|
|
Total posts: 9241
Last post: Aug 17, 2023 Member since:Jun 5, 2000
|
Cars in Garage: 0
Photos: 0 WorkBench Posts: 0 |
|
Google for "Anthony Rhodes Speedometer" and download his 27 page PDF document on repairing Jaeger and Smiths speedometers.
To get access to the inside of the speedometer you have to un-crimp the bends holding the chrome bezel to the speedometer case. Once you have pulled off the bezel and glass there are only two screws on the back of the case holding the speedometer movement in the housing.
The Rhodes article explains how the odometers work and how to disassemble them. Basically what you will need to do with your Mk1 is to remove the movement from the case to gain access to the odometer wheels. With care you can use a tiny flat blade screwdriver to move the wheels slightly to the "right" leaving a gap to the wheel to the left. (This will make sense once you open the gauge up). With the screwdriver holding the wheels apart you should be able to turn the "left" wheel to what you want it to read. Do that from left to right changing one wheel at a time. Make sure the digits line up with each other and are visible through the odometer window in the gauge face. It is easy to get this wrong. If you are unable to make the small screwdriver method work for you, you will have to disassemble the spedometer and odometer more completely to move the wheels. Don't do this without marking the needle position relative to the drag cup or you will loose your speedometer's calibration (this will be clear once you read over the Rhodes article).
Always carry out speedometer/tachometer work in a well lit area and work on top of an old white sheet or similar so if you knock any parts out/off they will be on the sheet where you can find them.
Before re-crimping the bezel to the case, use a nail ground into a square point to engage the drive in the back of the speedo. Use an electric drill running in reverse to spin the nail and operate the speedometer. Make sure the odometer works correctly... put a few miles on it before saying you are done.
|
|
Total posts: 473
Last post: Nov 21, 2019 Member since:Jun 29, 2011
|
Cars in Garage: 0
Photos: 0 WorkBench Posts: 0 |
|
|
|
Total posts: 137
Last post: Mar 23, 2016 Member since:Apr 26, 2012
|
Cars in Garage: 0
Photos: 0 WorkBench Posts: 0 |
|
Don't know what year speedo you have, but it is doable on the '90 and newer style units. Remove the idler gear to the odometer and the odometer can be reset with a drill or Dremel with a polishing tip up against the odometer gear. The idler gear axle is a stepped rivet that is carefully ground off and removed, and replaced with a small screw and double nut.
|
|
Total posts: 3382
Last post: Jan 13, 2022 Member since:Oct 1, 2002
|
Cars in Garage: 0
Photos: 1 WorkBench Posts: 0 |
|
//minirestoration.blogspot.com/p/speedometer.html?m=1
|
|
Total posts: 5840
Last post: Nov 1, 2019 Member since:Nov 12, 1999
|
Cars in Garage: 0
Photos: 0 WorkBench Posts: 0 |
|
I've had many mini speedometers apart, with varying success on reassembly. I am packing up a MK II Cooper S speedometer right now to send to Nisonger for refurbishment. I think that is the way to go.
Or, take it all apart, disassemble the odometer, reassemble it at 00000.0 and see if it works.
|
|
Total posts: 473
Last post: Nov 21, 2019 Member since:Jun 29, 2011
|
Cars in Garage: 0
Photos: 0 WorkBench Posts: 0 |
|


