
| Orig. Posting Date | User Name | Edit Date |
| Apr 21, 2014 07:30AM | meetthespeakers | Edited: Apr 28, 2014 07:25AM |
| Apr 21, 2014 07:25AM | meetthespeakers | |
| Apr 19, 2014 09:24AM | Dan Moffet | |
| Apr 18, 2014 09:31AM | joakwin | |
| Apr 17, 2014 08:37AM | meetthespeakers | Edited: Apr 17, 2014 08:42AM |
| Apr 7, 2014 06:16AM | meetthespeakers | |
| Apr 5, 2014 05:23AM | Minerva | |
| Mar 30, 2014 07:58AM | dimitris | |
| Mar 30, 2014 07:54AM | meetthespeakers | |
| Mar 27, 2014 05:29AM | meetthespeakers | |
| Mar 25, 2014 10:28PM | ssuperflyoldguy | Edited: Mar 25, 2014 10:37PM |
| Mar 25, 2014 10:36AM | dimitris | |
| Mar 25, 2014 09:28AM | meetthespeakers | Edited: Mar 25, 2014 01:00PM |
| Nov 27, 2013 12:17PM | AirRide | |
| Nov 27, 2013 08:41AM | Spitz | Edited: Nov 27, 2013 08:41AM |
| May 3, 2013 04:38AM | AirRide | |
| May 1, 2013 08:51AM | Air2air | |
| May 1, 2013 08:27AM | Dan Moffet | |
| May 1, 2013 02:26AM | AirRide | |
| Feb 6, 2013 07:38AM | meetthespeakers |
Found 33 Messages

|
Total posts: 1065
Last post: Feb 10, 2023 Member since:Oct 2, 2008
|
Cars in Garage: 0
Photos: 0 WorkBench Posts: 0 |
|


meetthespeakers:
Impressive work! Once this is done, will you be onto a "project Binky" type of project?
How are the large brackets going to be attached to the car body? On the inner wing panel, or connected to the subframe? Do you have a Mini front subby or some other type?
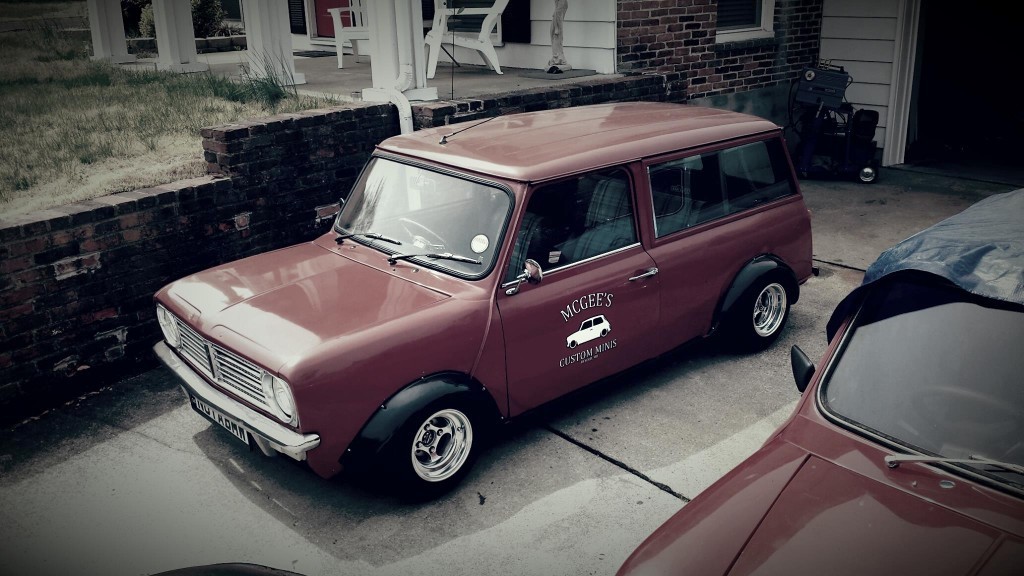
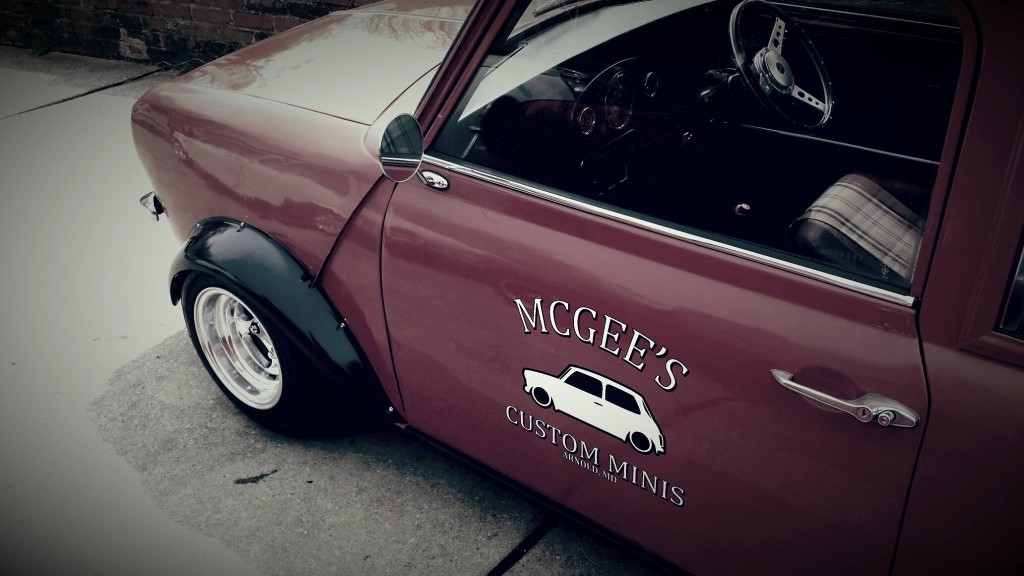
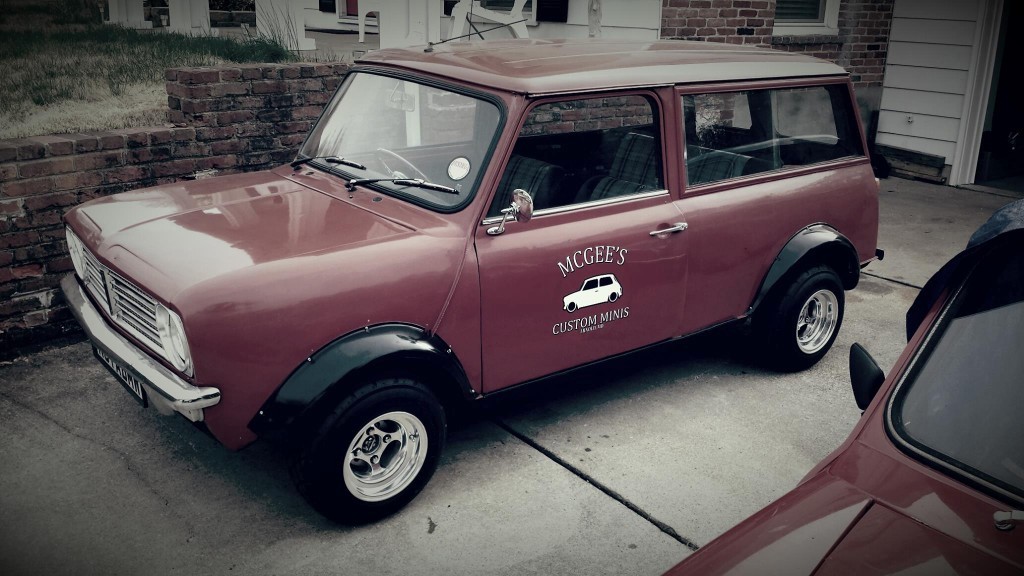
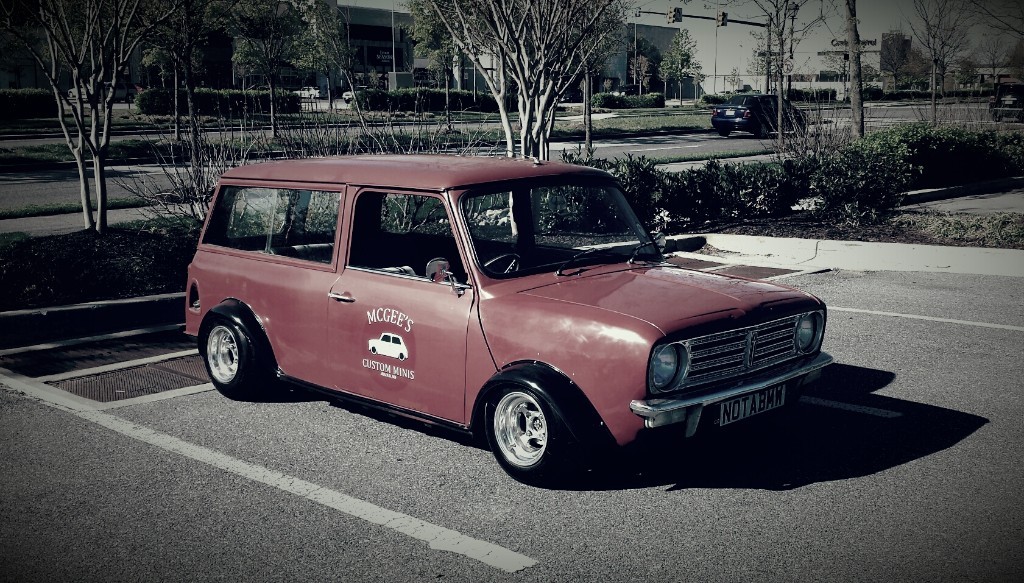
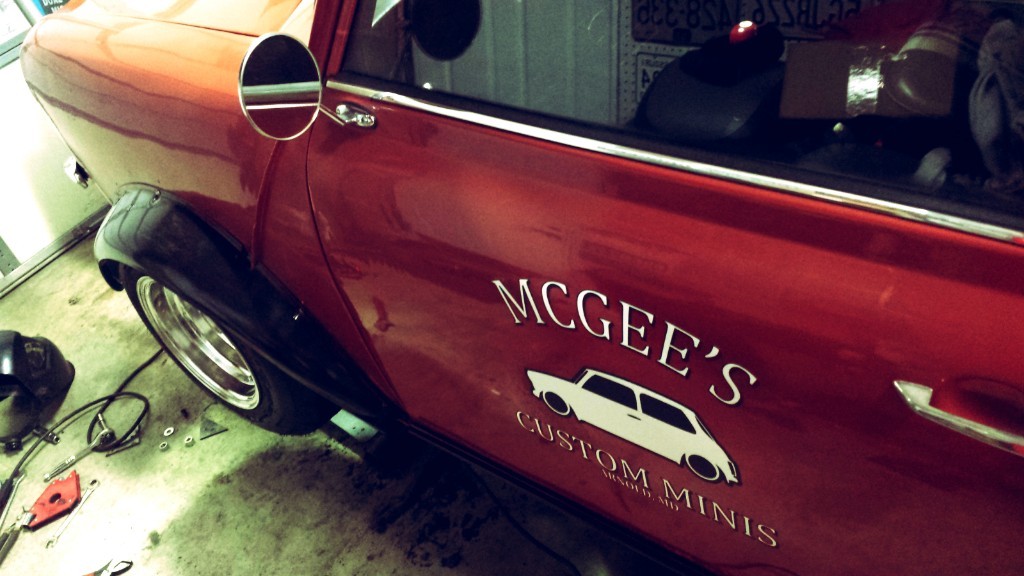
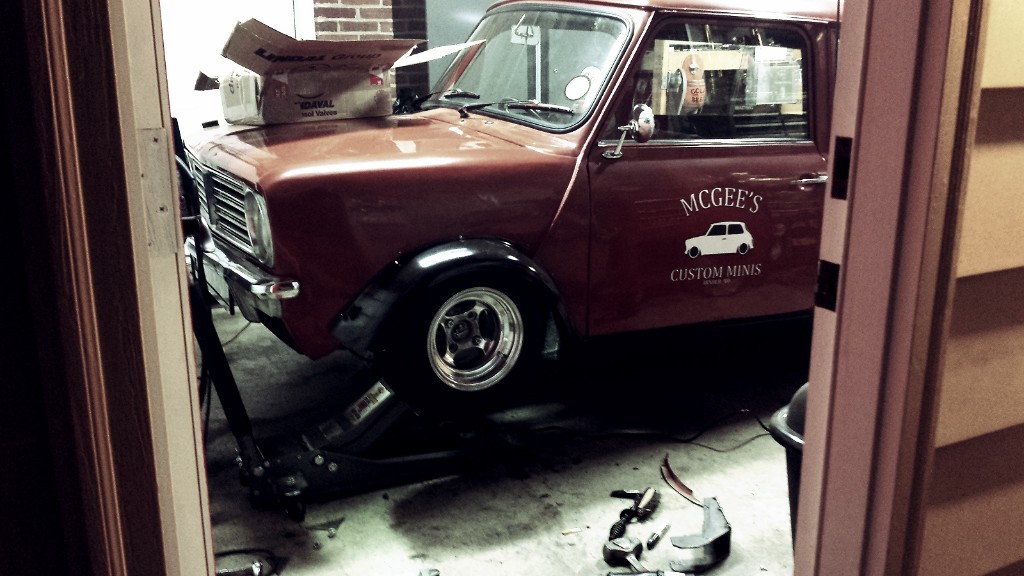
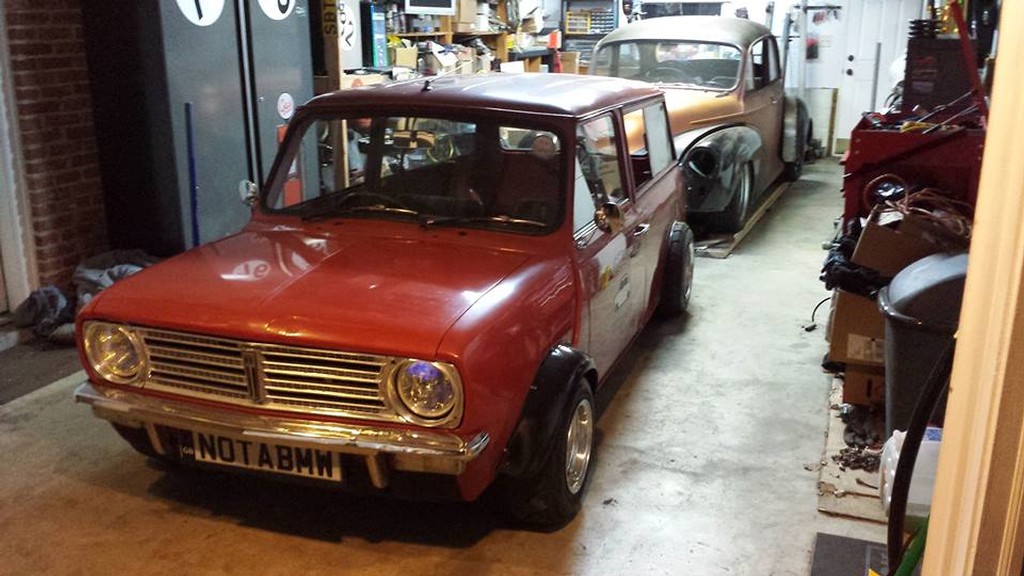
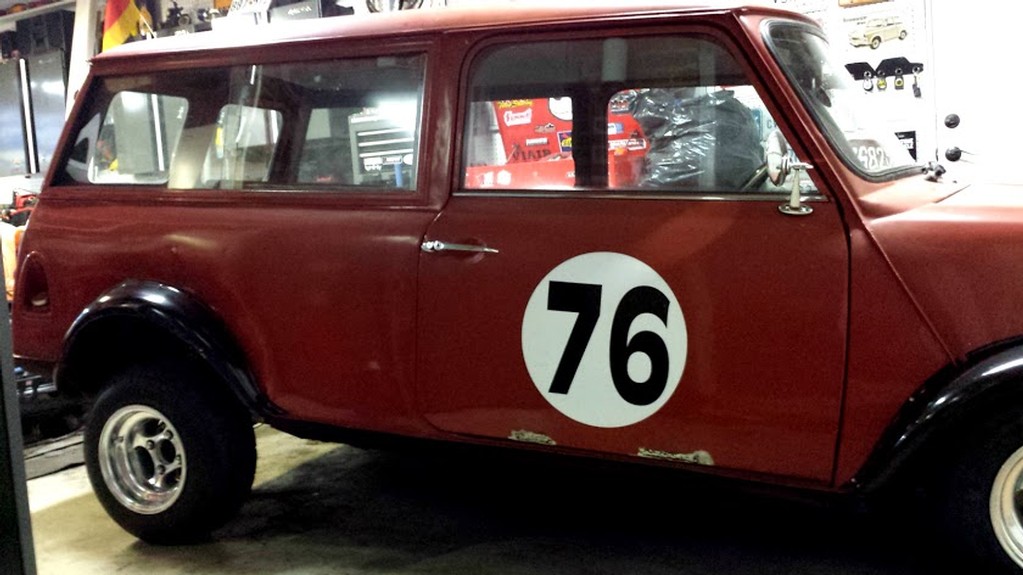
Dan, hmmm project Binky, well I already have a few engine swaps under my belt on Mini's, and Morris Minors... will be doing a 350 swap in the Astro when this motor wants to go, but that will be a while. I still would like to do a full frame on the Mini and bring in the track width to fit under the body without running arches and still have deep dish wheels... that and RWD, I know blasphemy. Ha! As far as the brackets they are bolted through, and welded to the inner wing panel. I am still running stock mini subframe. But all that may change over time. Just have to see how everything holds up to daily use. Anyway attached are pics from this weekend. I am pretty much done, just have minor fettling left. I measure 3/4" from sump and exhaust to ground. And when it is fully expanded I can about crawl under there.
|
|
Total posts: 1065
Last post: Feb 10, 2023 Member since:Oct 2, 2008
|
Cars in Garage: 0
Photos: 0 WorkBench Posts: 0 |
|
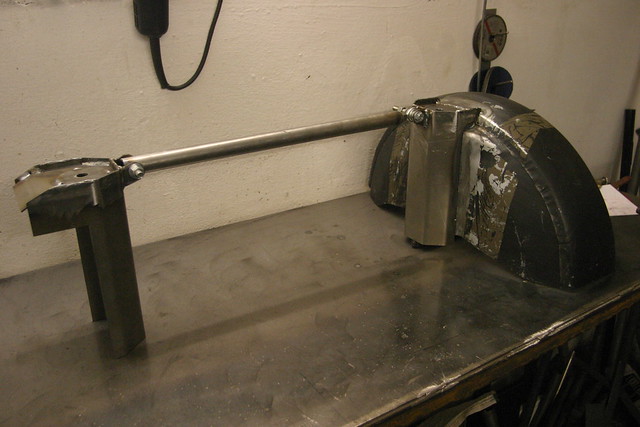
Originally for the rear I was gonna cut off the back portion of the stock frame and make it a tube frame with cups to mount something similar, I love slam specialties bags. Then machine a set of hi-los to mount the other side of the cup to. And then I suppose you could just use some lowered shocks in there stock location. However I liked this idea more... for now. Now if the made a re-4 I would have been a little more persaused cause that probably could have fit in the stock subframe with a little tweaking.
|
|
Total posts: 9547
Last post: Apr 26, 2024 Member since:Aug 14, 2002
|
Cars in Garage: 0
Photos: 0 WorkBench Posts: 0 |
|
meetthespeakers:
Impressive work! Once this is done, will you be onto a "project Binky" type of project?
How are the large brackets going to be attached to the car body? On the inner wing panel, or connected to the subframe? Do you have a Mini front subby or some other type?
.
"Hang on a minute lads....I've got a great idea."
|
|
Total posts: 53
Last post: Aug 18, 2019 Member since:Mar 5, 2010
|
Cars in Garage: 0
Photos: 0 WorkBench Posts: 0 |
|
I was looking at the idea of mounting re-5's on the rear arms on the mini and then making some one off uca's and mounting the bags off of them for the front and then some 1/4 inch valves to keep the speed down but this will be down the road for me
|
|
Total posts: 1065
Last post: Feb 10, 2023 Member since:Oct 2, 2008
|
Cars in Garage: 0
Photos: 0 WorkBench Posts: 0 |
|
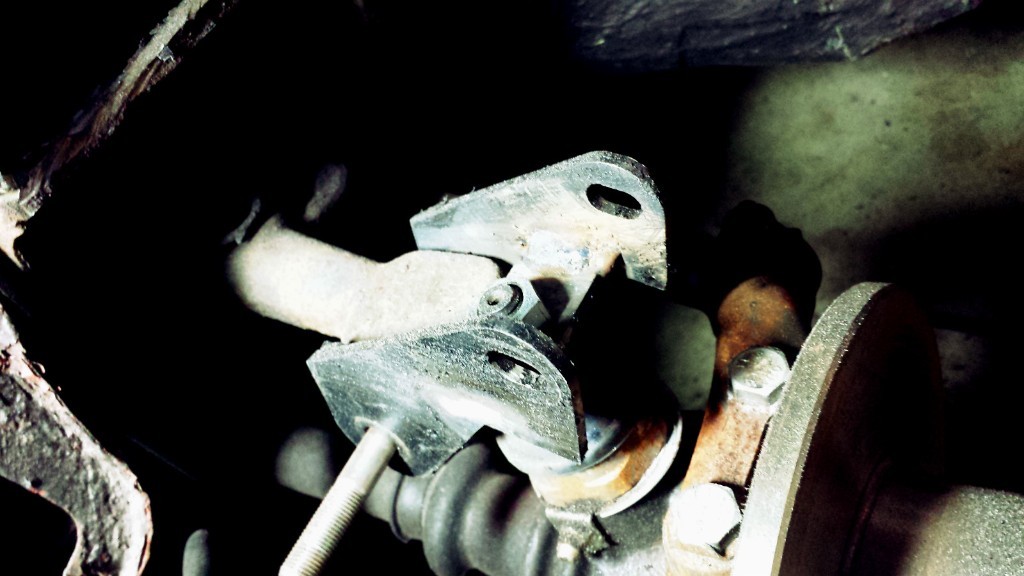
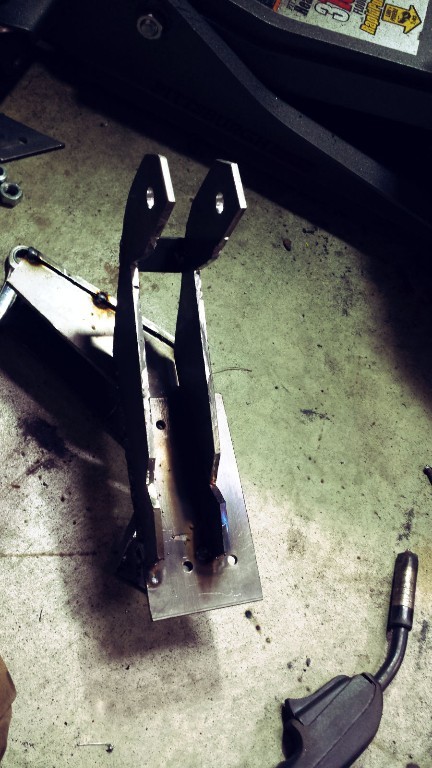
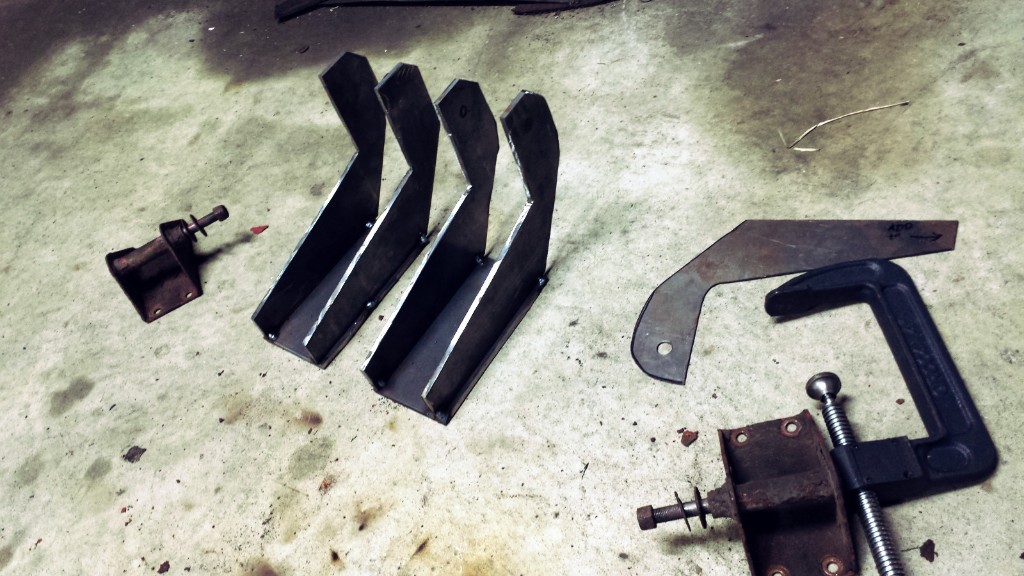
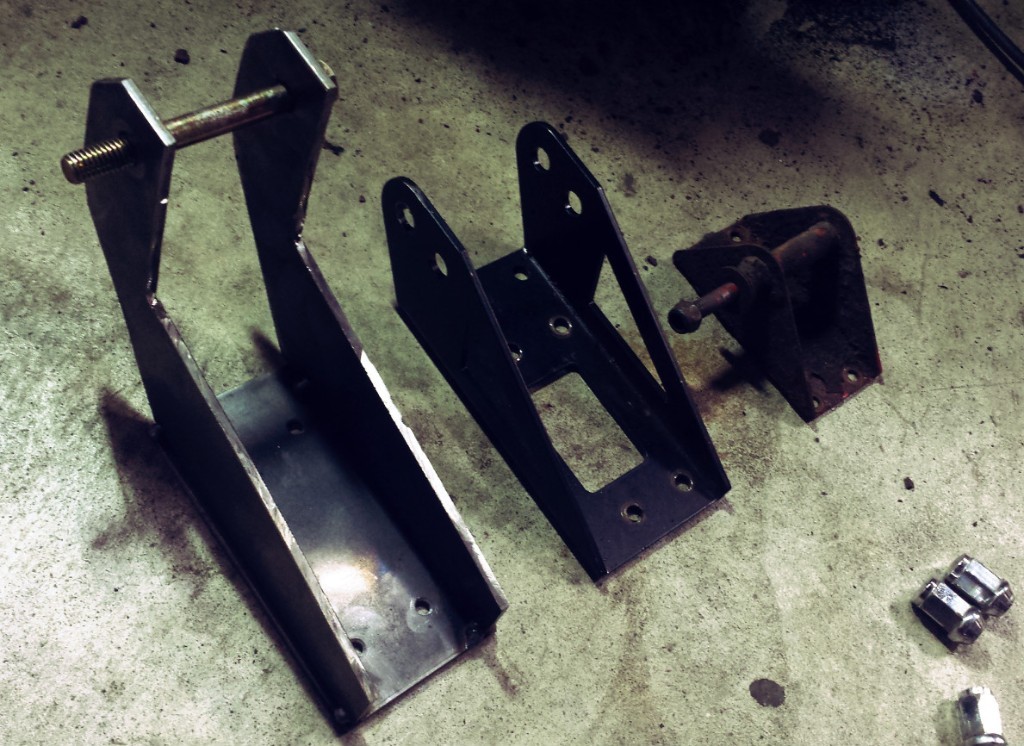
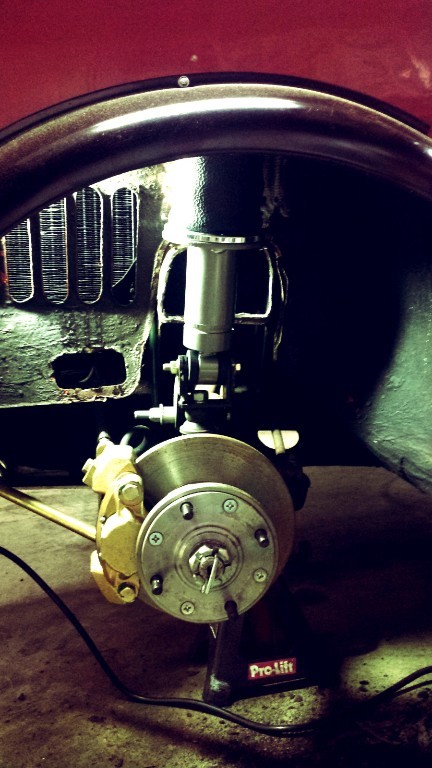
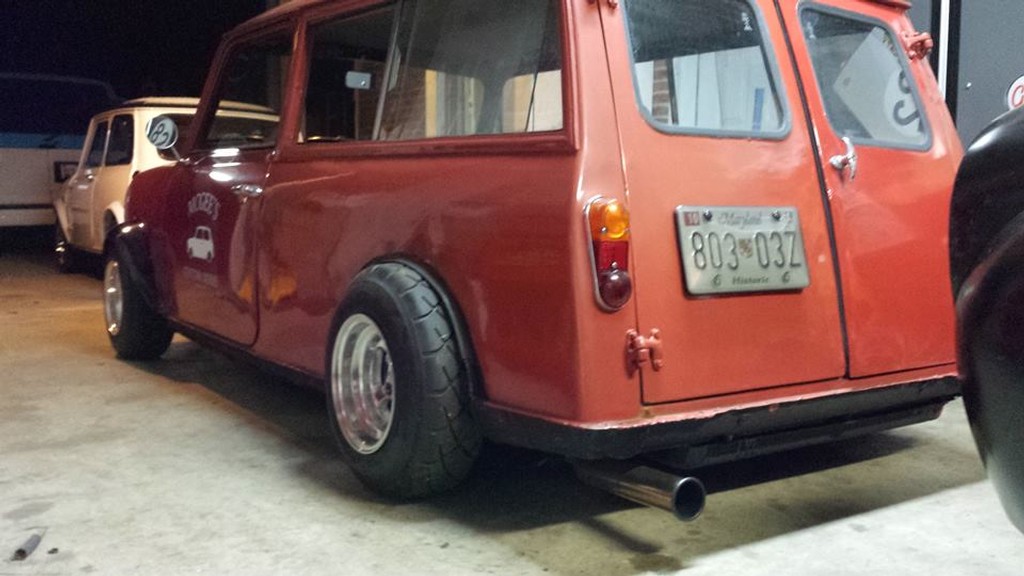
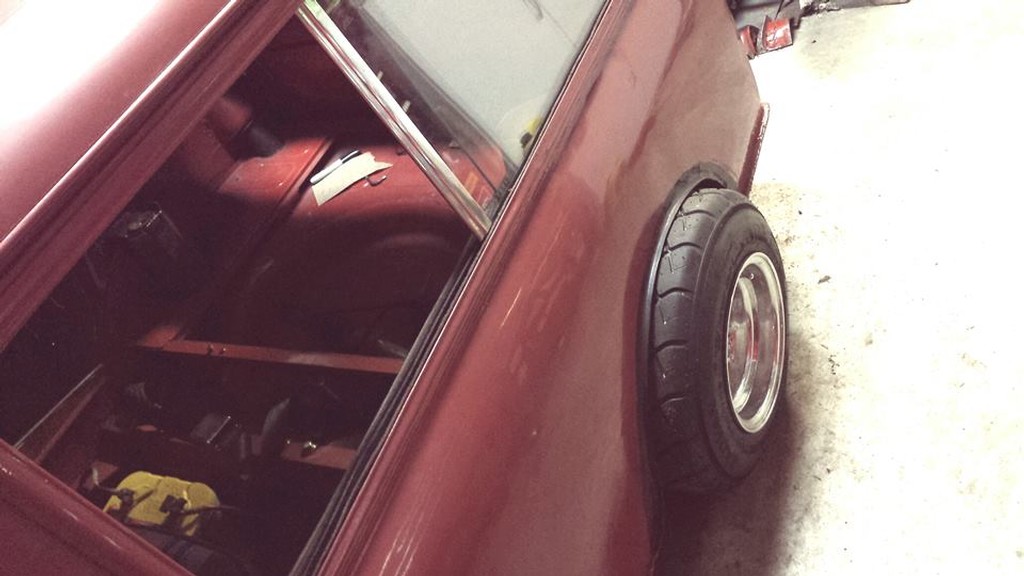
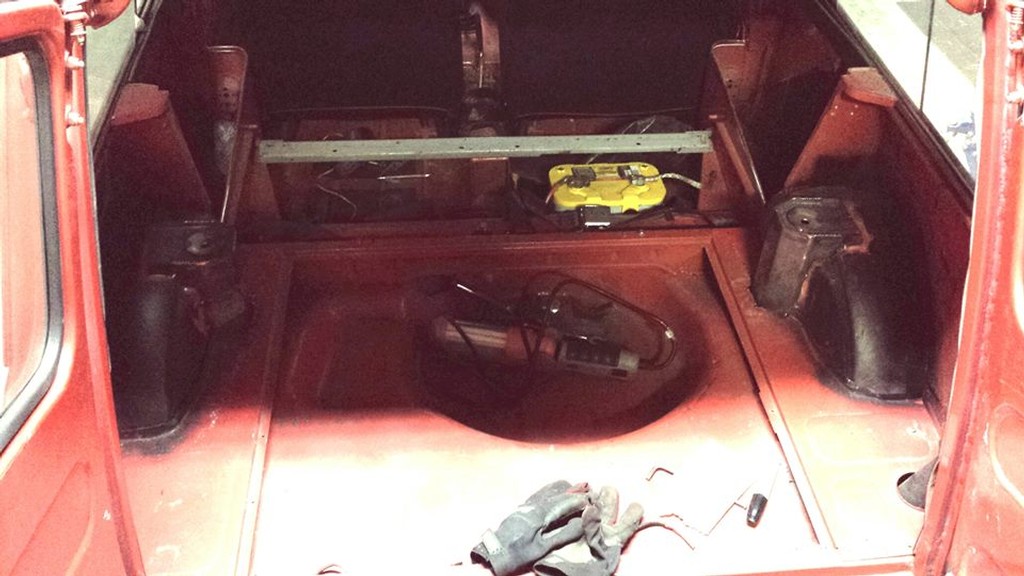
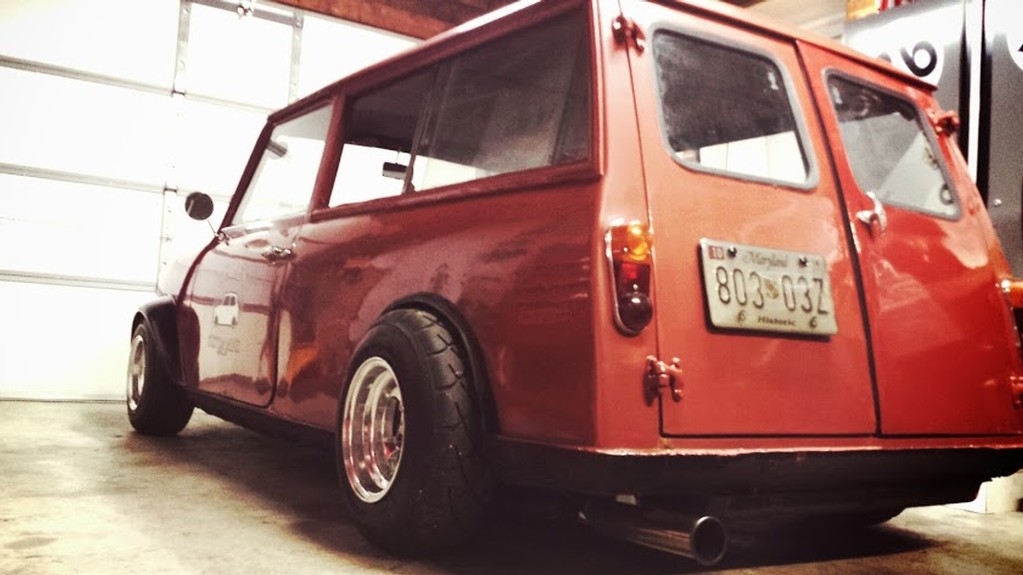
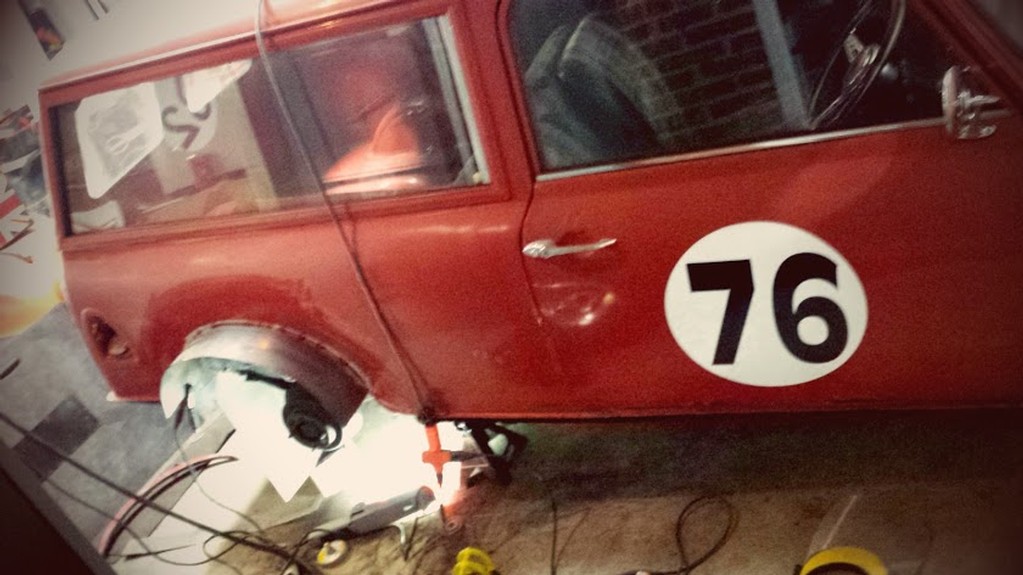
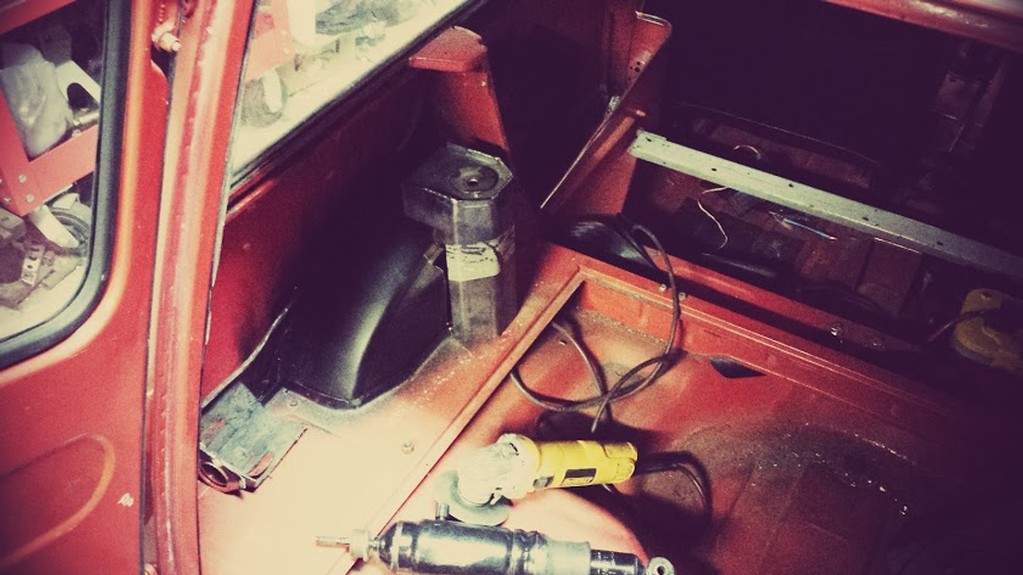
Wasn't sure if anyone was still following, but since I have made some progress the last 2 days and I am on version 3 of the top mount, and version 2 of lower mount I thought I would toss up some pictures. I ended up moving the top mount up 2 inches, this gave me better shock clearance and bag clearance against wheel/tire combo. The lower mount I had to modify to move slightly out and down to make a better angle during normal ride height, and still have clearance when dropped all the way. So passenger front is mocked up, hoping to finalize today/tomorrow and get the drivers side made up, and run the airlines to see what it can do. It really is hard to capture a picture of how low it is. Basically with the said mods to mounts, on collapse the wheel comes up 2 inches past the stock fender lip. Anyway, enjoy the pics, will try and get some more along the way. And for those wondering why I am doing this, it really is just to do it. I like fabricating and working through the design process. Goals are to obviously have ajustable ride height, potentially better ride quality, handling.... we will see how it does, I mainly just like cruising with the family at this point, but I think it should do fine in the twisties. Ha, who am I kidding, I just like low cars.
|
|
Total posts: 1065
Last post: Feb 10, 2023 Member since:Oct 2, 2008
|
Cars in Garage: 0
Photos: 0 WorkBench Posts: 0 |
|
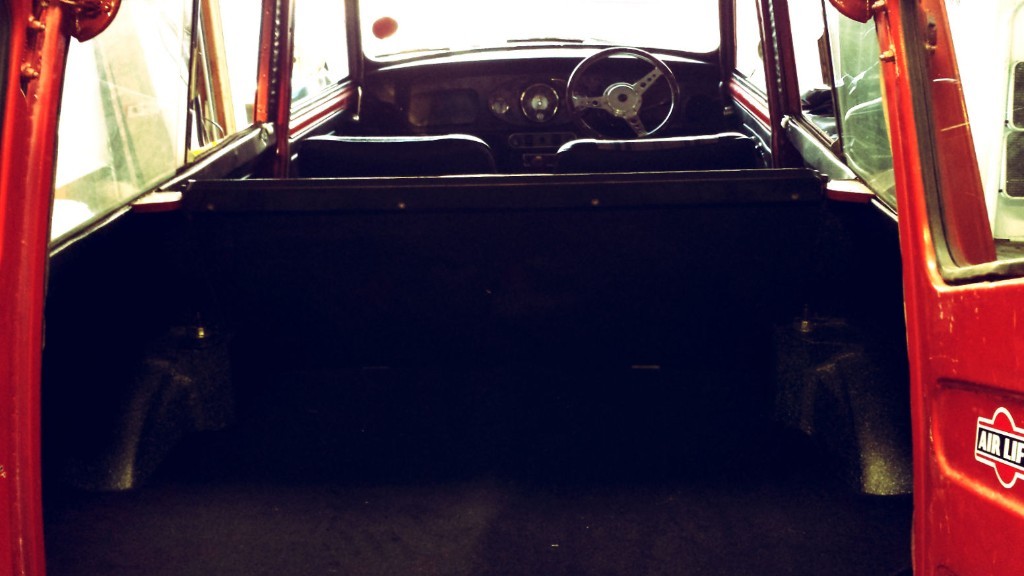
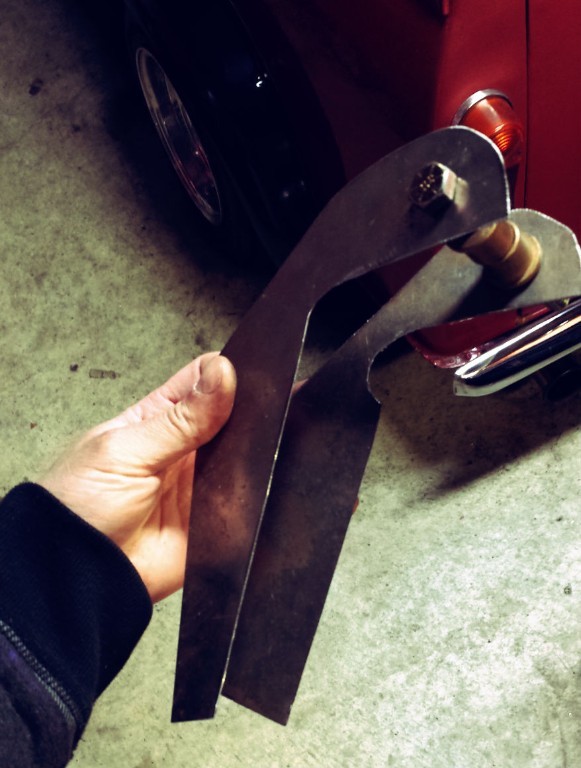
Rear is all done, finished putting interior back in. Fronts have now been started. Mocking up the mounts I will have to make for the front. Going to use the design on the left with no notch out of it. Ordering up steel today.
PS Minerva, I have never been to the west coast, I probably belong out there... next up lambo doors, neon lights, big fart can, big can of Nawssss. 
|
|
Total posts: 614
Last post: Sep 21, 2021 Member since:Jan 7, 2013
|
Cars in Garage: 0
Photos: 0 WorkBench Posts: 0 |
Airbags on a Mini? Sure you don't want to add "Lambo doors" as well? Yegads man...what are you thinking!!! Just stay away from East LA and the urge will pass. ![]()
If it's not Scottish....it's crap! (Cry of the Mini Tartan Owners' Clan)
|
|
Total posts: 2022
Last post: Jan 14, 2022 Member since:Mar 8, 2002
|
Cars in Garage: 0
Photos: 1 WorkBench Posts: 1 |
|
impressive work man!! keep it up!!
|
|
Total posts: 1065
Last post: Feb 10, 2023 Member since:Oct 2, 2008
|
Cars in Garage: 0
Photos: 0 WorkBench Posts: 0 |
|
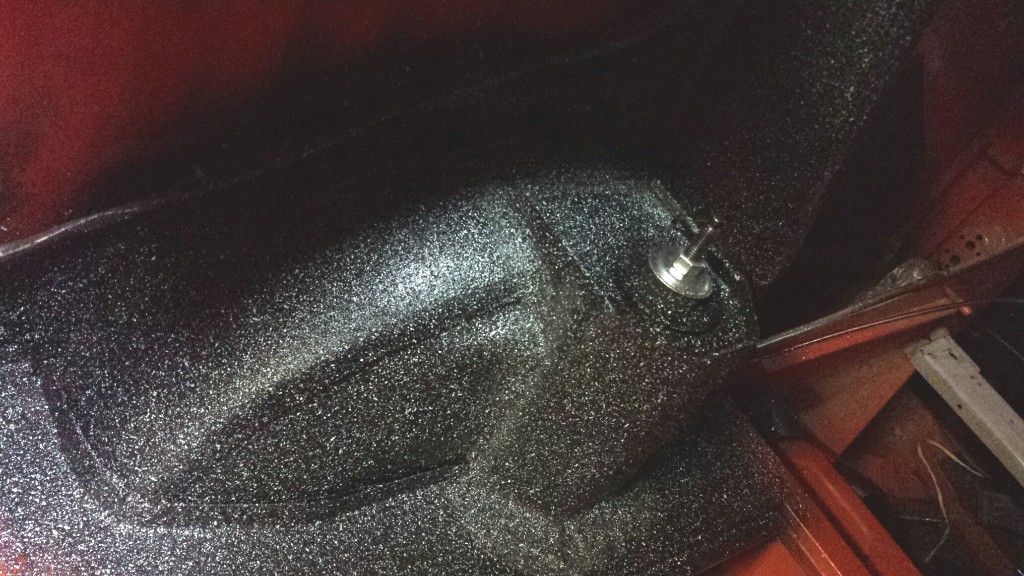
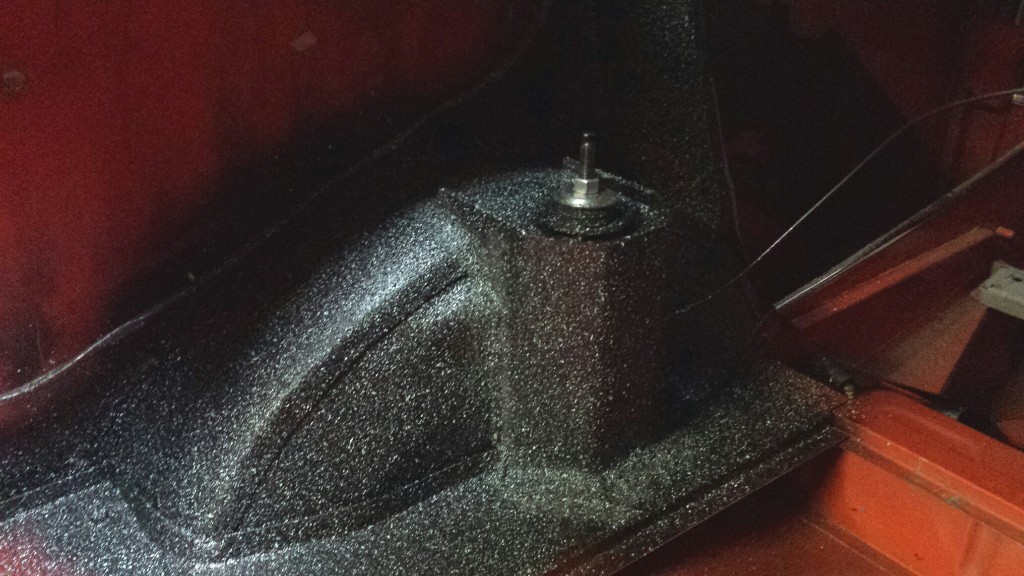
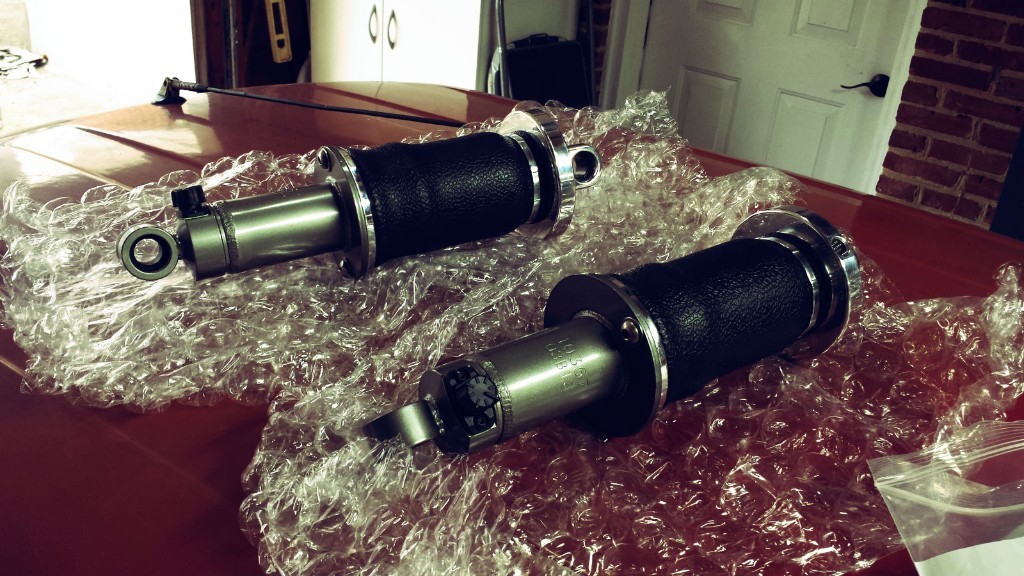
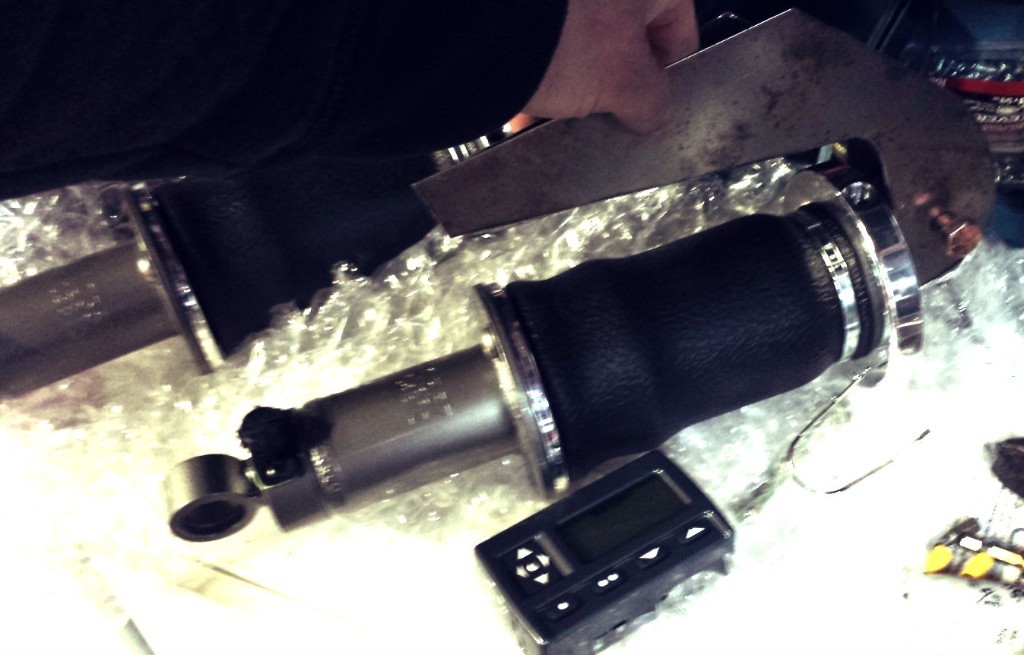
Just wanted to update, here is the finished rear shock towers. Just need to put the satin clear coat on it. I used the east wood black/turquoise splatter paint on the towers. Pretty happy with the results. Air management has arrived, just waiting on the air lift front shocks to start mocking up the front mounts...
|
|
Total posts: 1065
Last post: Feb 10, 2023 Member since:Oct 2, 2008
|
Cars in Garage: 0
Photos: 0 WorkBench Posts: 0 |
|
Got the rear towers tacked in, just need to take it down to metal and weld her up. Finally got that last 1/2" on the rear. Now I just need to figure out how to come down 2 inches in the front. Currently measures a reverse rake of 1". Air lift sleeves are ordered up and will fabricate new front mounts moved up 2 inches or so. Balljoint and axles will most likely be the limiting factor, we shall see. I am happy with the progress so far. Hope to drive this thing to work soon! Getting very itchy to say the least. While I have the interior out I am going to use some left over liquid sound deadening and top coat it with black a torquise speckle trunk coating to finish off. Cheers!
|
|
Total posts: 1268
Last post: Feb 23, 2020 Member since:Oct 30, 2008
|
Cars in Garage: 0
Photos: 46 WorkBench Posts: 1 |
John, there's somebody on the board looking for those original rear shock turrets you cut out...... Maybe you'll have to retub it to get lower.
- Contact:Jacob
- UserName: Simpsoncan2
- Telephone:334-774-8296
- E-Mail:Send Seller E-Mail
- Location:Orlando
- State:FL
- Country:United States
- Make:Mini
- Ad Type:Part
- Created on:Mar 07, 2014
- Modified on:Mar 24, 2014
- Other Ads:None
|
|
Total posts: 2022
Last post: Jan 14, 2022 Member since:Mar 8, 2002
|
Cars in Garage: 0
Photos: 1 WorkBench Posts: 1 |
|
that looks fantastic!! keep it up!! ![]()
|
|
Total posts: 1065
Last post: Feb 10, 2023 Member since:Oct 2, 2008
|
Cars in Garage: 0
Photos: 0 WorkBench Posts: 0 |
|

Still working on my design. It is almost there, need to revisit front and build mounts higher to be able to go lower. Rear is almost done, just need to finish welding in new towers. I am getting close to where I want to be, will let you guys know the result hopefully in a few weeks when I start driving it daily to work. Can't wait!
Pics are in no order, but I re-arched the rear wheel wells to be flat. Then made a little bit more room for the rear sleeves in diameter and height with the new rear towers.
|
|
Total posts: 5
Last post: Nov 27, 2013 Member since:May 1, 2013
|
Cars in Garage: 0
Photos: 0 WorkBench Posts: 0 |
There is a far more informative video now and hopefully more to follow. If you want to see anything else let us know. Should be at //www.youtube.com/watch?v=JbNMpDILC2E if I copied the link correctly?
Just re-read this discussion and we dont do a kit for 6.5k! lol. In the old days of 2007 when the kit was introduced the computers cost almost £1k GBP which added a lot of cost and it also used very expensive billet front damper/bag units which cost almost as much, and the kits were more expensive.
Our cheapest kit is now £995 GBP. Air does indeed handle and ride better than the rubber cones. The suspension allows full motion although its still restricted to about 4 inches of travel, but with the air you are able to use the 4 inches and not just 1.5-2 inches.
|
|
Total posts: 13978
Last post: Jan 15, 2024 Member since:Jan 22, 2003
|
Cars in Garage: 4
Photos: 381 WorkBench Posts: 1 |
|
Not trying to step on anyones toes here but thought i would add a quick video to show Air suspension working on a Mini.
Not a really useful video. Would be nice to see something other than max and min travel. How about just a couple inches up....and fine tune it. Would also be interesting to see a wheel level shot of it driving along a road with the occasional dip or bump
"Everybody should own a MINI at some point, or you are incomplete as a human being" - James May
"WET COOPER", Partsguy1 (Terry Snell of Penticton BC ) - Could you send the money for the unpaid parts and court fees.
Ordered so by a Judge
|
|
Total posts: 5
Last post: Nov 27, 2013 Member since:May 1, 2013
|
Cars in Garage: 0
Photos: 0 WorkBench Posts: 0 |
You are spot on the camber and all other geometry will change remarkably as the car lifts and drops.
This happens with most cars that go up and down even to some extent when you drive and go over a bump (although far less) and certainly when a car is lowered.
This is no issue as the geometry should be set at the intended ride height, and as with all cars will go off a bit when raised or lowered. The thing with air is that it tends to lift and lower more.
On the mini we have worked not only on handling, but also the main focus of the attention has been on ride quality and the increased useable suspension range certainly goes a long way to achieving this.
A vehicle like this is usually driven at a relatively low level such that everything clears, and the geometry set at this height. It can be raised if you use dashboard control if you need clearance for a speed bump etc, and lowered if you want a cool look at a show or when parked. It also has security advantage but that’s not a major reason for investing in air.
Cheers,
AirRide
|
|
Total posts: 1557
Last post: Sep 26, 2016 Member since:Nov 24, 2012
|
Cars in Garage: 0
Photos: 0 WorkBench Posts: 0 |
This is a fascinating thread.
If you had an up/down toggle switch on the dash though, when would you ever push it up? Speed bumps?
|
|
Total posts: 9547
Last post: Apr 26, 2024 Member since:Aug 14, 2002
|
Cars in Garage: 0
Photos: 0 WorkBench Posts: 0 |
|
Interesting, though the close-up of the front rising and falling shows how much it affects camber on a Mini - visibly going from small negative to major positive. It would also affect castor and toe-out.
.
"Hang on a minute lads....I've got a great idea."
|
|
Total posts: 5
Last post: Nov 27, 2013 Member since:May 1, 2013
|
Cars in Garage: 0
Photos: 0 WorkBench Posts: 0 |
Not trying to step on anyones toes here but thought i would add a quick video to show Air suspension working on a Mini.
|
|
Total posts: 1065
Last post: Feb 10, 2023 Member since:Oct 2, 2008
|
Cars in Garage: 0
Photos: 0 WorkBench Posts: 0 |
|
Eh, no problem. I just love fabrication, and seeing stuff not of the norm. With that said if there is a bolt on product that's been tested I'm all for that until it passes the time/money threshold. Anyway, here are 2 more pictures to mull over. This will be obviously easier for me to do since I have an Estate, but adding rear turrets for the rear to give the clearance needed for the air shocks.

Found 33 Messages


