
Found 31 Messages

|
Total posts: 678
Last post: Sep 29, 2022 Member since:Apr 26, 2011
|
Cars in Garage: 0
Photos: 0 WorkBench Posts: 0 |
Quote:
Originally Posted by croc7
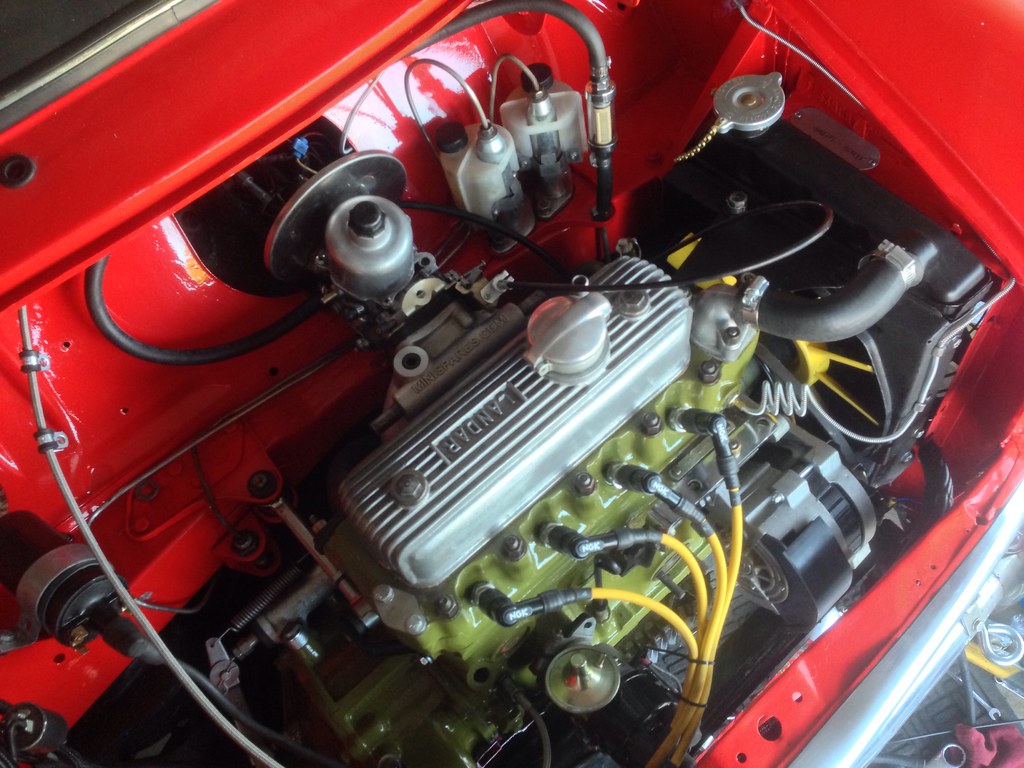
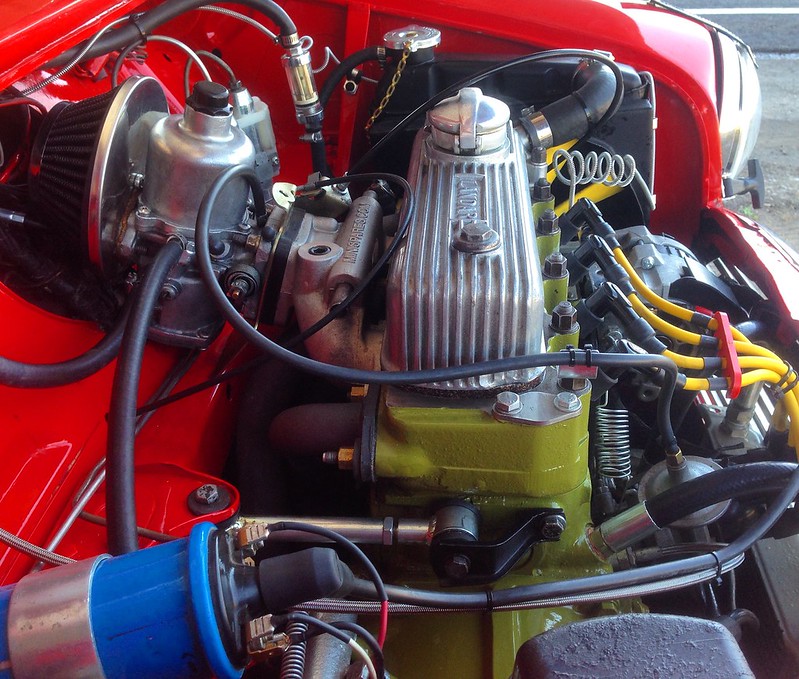
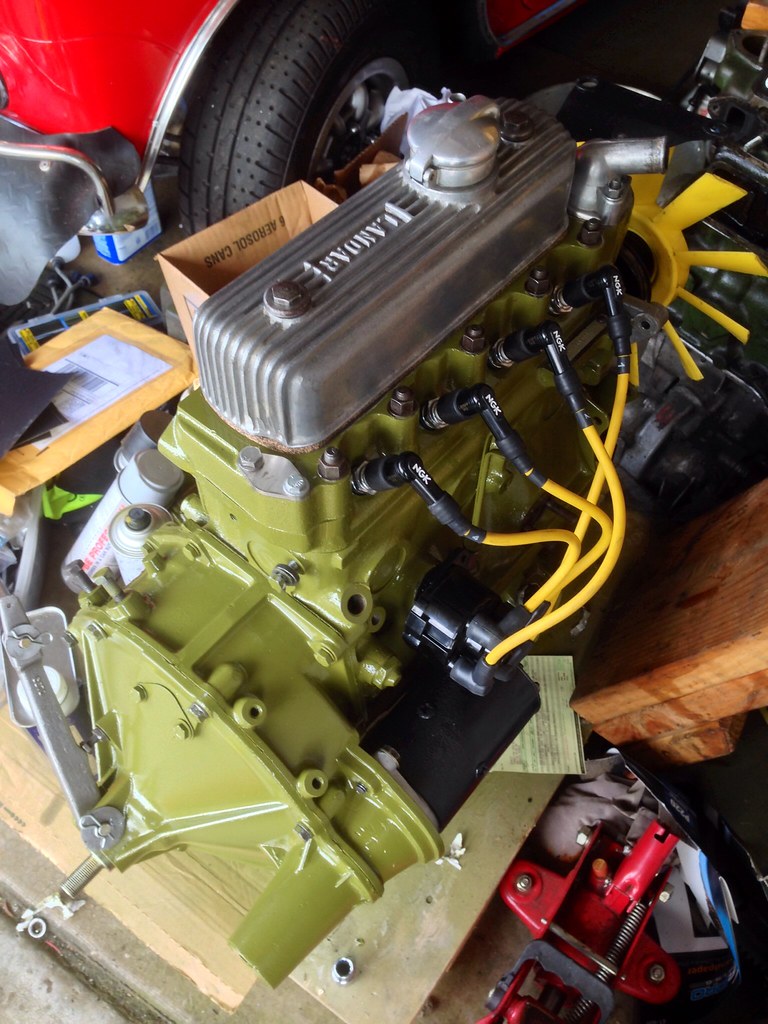
Interesting valve cover. I like it. What is it?
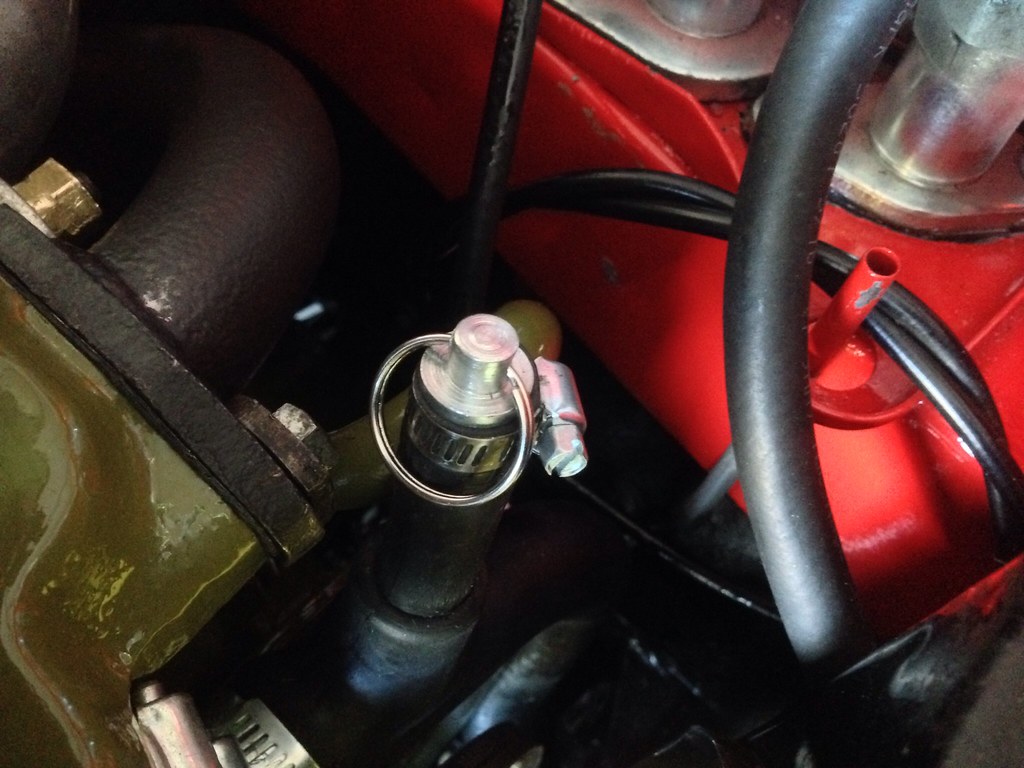
Norm: the pin does look like a grenade pin but it is the adjustable locking pin from a Harbor Freight engine stand. It fits snug and just needed a clamp. It came out nice and stock looking. I replaced the pin on my engine stand with a thick screw driver.
|
|
Total posts: 654
Last post: Dec 20, 2017 Member since:Sep 24, 2011
|
Cars in Garage: 0
Photos: 0 WorkBench Posts: 0 |
|
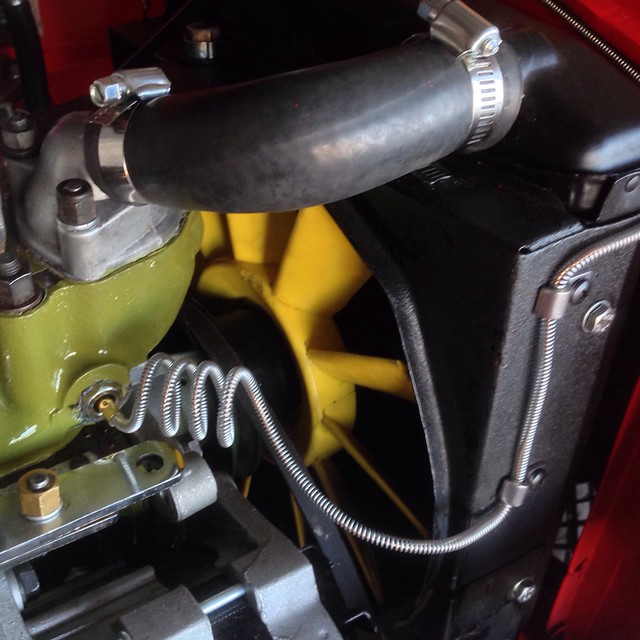
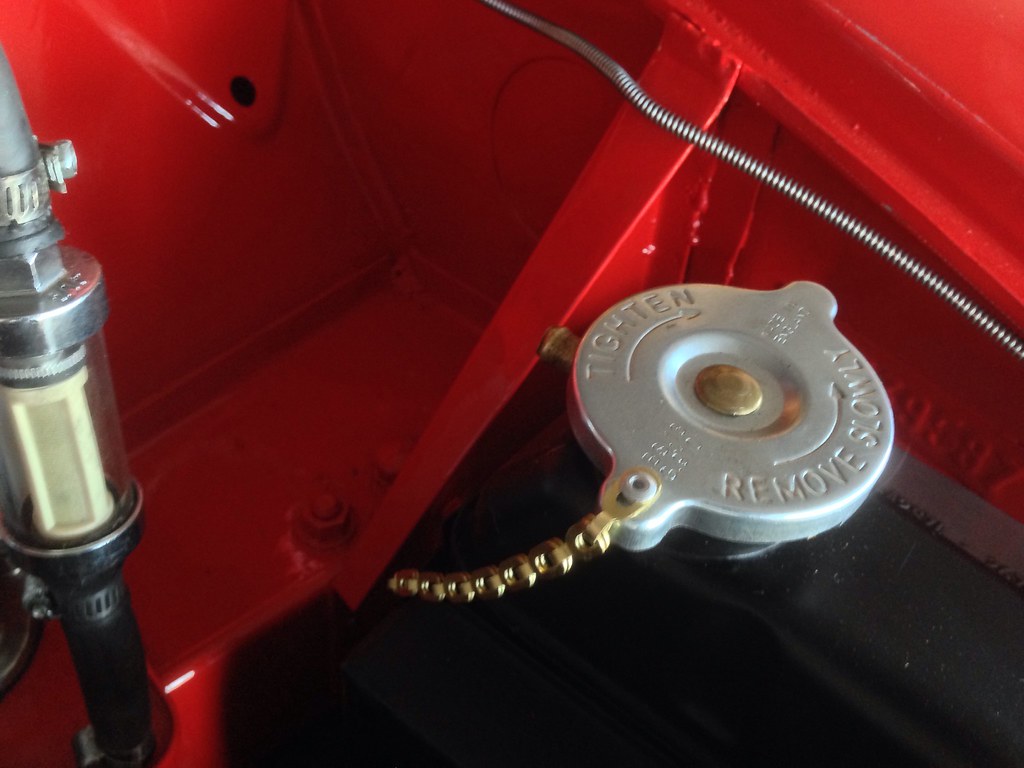
I like the "grenade pin" where you blocked off the heater outlet.
Also, very nice touch with the brass radiator cap keeper chain!
Looks beautiful throughout. Very nicely done.
Norm
|
|
Total posts: 834
Last post: Mar 7, 2023 Member since:Aug 15, 2002
|
Cars in Garage: 0
Photos: 0 WorkBench Posts: 0 |
|
Interesting valve cover. I like it. What is it?
|
|
Total posts: 1404
Last post: Jun 21, 2018 Member since:Oct 8, 2013
|
Cars in Garage: 0
Photos: 0 WorkBench Posts: 0 |
Wow nice job sir! Very clean and tidy
Mini's are like buses they come along in a bunch
|
|
Total posts: 678
Last post: Sep 29, 2022 Member since:Apr 26, 2011
|
Cars in Garage: 0
Photos: 0 WorkBench Posts: 0 |
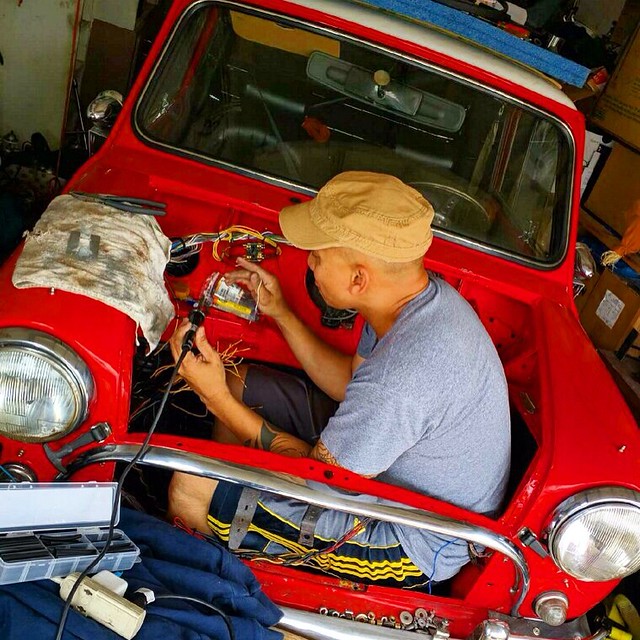
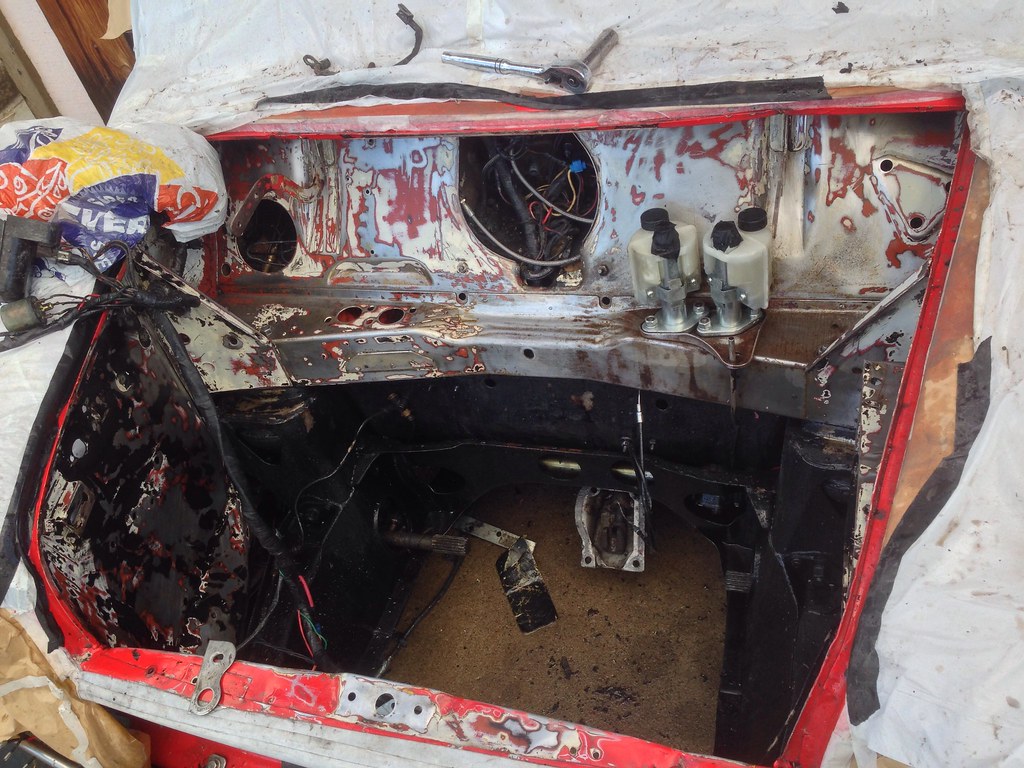
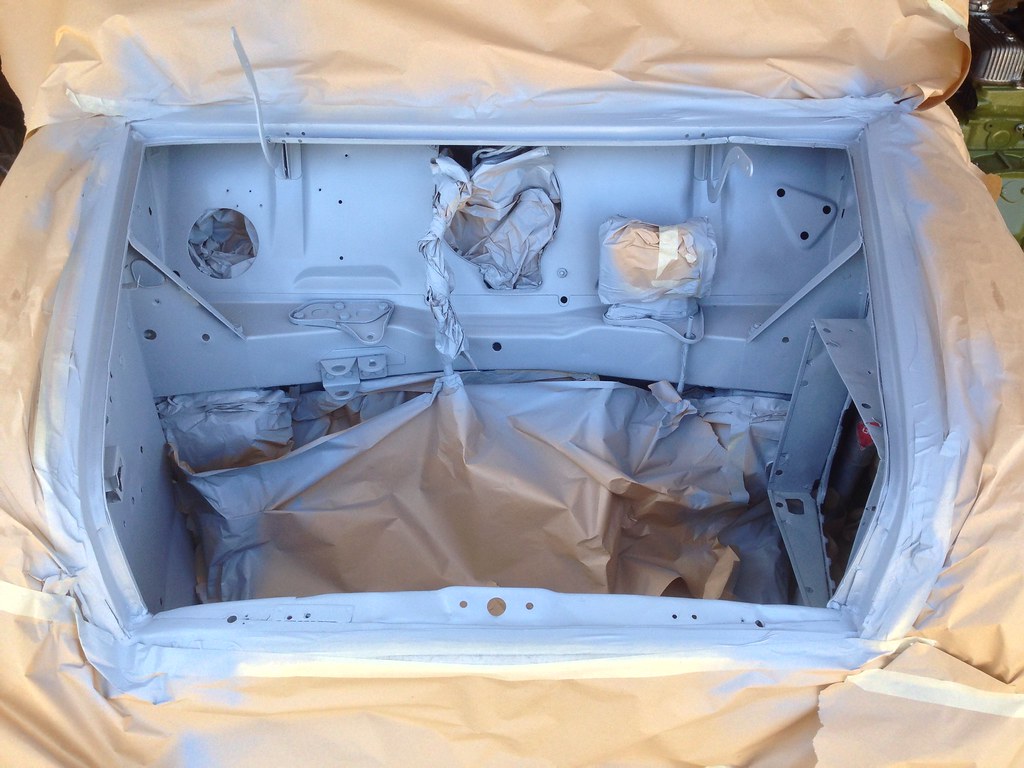
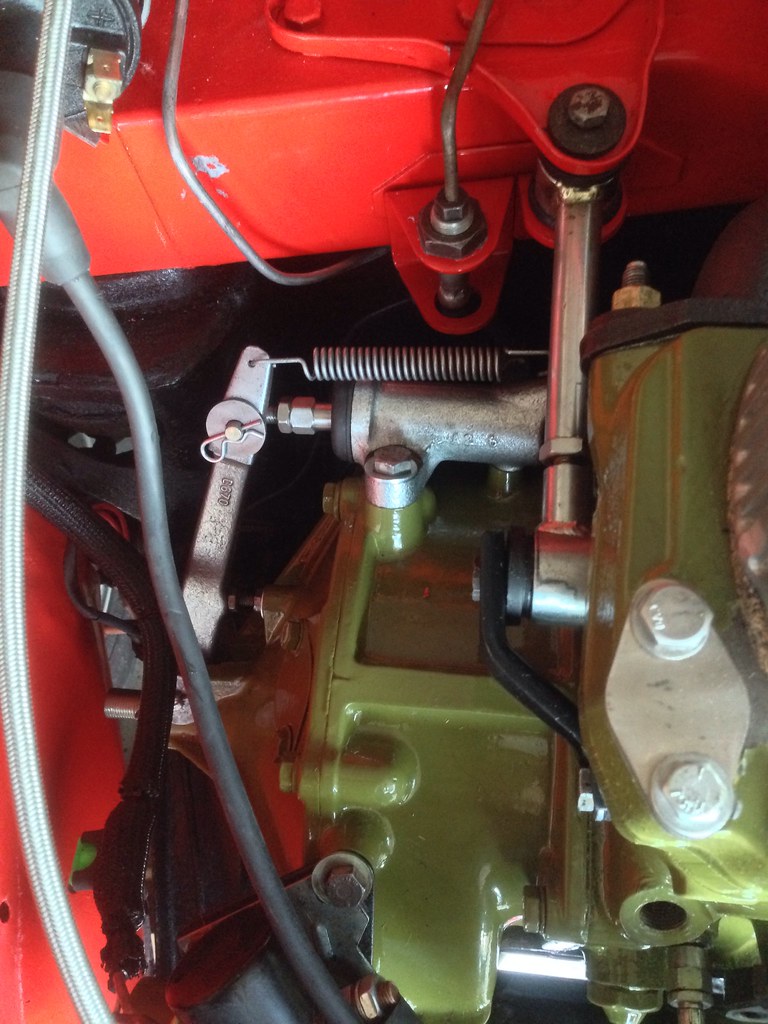
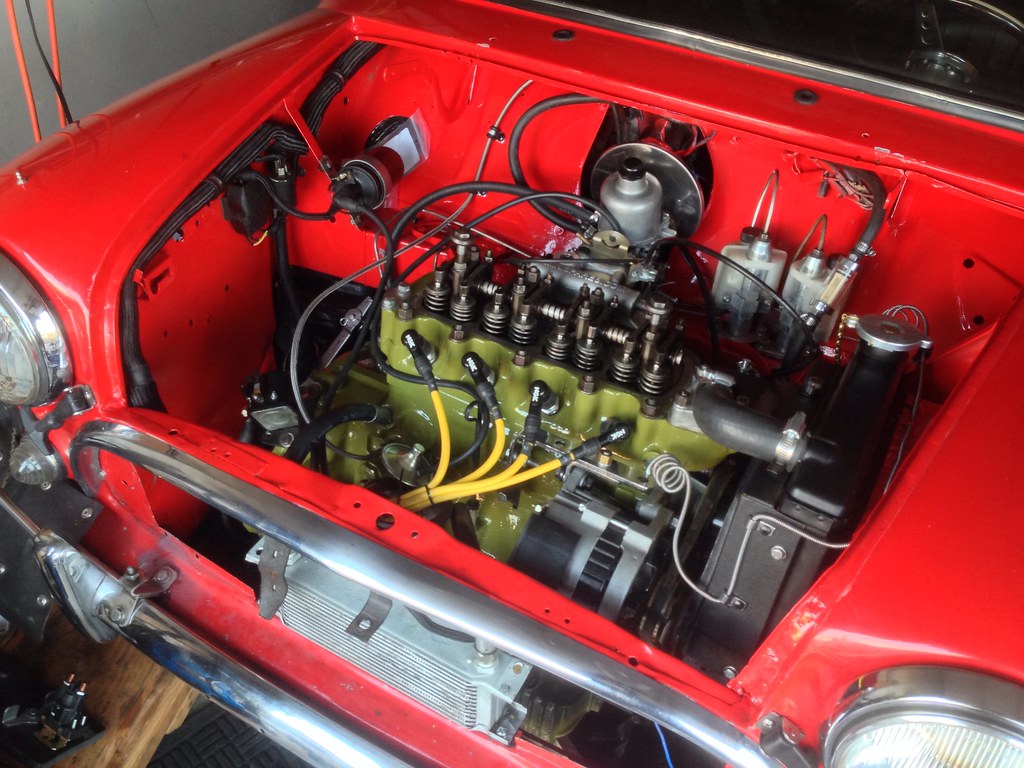
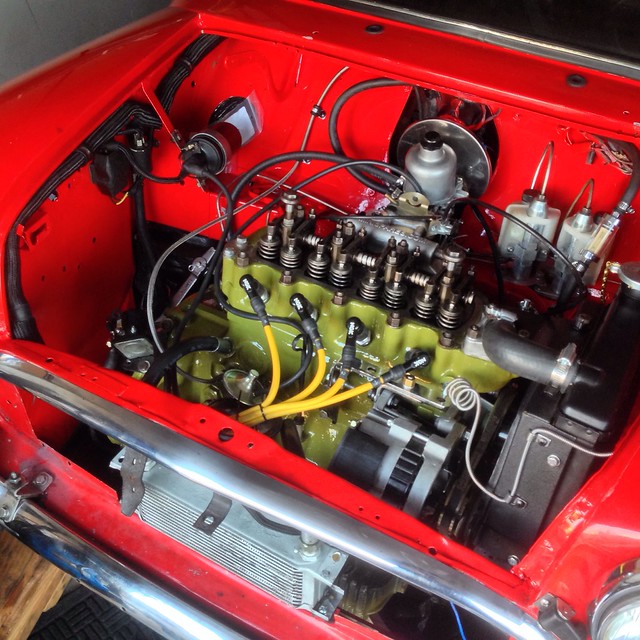
These are few photos of me painting and soldering wires in my engine bay. It's my first time painting so it's not perfect. The old wire harness had a few worn wires barely hanging to each other and I had to cut them off and soldered new ones. This is a decent fix until I am able to afford a new wire harness. I wish I can weld. I could've fixed those holes I made  but that is how I am. I always seem to break and destroy stuff before learning to fix them.
i decided to go with a color scheme that matches my current paint color. The outside is Ford Red.. It has a slight tint of orange but sporty looking. So I decided to with this shade of lime green. Looks ok i think. In the Philippines we learned how to solder in 6th grade. I remember We made our own transistor radio as one of our final projects. It pays knowing that now.

but that is how I am. I always seem to break and destroy stuff before learning to fix them.i decided to go with a color scheme that matches my current paint color. The outside is Ford Red.. It has a slight tint of orange but sporty looking. So I decided to with this shade of lime green. Looks ok i think. In the Philippines we learned how to solder in 6th grade. I remember We made our own transistor radio as one of our final projects. It pays knowing that now.
|
|
Total posts: 7075
Last post: Nov 5, 2019 Member since:Apr 25, 2000
|
Cars in Garage: 0
Photos: 0 WorkBench Posts: 0 |
|
Well done!
You can do mine too if you'd like -
You can do mine too if you'd like -
 The peasants are revolting...
 ![]()
"Gone with the Wind" - a brief yet moving vignette concerning lactose intolerance
|
|
Total posts: 678
Last post: Sep 29, 2022 Member since:Apr 26, 2011
|
Cars in Garage: 0
Photos: 0 WorkBench Posts: 0 |
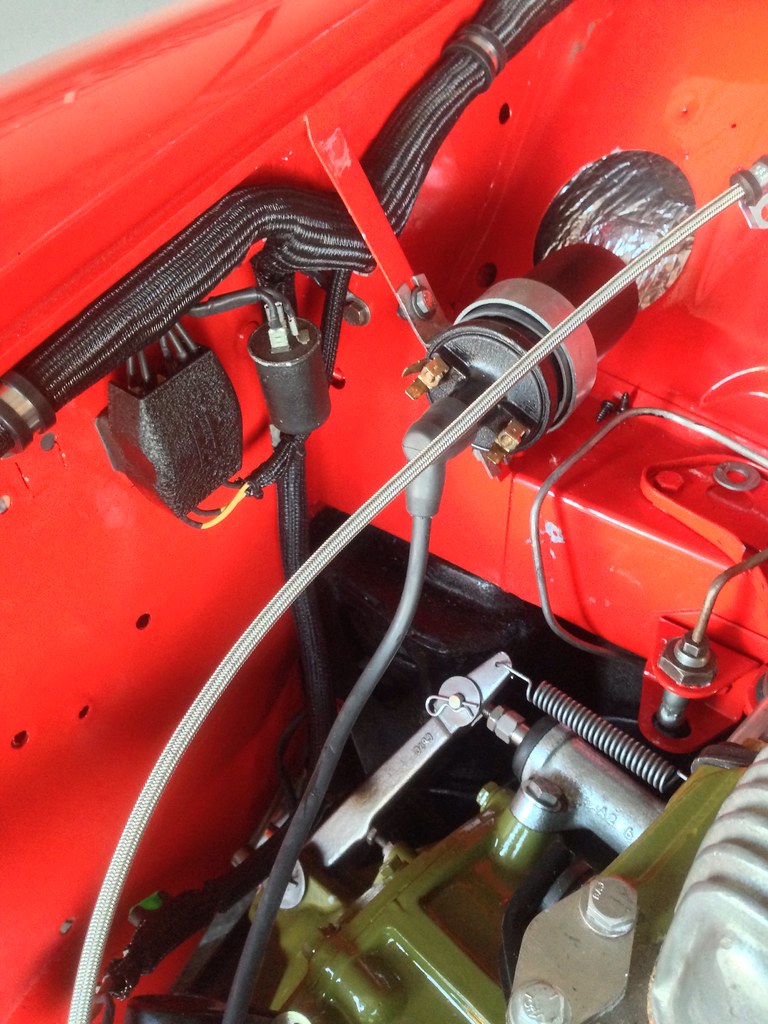
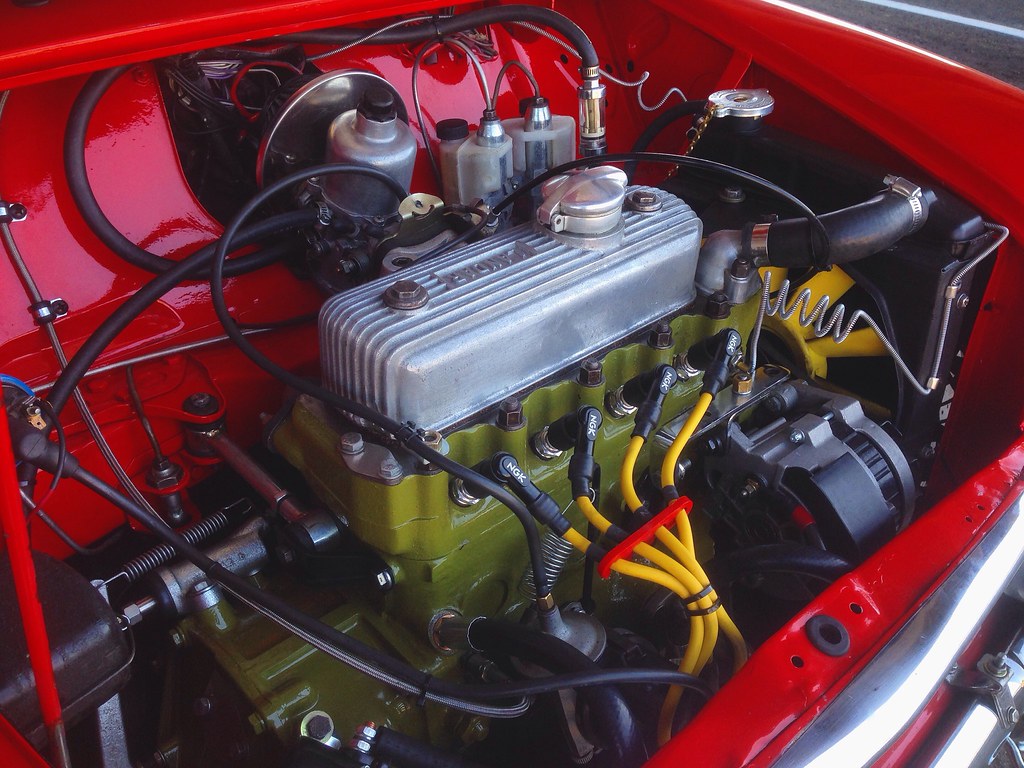
Here is what it looks like now.
|
|
Total posts: 678
Last post: Sep 29, 2022 Member since:Apr 26, 2011
|
Cars in Garage: 0
Photos: 0 WorkBench Posts: 0 |
Thanks!!
|
|
Total posts: 1456
Last post: Jan 31, 2022 Member since:Sep 8, 2003
|
Cars in Garage: 1
Photos: 186 WorkBench Posts: 0 |
|
Looks great!
Sean Windrum
1996 MGF VVC
1970 1275 GT Racer
66 Austin Countryman
63 997 Cooper (Under Construction)
63 MG 1100
|
|
Total posts: 678
Last post: Sep 29, 2022 Member since:Apr 26, 2011
|
Cars in Garage: 0
Photos: 0 WorkBench Posts: 0 |
Quote:
Originally Posted by Richard1
Quote:
Originally Posted by armycook
I hope I did ok on the prep. If it lasts for 6 months then I'd be very happy. If it doesn't then I'll try again. I don't think I'd have enough time to work on my engine bay so I'll just do that after the wedding and MMW. Thank to everyone who gave all the suggestions.
|
|
Total posts: 606
Last post: Feb 2, 2024 Member since:Mar 11, 2010
|
Cars in Garage: 0
Photos: 6 WorkBench Posts: 1 |
|
Quote:
Originally Posted by armycook
I hope I did ok on the prep. If it lasts for 6 months then I'd be very happy. If it doesn't then I'll try again. I don't think I'd have enough time to work on my engine bay so I'll just do that after the wedding and MMW. Thank to everyone who gave all the suggestions.

|
|
Total posts: 678
Last post: Sep 29, 2022 Member since:Apr 26, 2011
|
Cars in Garage: 0
Photos: 0 WorkBench Posts: 0 |
I hope I did ok on the prep. If it lasts for 6 months then I'd be very happy. If it doesn't then I'll try again. I don't think I'd have enough time to work on my engine bay so I'll just do that after the wedding and MMW. Thank to everyone who gave all the suggestions.
|
|
Total posts: 8382
Last post: Jan 13, 2022 Member since:Feb 7, 2006
|
Cars in Garage: 0
Photos: 0 WorkBench Posts: 0 |
|
Try using a DA sander with some fine paper on it just run it at a slow speed.
If in doubt, flat out. Colin Mc Rae MBE 1968-2007.
Give a car more power and it goes faster on the straights,
make a car lighter and it's faster everywhere. Colin Chapman.
|
|
Total posts: 2161
Last post: Jun 13, 2019 Member since:Oct 21, 2006
|
Cars in Garage: 0
Photos: 553 WorkBench Posts: 0 |
Quote

Originally Posted by armycook
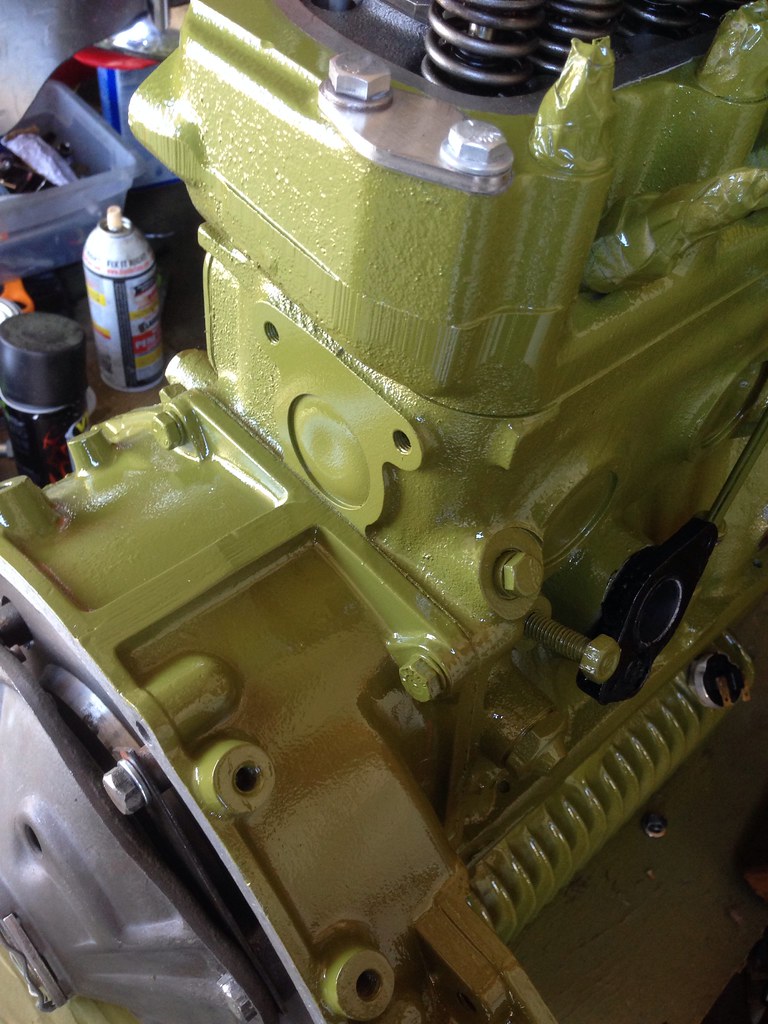
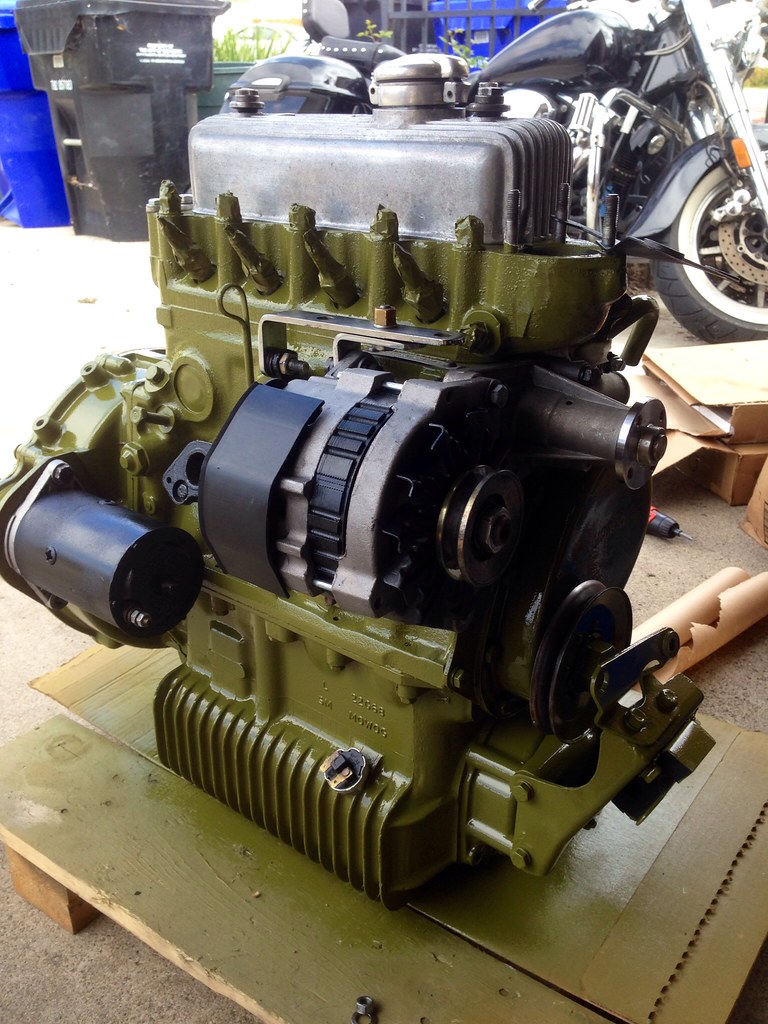
I used muriatic acid to remove the surface rust that I couldn't get off. its my first time and Ive no problem repainting it again to get better because I just like working on it. I picked a different shade of green "Citrus green" (GM manufactured color) from this automotive paint store and they prepped the cans for me. They told me I just need the 500 degree for this paint job since I wont be using it for racing. Looks really nice for my taste. Im also working on the engine bay. Got KBS rust seal and big lesson learned.. Shouldve worn gloves. My hands are stained for weeks. Tried everything... lacquer thinner, acetone, etc... Looks like I will be wearing this on my hands for weeks..
Im getting married in 3 weeks and now my fiancée is pissed and wants me to wear gloves on our big day if this stuff doesn't come off lol.
Im getting married in 3 weeks and now my fiancée is pissed and wants me to wear gloves on our big day if this stuff doesn't come off lol.
Congratulations! Hey, sounds crazy, but you can remove the stains on your hands with a fine emery nail file. File the skin smooth, fingers and all. Your hands will be smooth as a babies behind. Just try it. Mini Estate
"It's a good day when you wake up with a Woody!"
|
|
Total posts: 6349
Last post: Oct 22, 2023 Member since:Mar 9, 1999
|
Cars in Garage: 0
Photos: 0 WorkBench Posts: 0 |
|
I've done automotive exterior panel paint both spray on and I've even (gasp!) brushed it on. Besides it being runny, it went on no worse nor better than spraying it on. I just didn't have to use a sprayer. Looked fantastic for as long as I had the car.
I've also used brush on rustoleum. Takes longer to dry, but that is now my preferred option.
If I use spray-on spray paint (I don't waste money on specific "engine paint" stuff anymore), I heat the block up with a propane torch to burn off stuff that was missed while cleaning it and to make it "sweat" til dry, then spray on the paint after a second or 10 of cooling. It bakes it on, is my theory. I'll do a second coat at whatever temp if it looks too "dry" after the first coat.
At the end of the day, do what makes you feel good about it. Some of us have lower standards when doing something and some of us have higher standards when doing the same thing.
Some people will always swear they can tell when a car has been worked on using Snap On tools versus one that has been worked on by Craftsman tools. Me? I see a car.
|
|
Total posts: 606
Last post: Feb 2, 2024 Member since:Mar 11, 2010
|
Cars in Garage: 0
Photos: 6 WorkBench Posts: 1 |
|
Best thing for rust removal is phosphoric acid, as it leaves a slight anti-rust coating to be painted without more rust forming. Generally sold in auto paint stores.
Best thing for dissolving paint and grease from your hands, nose, or wherever is women's cold cream. Smear it all over, under your nails, etc. rub it in. You can wipe off excess for the moment, but leave it a few hours or overnight and wash in the morning.
Best thing for dissolving paint and grease from your hands, nose, or wherever is women's cold cream. Smear it all over, under your nails, etc. rub it in. You can wipe off excess for the moment, but leave it a few hours or overnight and wash in the morning.
|
|
Total posts: 678
Last post: Sep 29, 2022 Member since:Apr 26, 2011
|
Cars in Garage: 0
Photos: 0 WorkBench Posts: 0 |
I used muriatic acid to remove the surface rust that I couldn't get off. its my first time and Ive no problem repainting it again to get better because I just like working on it. I picked a different shade of green "Citrus green" (GM manufactured color) from this automotive paint store and they prepped the cans for me. They told me I just need the 500 degree for this paint job since I wont be using it for racing. Looks really nice for my taste. Im also working on the engine bay. Got KBS rust seal and big lesson learned.. Shouldve worn gloves. My hands are stained for weeks. Tried everything... lacquer thinner, acetone, etc... Looks like I will be wearing this on my hands for weeks..
Im getting married in 3 weeks and now my fiancée is pissed and wants me to wear gloves on our big day if this stuff doesn't come off lol.
Im getting married in 3 weeks and now my fiancée is pissed and wants me to wear gloves on our big day if this stuff doesn't come off lol.
|
|
Total posts: 606
Last post: Feb 2, 2024 Member since:Mar 11, 2010
|
Cars in Garage: 0
Photos: 6 WorkBench Posts: 1 |
|
No, you don't need special equipment. I used a $10 sprayer from Harbor freight that I use for the suspension and other things, with a cheap pancake compressor. BUT, as far as paint, many will scrape off or dissolve with the gasoline or oil spills. The PU withstands just about anything.
|
|
Total posts: 1716
Last post: Oct 18, 2020 Member since:Oct 18, 2011
|
Cars in Garage: 0
Photos: 0 WorkBench Posts: 0 |
Quote:
Originally Posted by nkerr
Regarding how to paint: clean, dry cast iron takes paint really well, and won't rust as readily as steel does, which also helps paint stay on. There are surely techniques which can help, but once the engine is installed and all of the attached parts are in the way, you can't see most of it anyway, so painting the engine block isn't anywhere as difficult/specific as painting, say, the body panels.
With "normal" paint I think a brush would be fine because of the rough cast surface wouldn't show brush marks.
Even after 25 years the paint is still pretty much intact..
Cheers, Ian
|
|
Total posts: 2161
Last post: Jun 13, 2019 Member since:Oct 21, 2006
|
Cars in Garage: 0
Photos: 553 WorkBench Posts: 0 |
Sean,
Awesome job on the engine paint! That looks particularly nice. Thanks for sharing! Mini Estate
Awesome job on the engine paint! That looks particularly nice. Thanks for sharing! Mini Estate
"It's a good day when you wake up with a Woody!"
Found 31 Messages


