

|
Total posts: 2022
Last post: Jan 14, 2022 Member since:Mar 8, 2002
|
Cars in Garage: 0
Photos: 1 WorkBench Posts: 1 |
|
keep it up Rick nice work!
|
|
Total posts: 6469
Last post: Sep 29, 2022 Member since:Nov 2, 2006
|
Cars in Garage: 4
Photos: 1354 WorkBench Posts: 2 |
|
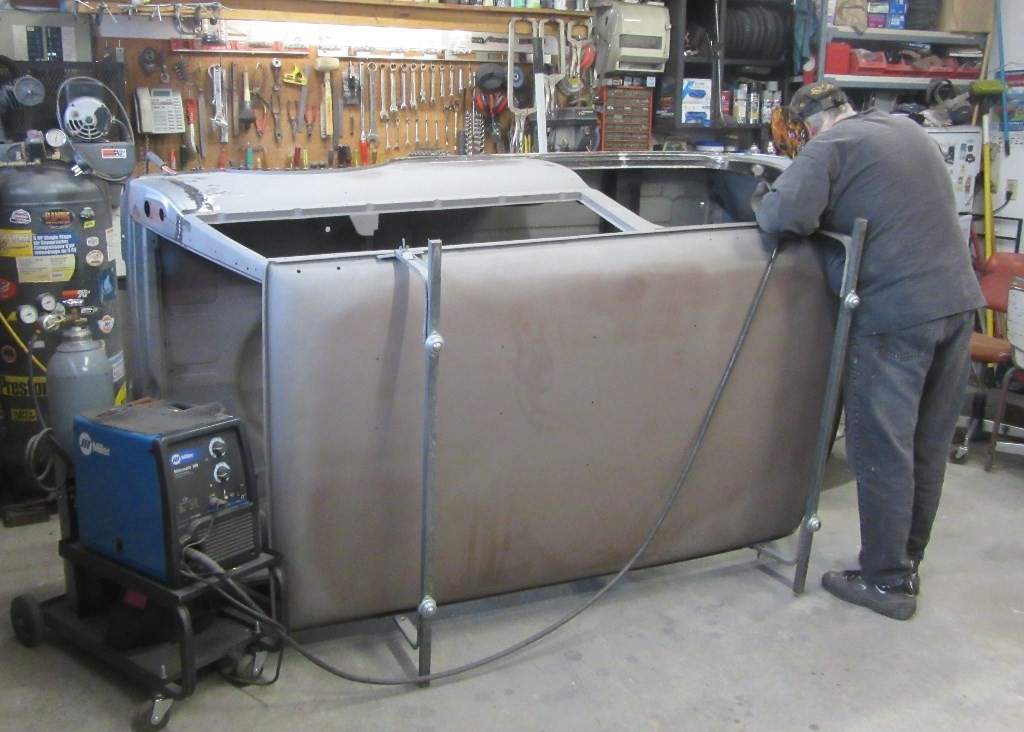
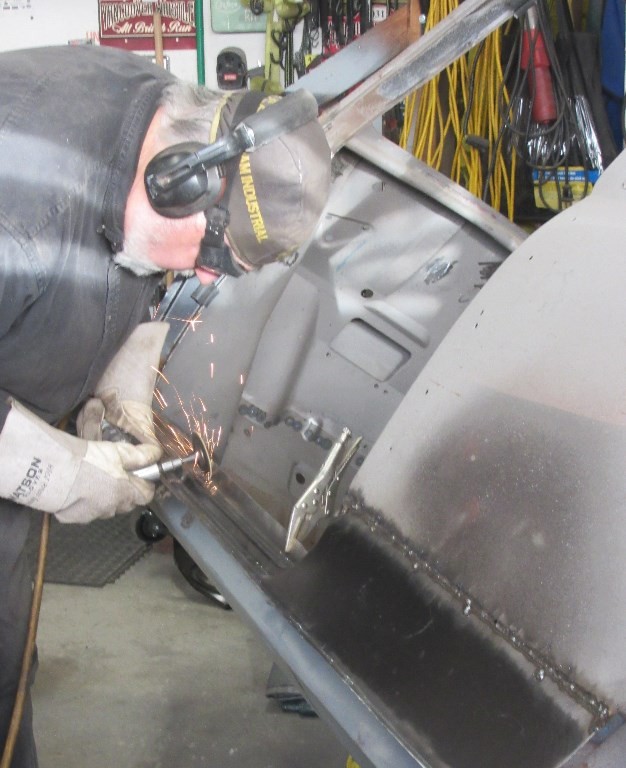
Good day in the garage after 2 days off....
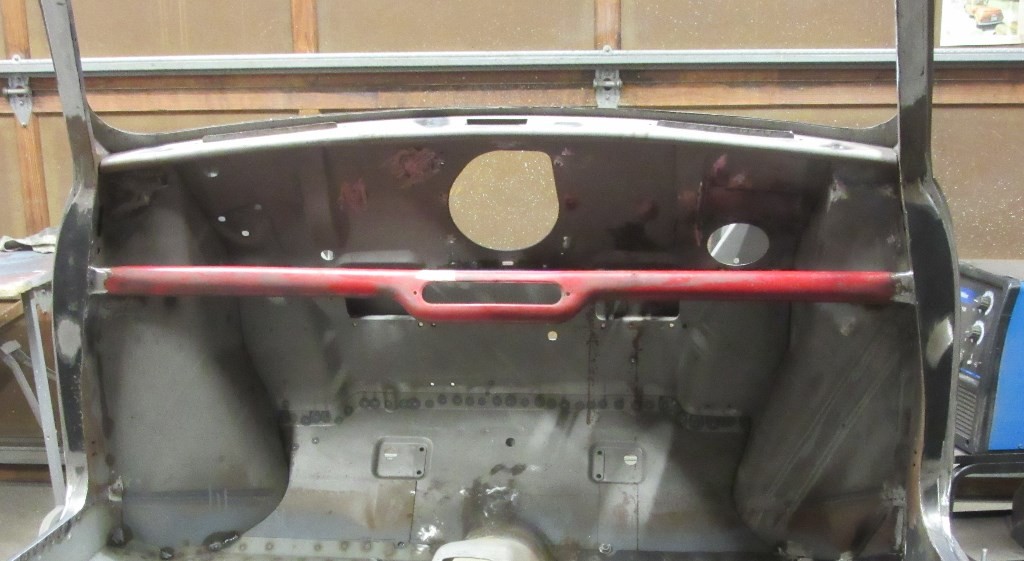
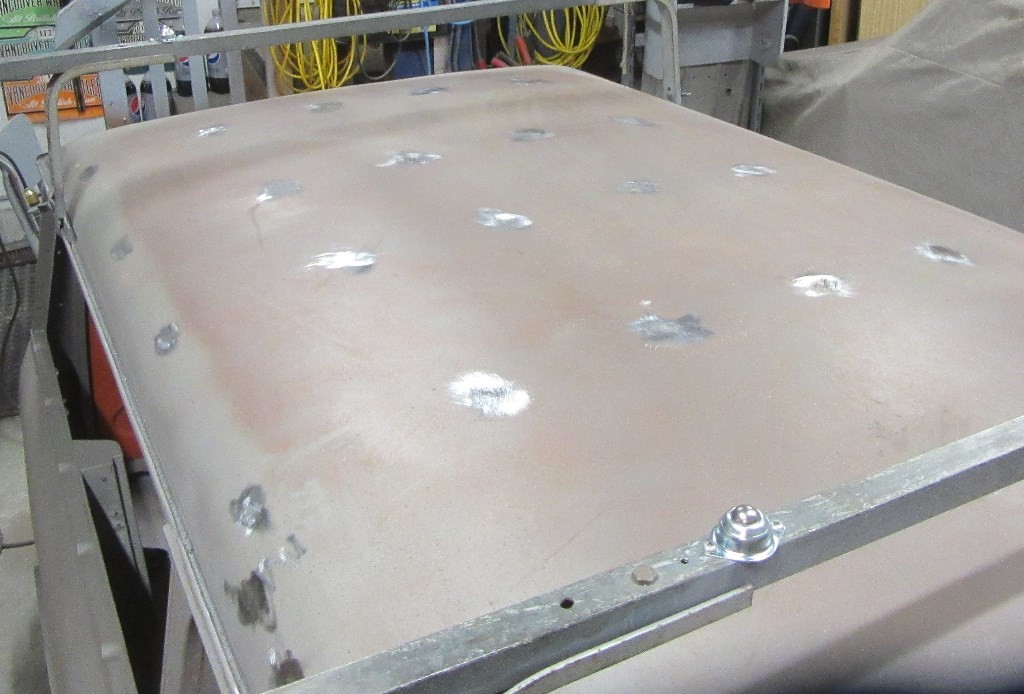
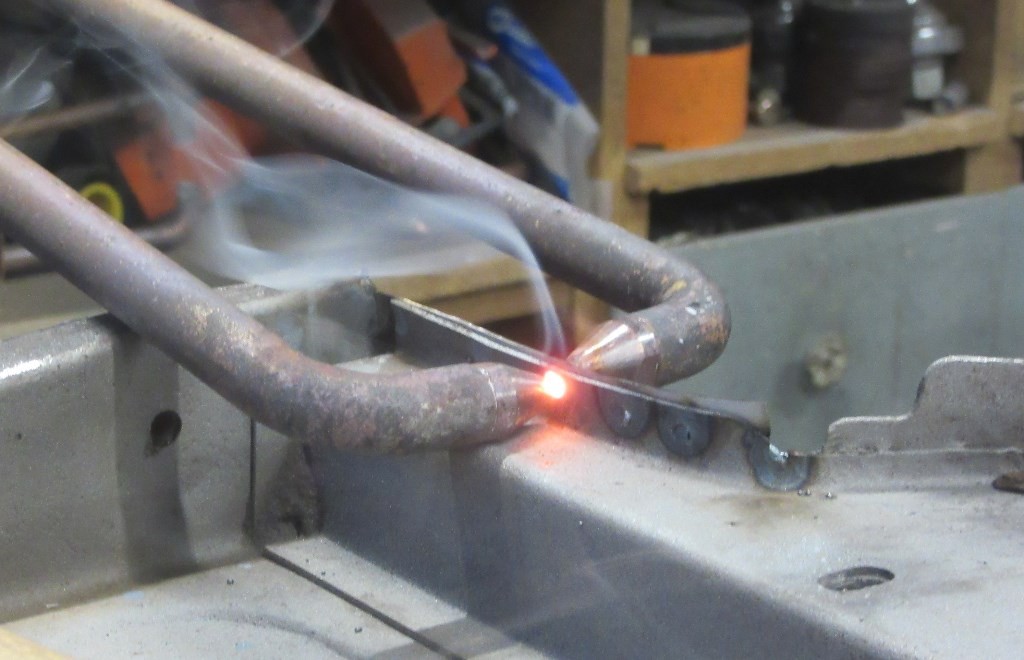
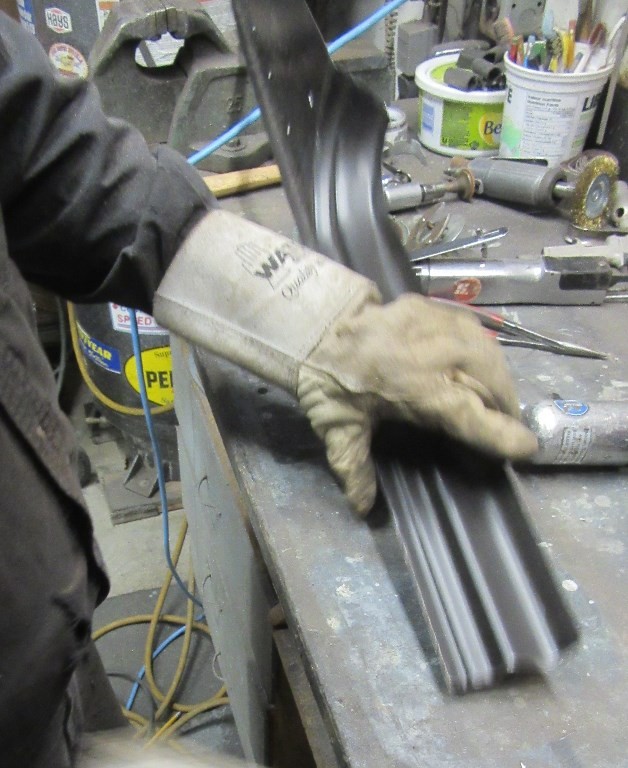
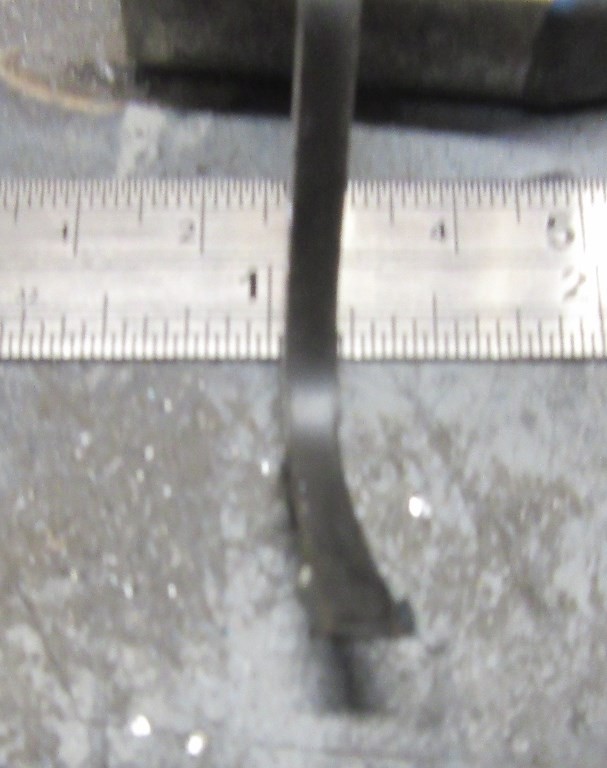
Welded in replacement front parcel shelf...and...welded up all of the holes from the roof rack install more than 35 years ago. We used 2" wide, 18 gauge, side to side strips to allow plug welding of the holes in the roof.
On to the new wings & apron with the original bonnet tomorrow!
(IF we keep adding steel I may soon be unable to pick up the shell)
|
|
Total posts: 6469
Last post: Sep 29, 2022 Member since:Nov 2, 2006
|
Cars in Garage: 4
Photos: 1354 WorkBench Posts: 2 |
|
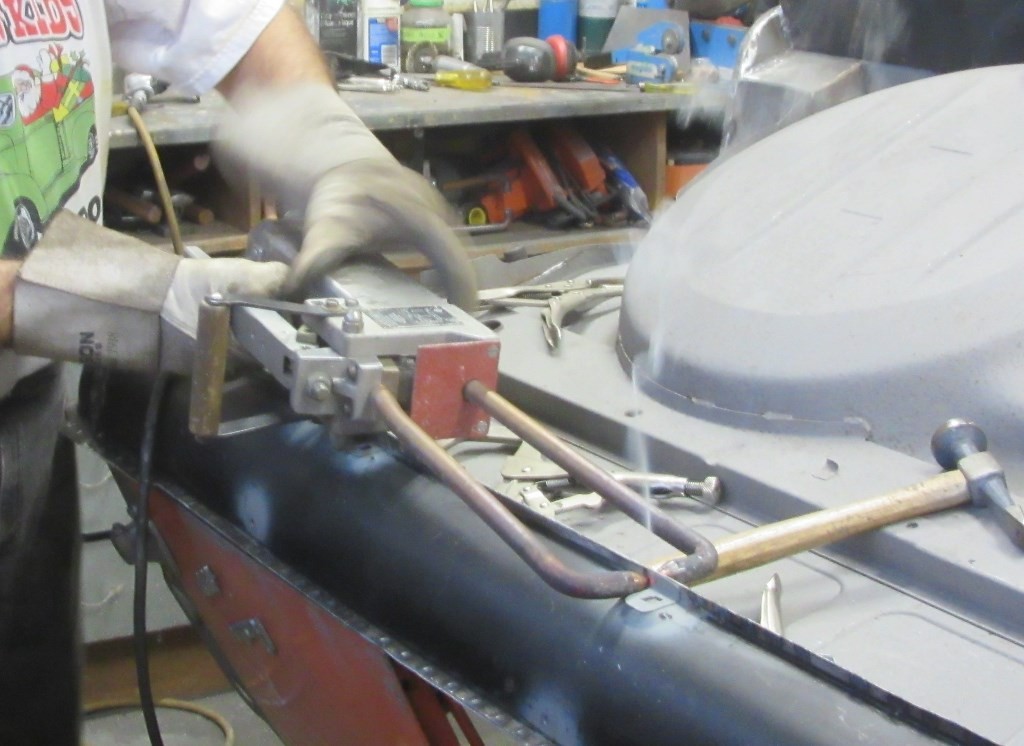
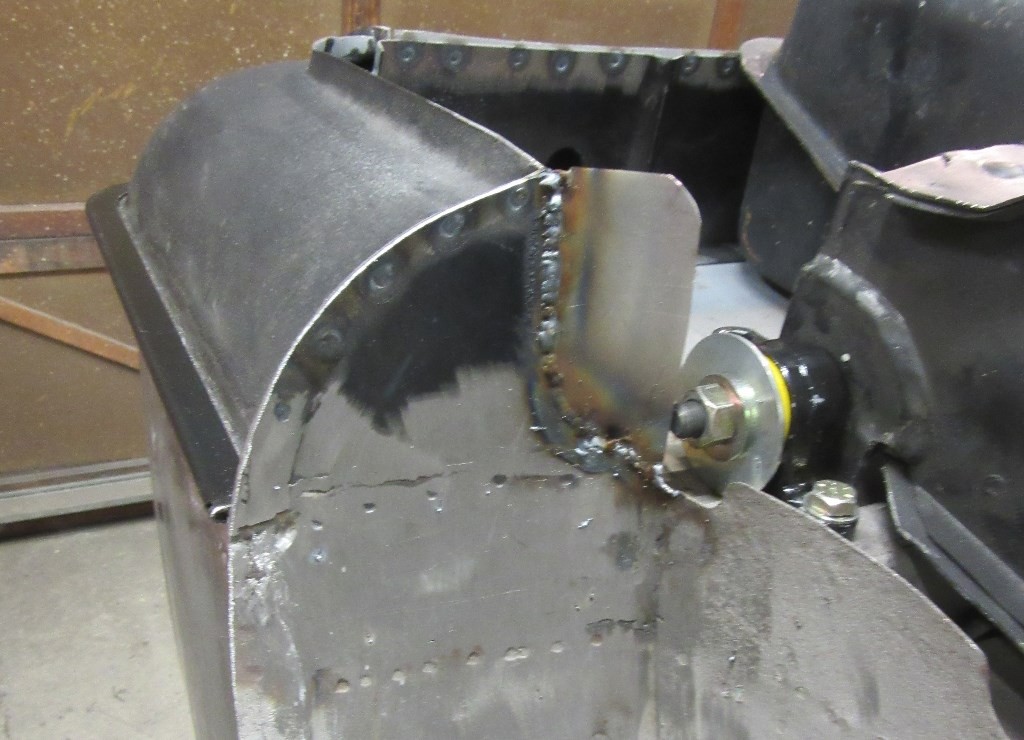
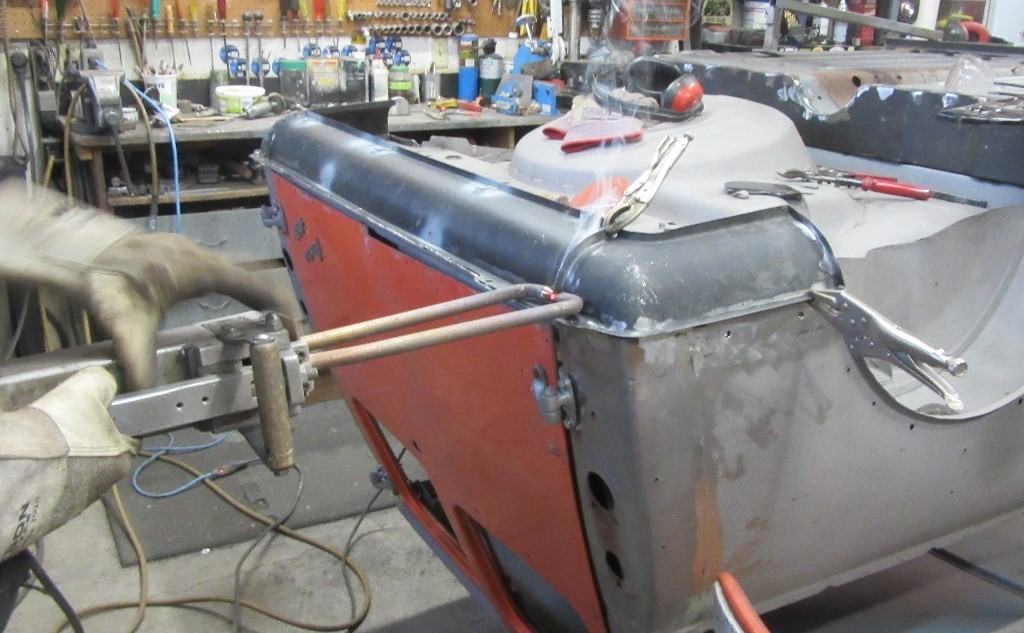
One outer sill to install when it goes through the shrinker later this week - it was a 6 flute Hadrian panel converted to 4 flute and rearced. Other wise the Mini is upright for front clip fitment and scuttle closing panels...so wings, slam panel and original bonnet.
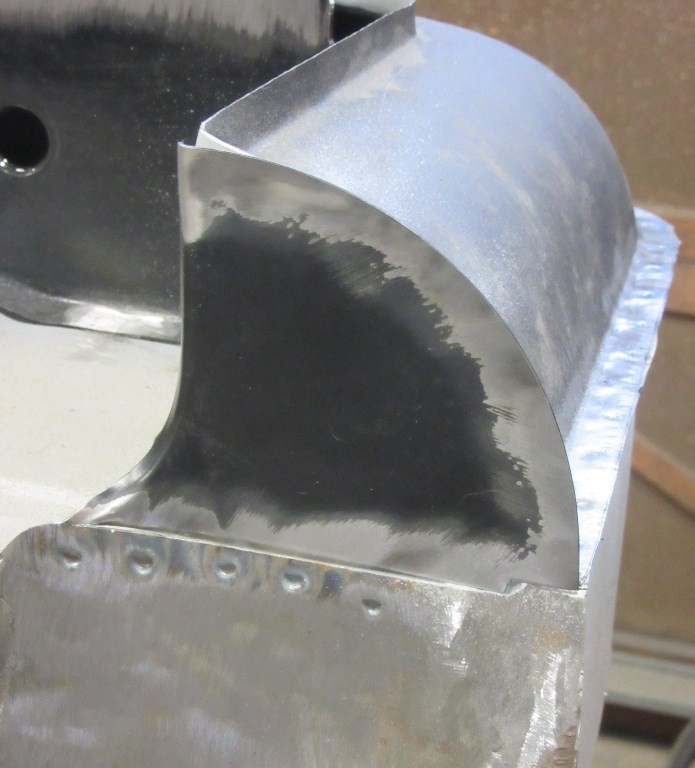
Today we finished up the lower back end, located the fuel tank and rear subbie to see if we could improve on the standard rear arch closing panel...I think we managed it.
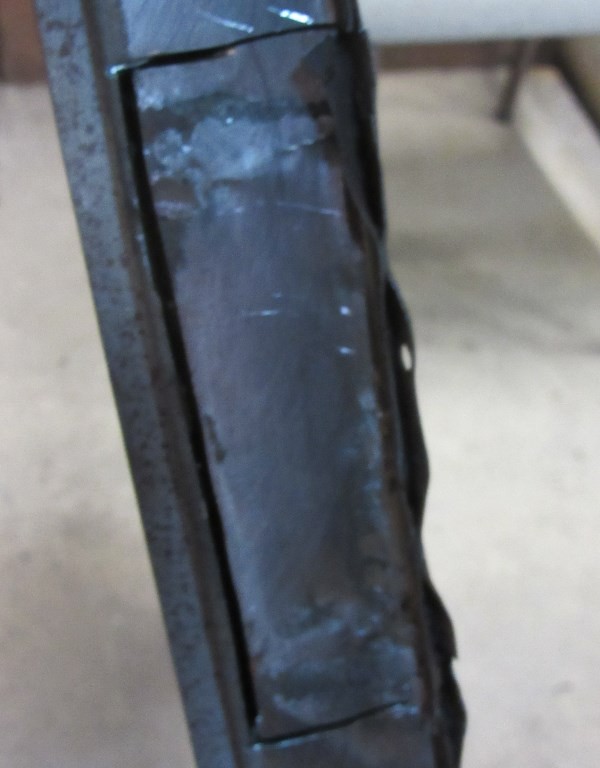
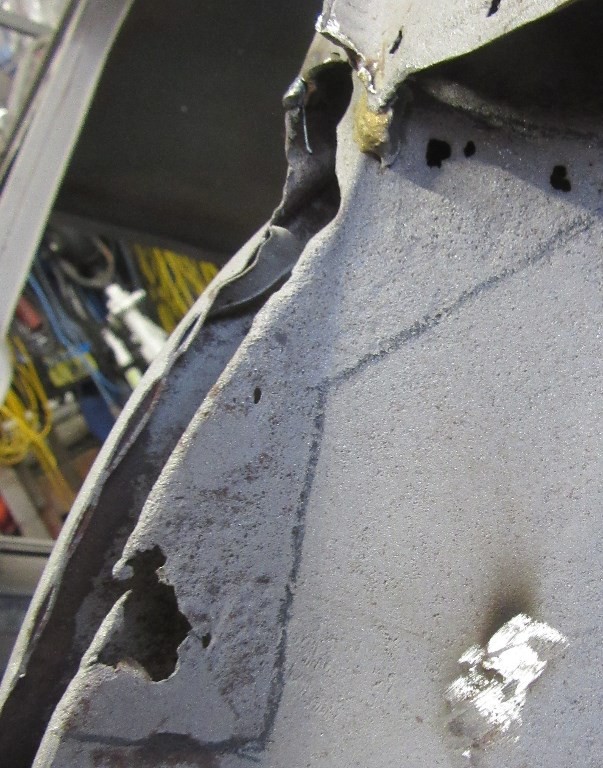
I also took a close look at the A Pillar welds and decided we would cut out the 'doorside' splices and weld in 20 gauge...both sides.
|
|
Total posts: 1959
Last post: Sep 5, 2020 Member since:Jul 13, 1999
|
Cars in Garage: 0
Photos: 0 WorkBench Posts: 0 |
|
Yes Dan, they went to the stressed/ribbed roof to remove the vibration/wobbling that produced the drumming sound. i hope that the steel cross strops will end that while also allowing us to weld up the roof rack holes with less risk of warping. We'll use cold wet towels and air flow over the welding area to help too.

|
|
Total posts: 13978
Last post: Jan 15, 2024 Member since:Jan 22, 2003
|
Cars in Garage: 4
Photos: 381 WorkBench Posts: 1 |
|
I'm tempted to toss my van on a trailer and send it to Rick to weld up !
"Everybody should own a MINI at some point, or you are incomplete as a human being" - James May
"WET COOPER", Partsguy1 (Terry Snell of Penticton BC ) - Could you send the money for the unpaid parts and court fees.
Ordered so by a Judge
|
|
Total posts: 6469
Last post: Sep 29, 2022 Member since:Nov 2, 2006
|
Cars in Garage: 4
Photos: 1354 WorkBench Posts: 2 |
|
My 1973 OZ Mini Window Van has the stressed toof and no headliner behind the two seats up front. Empty it has a tinny sound...loaded nada.
|
|
Total posts: 9547
Last post: Apr 26, 2024 Member since:Aug 14, 2002
|
Cars in Garage: 0
Photos: 0 WorkBench Posts: 0 |
|
Yes Dan, they went to the stressed/ribbed roof to remove the vibration/wobbling that produced the drumming sound. i hope that the steel cross strops will end that while also allowing us to weld up the roof rack holes with less risk of warping. We'll use cold wet towels and air flow over the welding area to help too.
Ahah! Some Mini problems take longer to figure out... though 44 years may be a new record.
.
"Hang on a minute lads....I've got a great idea."
|
|
Total posts: 6469
Last post: Sep 29, 2022 Member since:Nov 2, 2006
|
Cars in Garage: 4
Photos: 1354 WorkBench Posts: 2 |
|
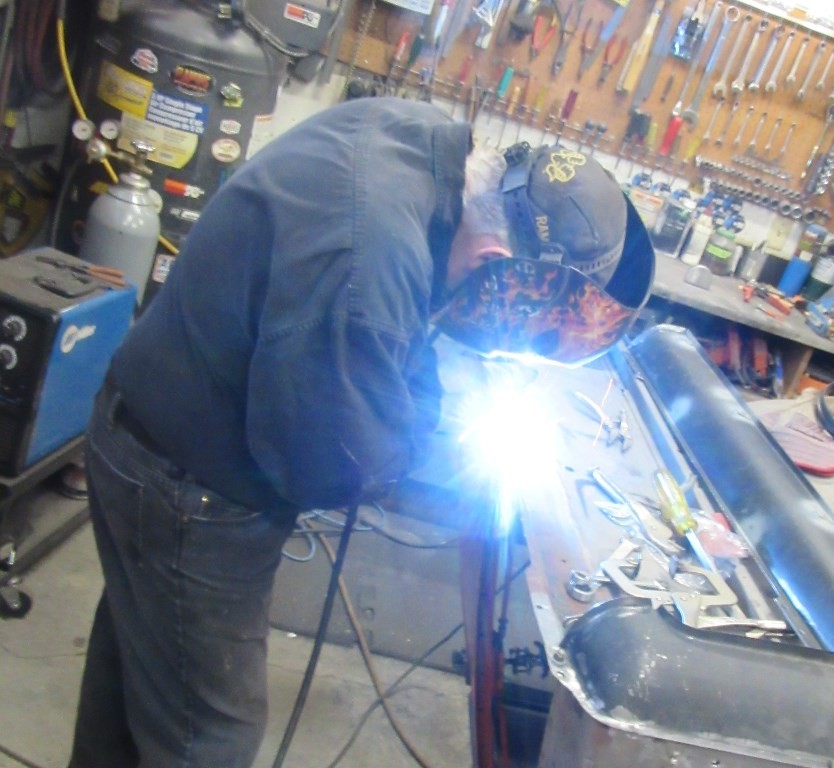
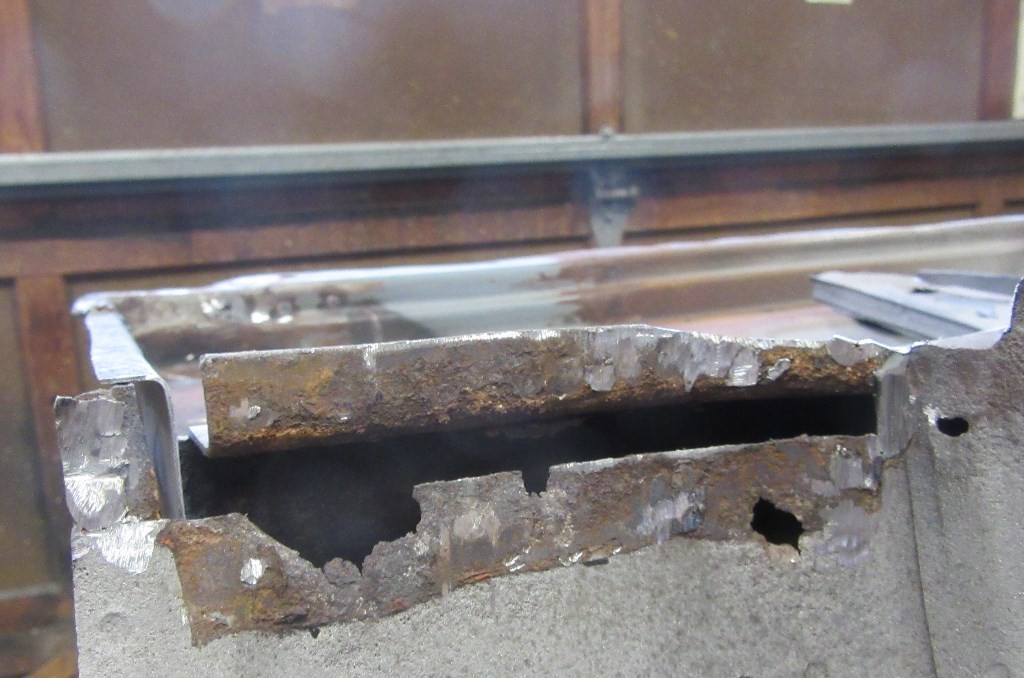
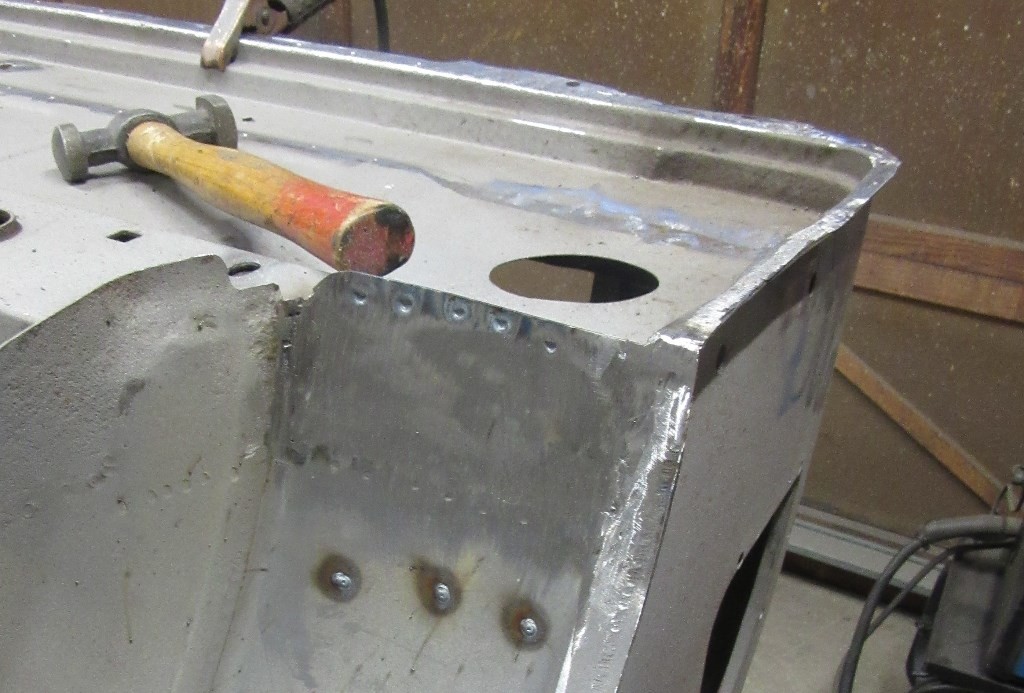
Got a bit done today and rear valence assembly ready to be welded on after primer & paint in the to be hidden area has set up.
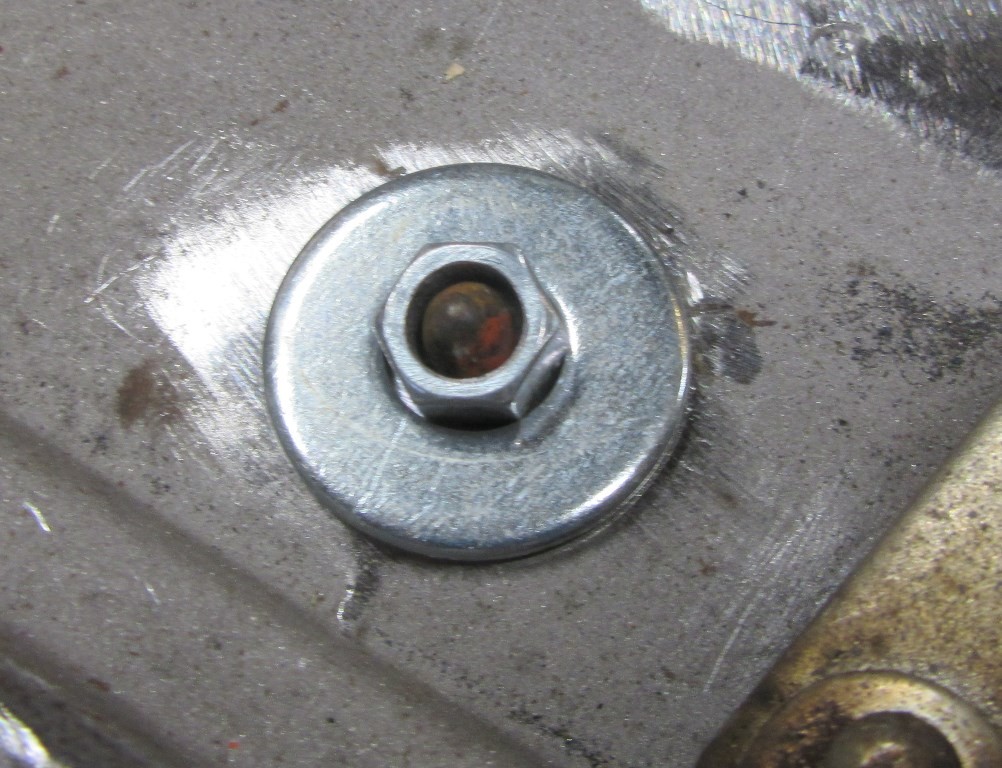
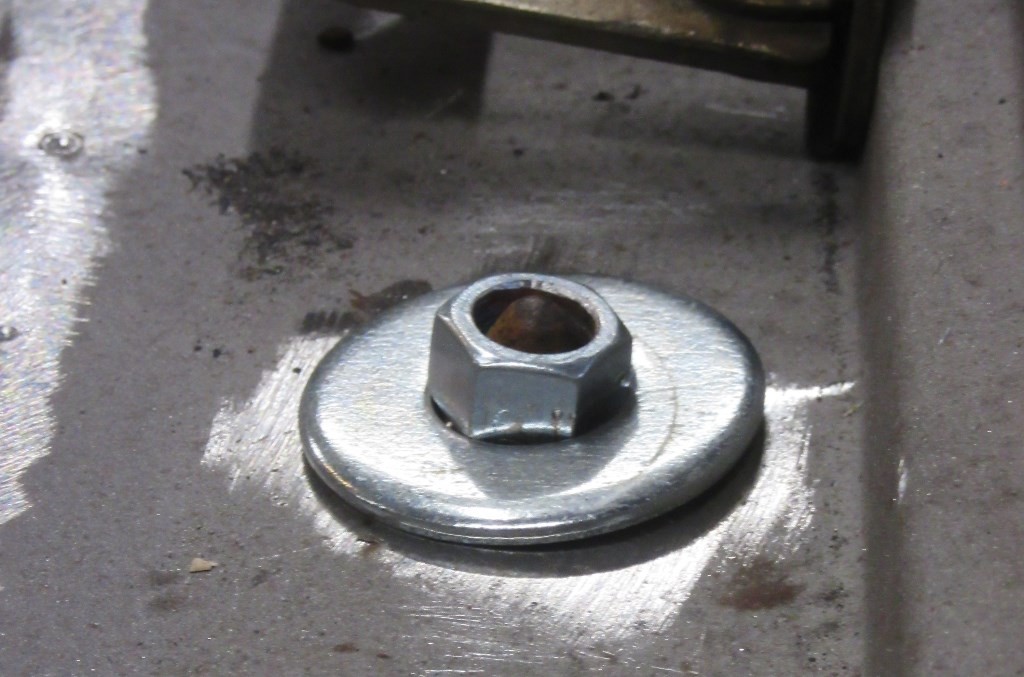
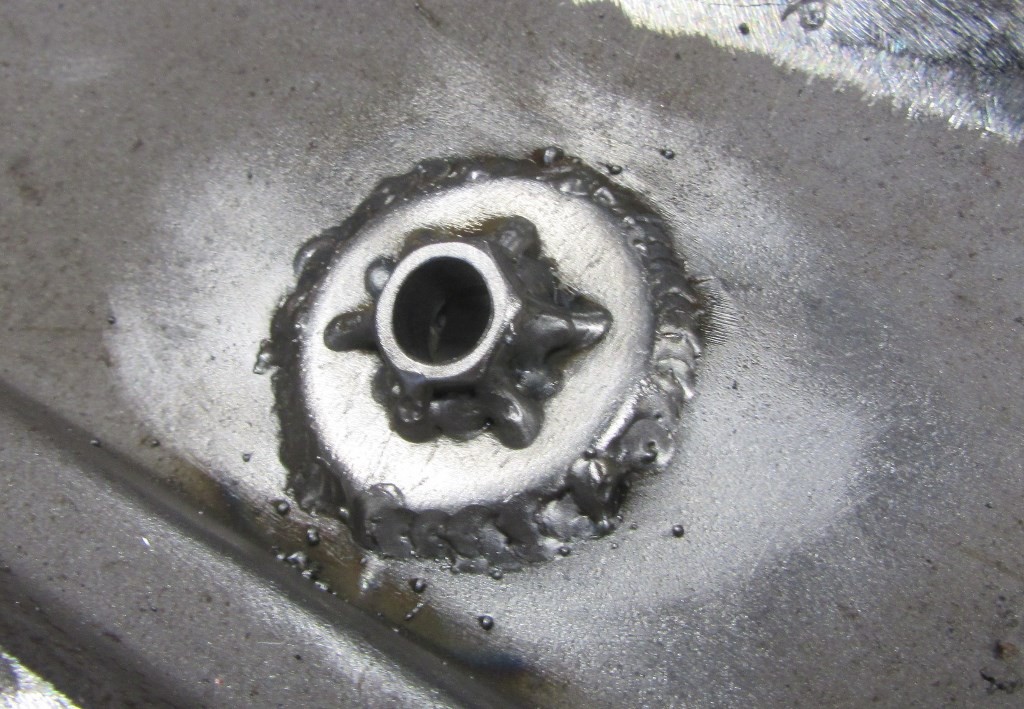
Most important was to provide a more robust location for the lower latch pin on the rear barn door. Because the hole in the floor originally had a thick washer spot welded around the hole but had a bigger hole, the latch pin ovalled the hole in the floor over time...so new thick washer with 3/8" nut drilled out to 25/64" and welded into the thick washer at the correct angle.
|
|
Total posts: 6469
Last post: Sep 29, 2022 Member since:Nov 2, 2006
|
Cars in Garage: 4
Photos: 1354 WorkBench Posts: 2 |
|
Yes Dan, they went to the stressed/ribbed roof to remove the vibration/wobbling that produced the drumming sound. i hope that the steel cross strops will end that while also allowing us to weld up the roof rack holes with less risk of warping. We'll use cold wet towels and air flow over the welding area to help too.
|
|
Total posts: 9547
Last post: Apr 26, 2024 Member since:Aug 14, 2002
|
Cars in Garage: 0
Photos: 0 WorkBench Posts: 0 |
|
NO roof rack. Yes Spitz, we will be welding up the holes to steel strips crossing the roof side to side. Should help dissapate the heat and also address the roof flexing/wobbling at speed....
Rick: can you explain the "roof flexing/wobbling at speed"?
My first Mini was a Mk1 Counryman. Above about 40mph it would get a faint constant-pitch droning sound (something like a Landcaster bomber in the distance) that I never figured out. Some kind of harmonic thing going on. I tried replacing tires, rear wheel bearings exhaust etc. to no avail and the car drove straight and had no tire wear problems, so it did not seem to be an alignment issue or engine/drvietrain exhaust harmonic. I wonder if it was the roof....
.
"Hang on a minute lads....I've got a great idea."
|
|
Total posts: 6469
Last post: Sep 29, 2022 Member since:Nov 2, 2006
|
Cars in Garage: 4
Photos: 1354 WorkBench Posts: 2 |
|
NO roof rack. Yes Spitz, we will be welding up the holes to steel strips crossing the roof side to side. Should help dissapate the heat and also address the roof flexing/wobbling at speed....
|
|
Total posts: 13978
Last post: Jan 15, 2024 Member since:Jan 22, 2003
|
Cars in Garage: 4
Photos: 381 WorkBench Posts: 1 |
|
Looking good....looking warm! Was -30 here this morning. Wish I could be working on my Van.
Are you refitting a roof rack or welding up those holes?
"Everybody should own a MINI at some point, or you are incomplete as a human being" - James May
"WET COOPER", Partsguy1 (Terry Snell of Penticton BC ) - Could you send the money for the unpaid parts and court fees.
Ordered so by a Judge
|
|
Total posts: 6469
Last post: Sep 29, 2022 Member since:Nov 2, 2006
|
Cars in Garage: 4
Photos: 1354 WorkBench Posts: 2 |
|
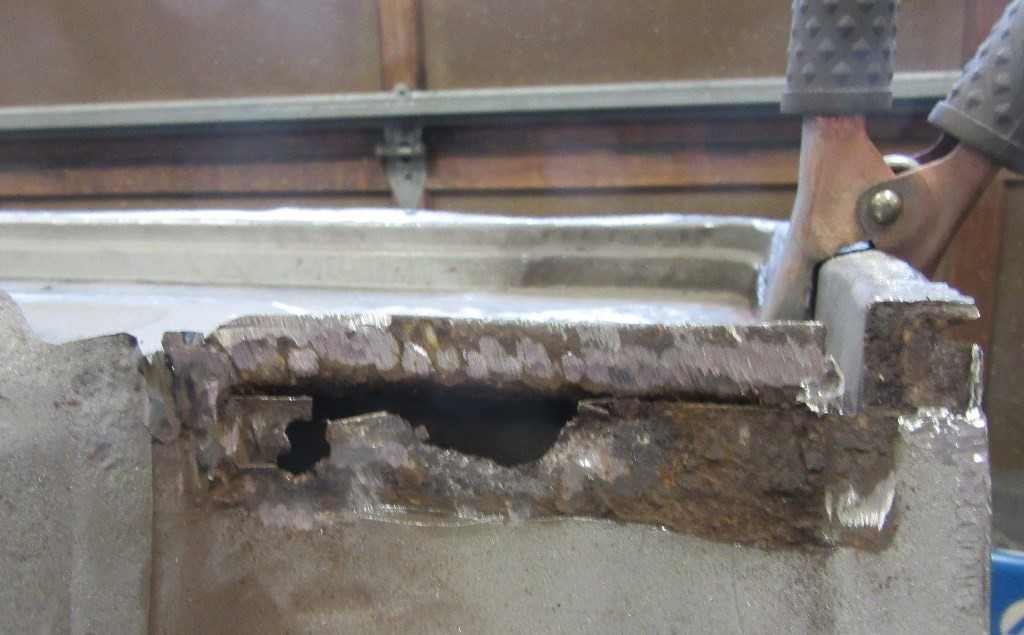
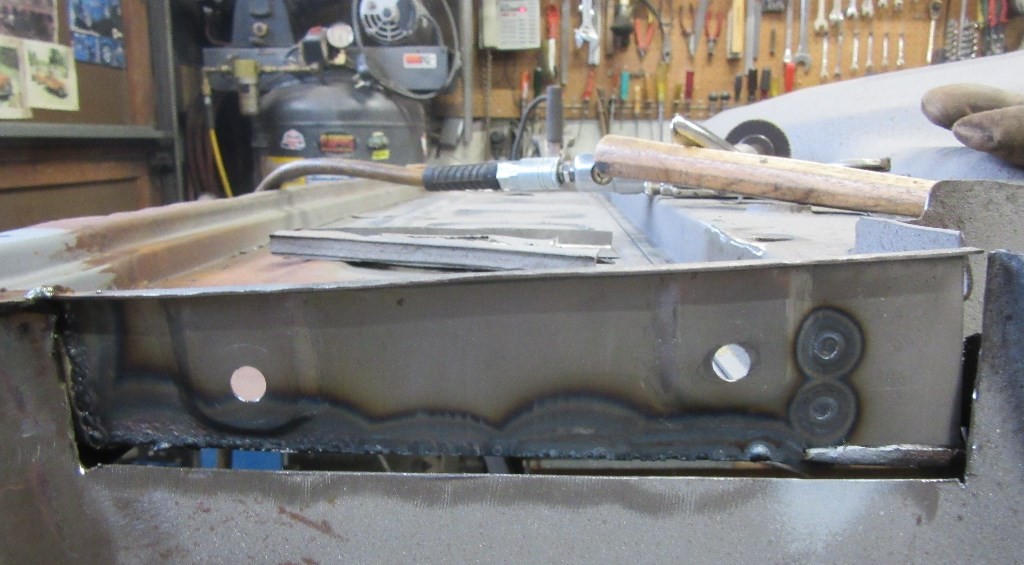
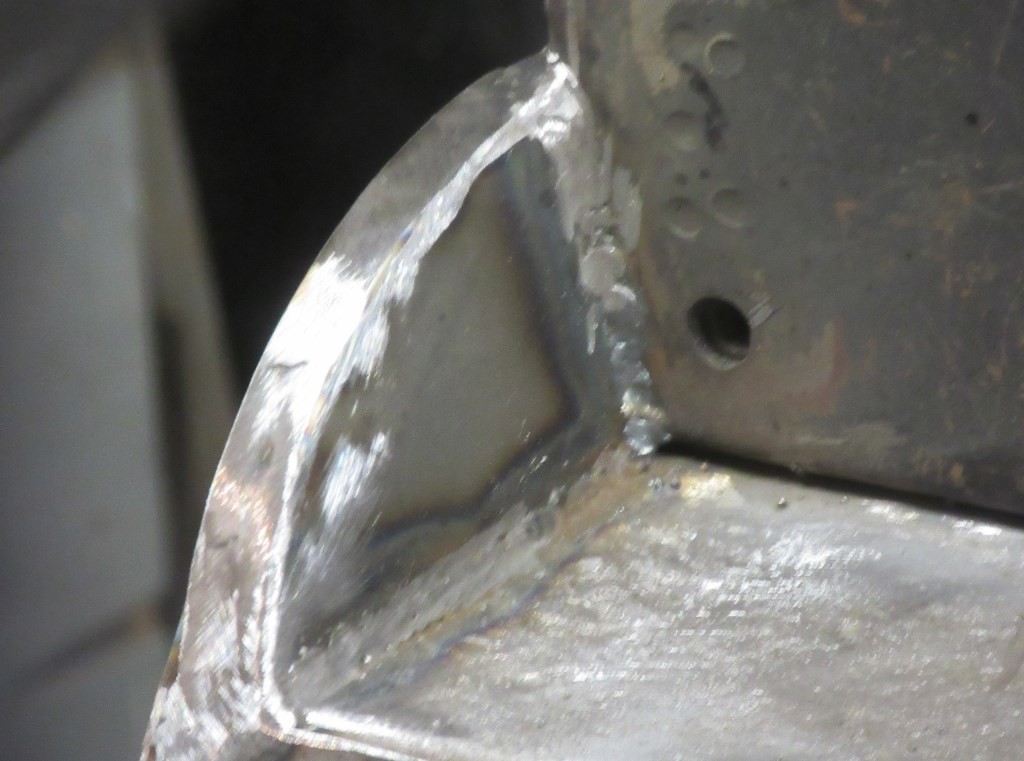
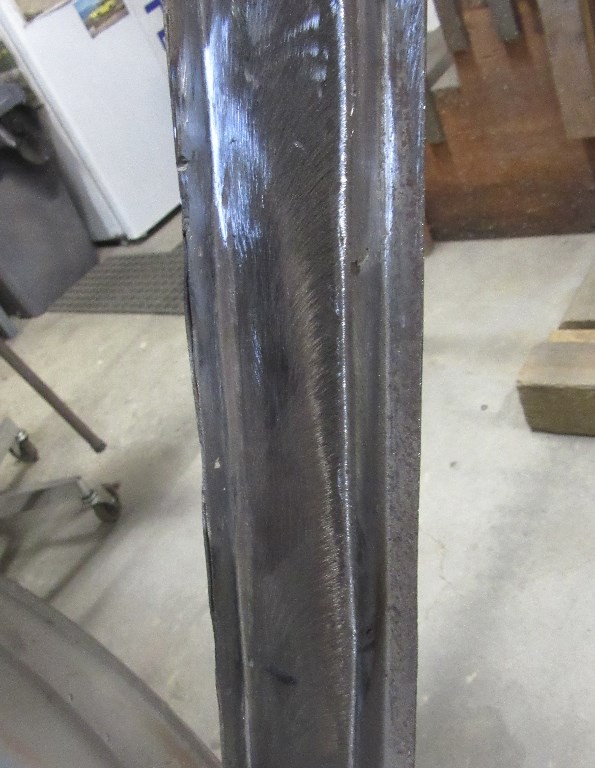
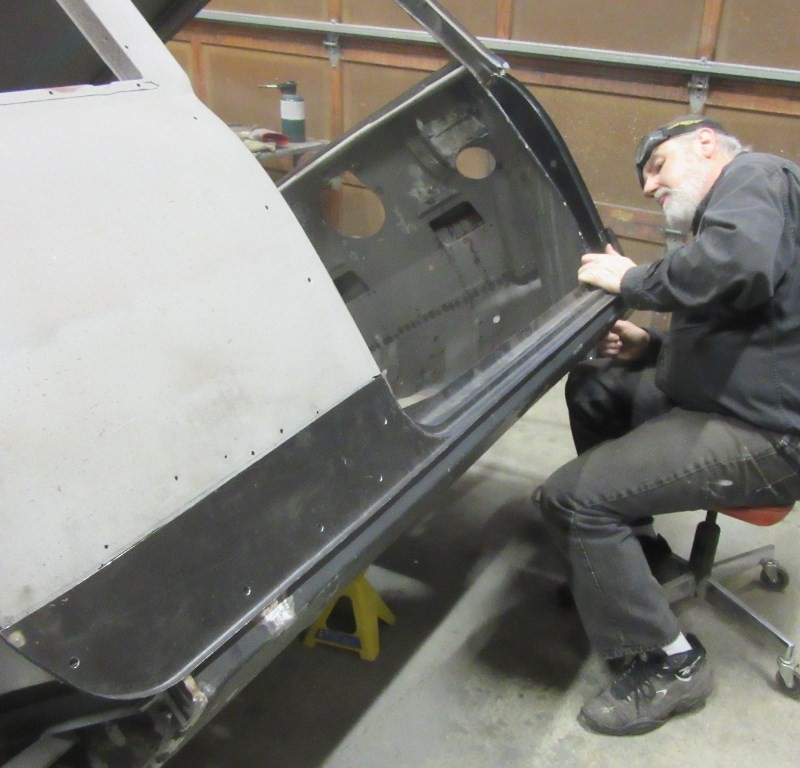
Both full length doorsteps and new inner & outer A Panels are welded in. 2nd outer sill is being shrunk to recurve after we hammered out the 6 flutes and pute 4 flutes in as per MK I.
Got on with repairs at the rear yesterday after addressing exposed weld in the left hand A Pillar.
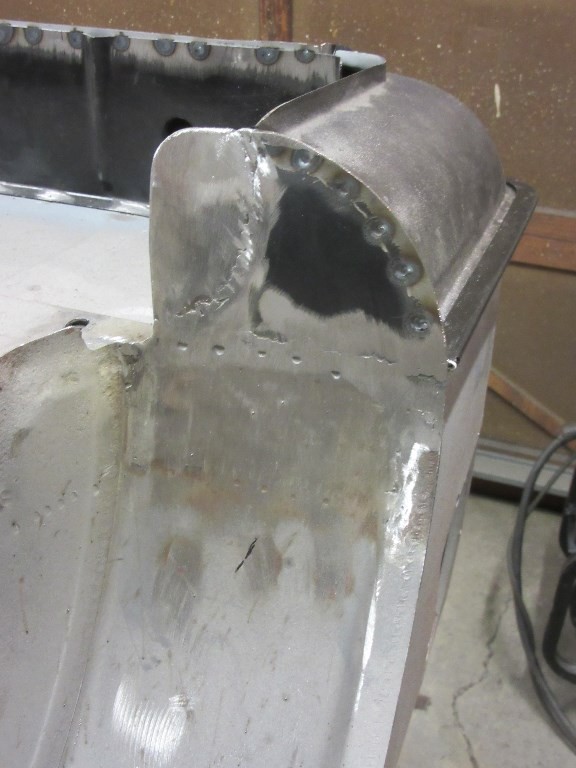
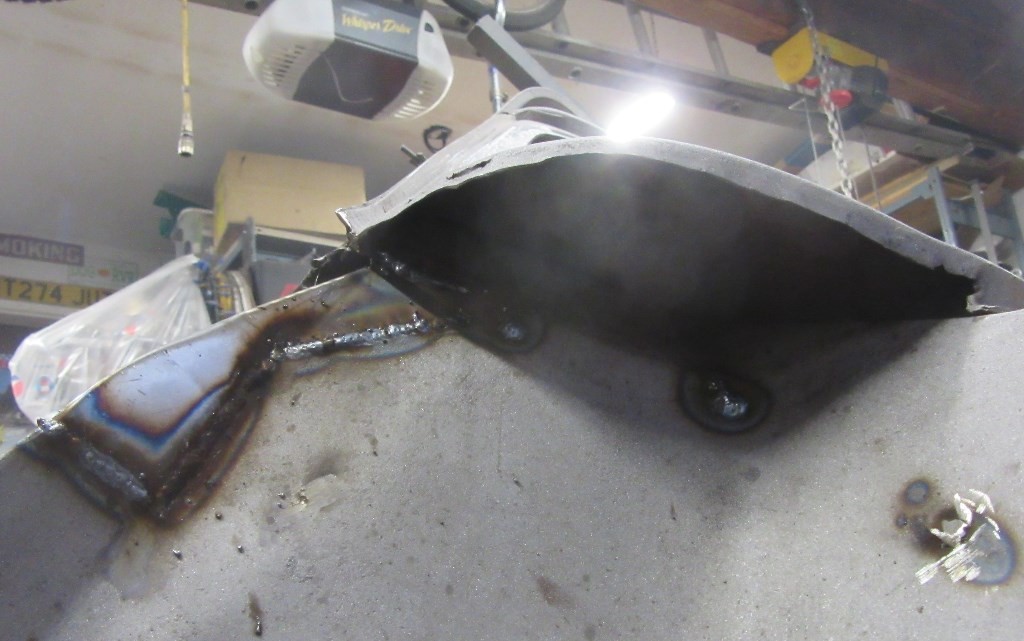
Interesting that the rear wheel arches did not appear the same length...you will see in photos after remnant closing panels were removed.
Arches repaired, 2nd rear corner repaired, closing panel on the completed RH outer sill welded in at rear.
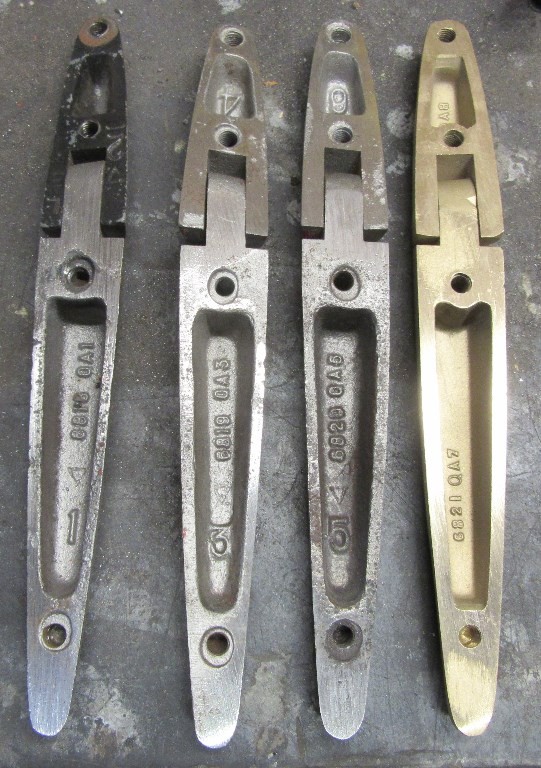
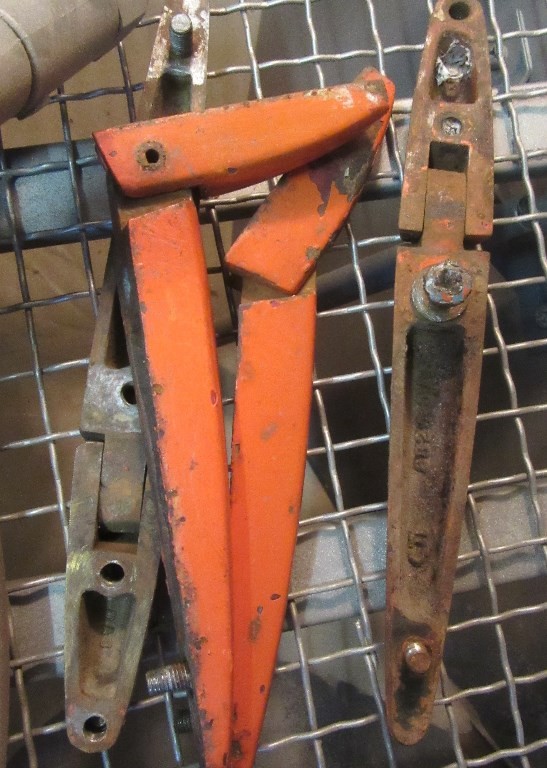
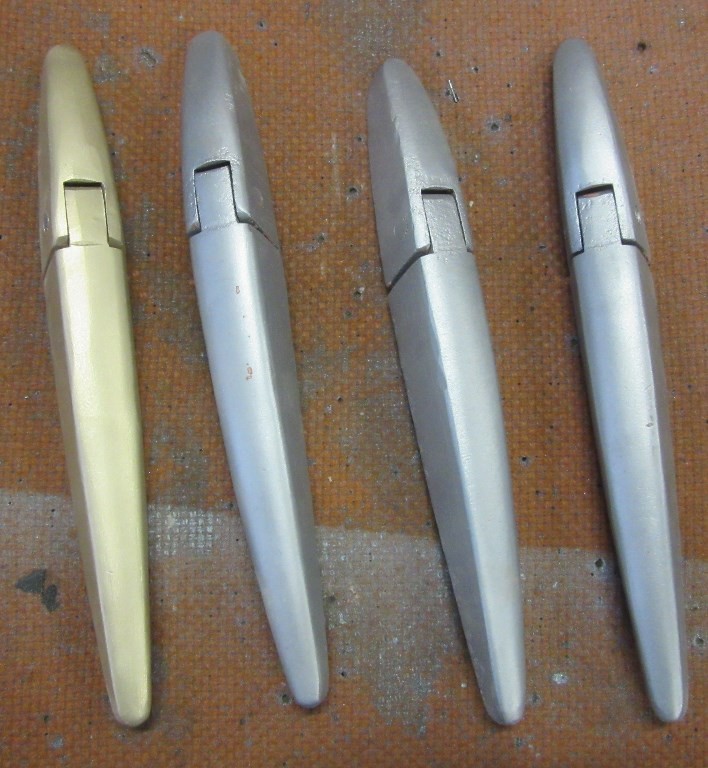
And I have a complete set of door hinges after looking in parts bin for a #1/#2 half. no bushes worn through.
|
|
Total posts: 6469
Last post: Sep 29, 2022 Member since:Nov 2, 2006
|
Cars in Garage: 4
Photos: 1354 WorkBench Posts: 2 |
|
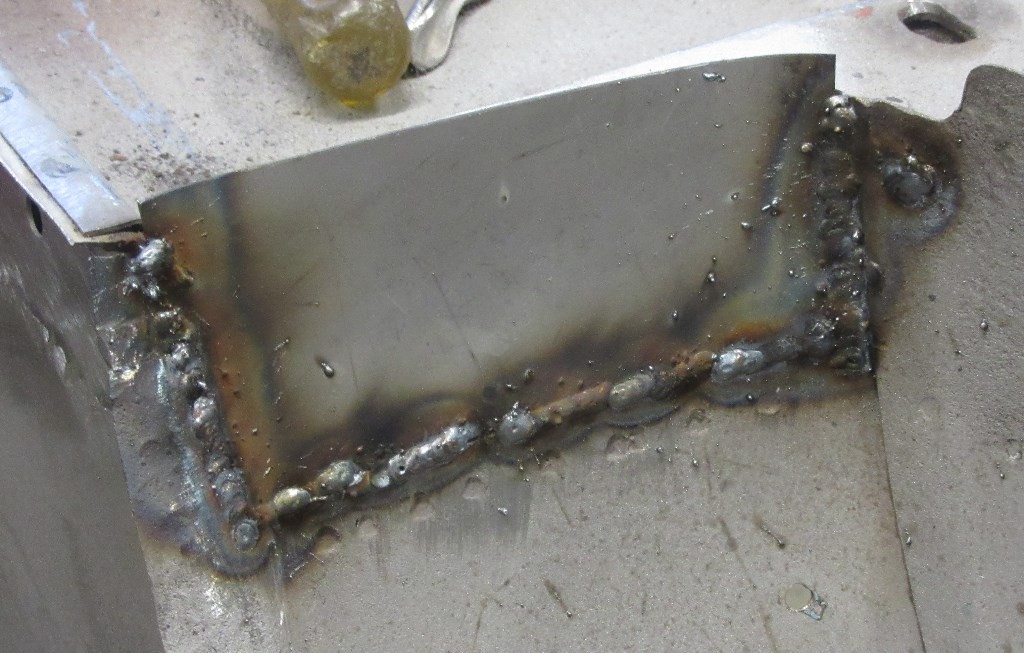
Thanks Dan! My steel bashing & welding partner and I are looking to create a sound car.
Should finish up doortep & A panels intall today on the right hand side. Later a few smaller repairs at the rear and new closing panels & valance. Then the nose, new wings, early MK I apron and hopefully the original bonnet. One door needs modest skin work right at the lower hinge location (rust between the reinforcing bracket & skin).
Son has convinced me to put 1293cc build into the Woody & Turbo into the Aussie Van which has 8.4" discs. Alex has persuaded me to go with 10" wheels on the Woody so Cooper S brakes....
It's coming. Lots more to do!
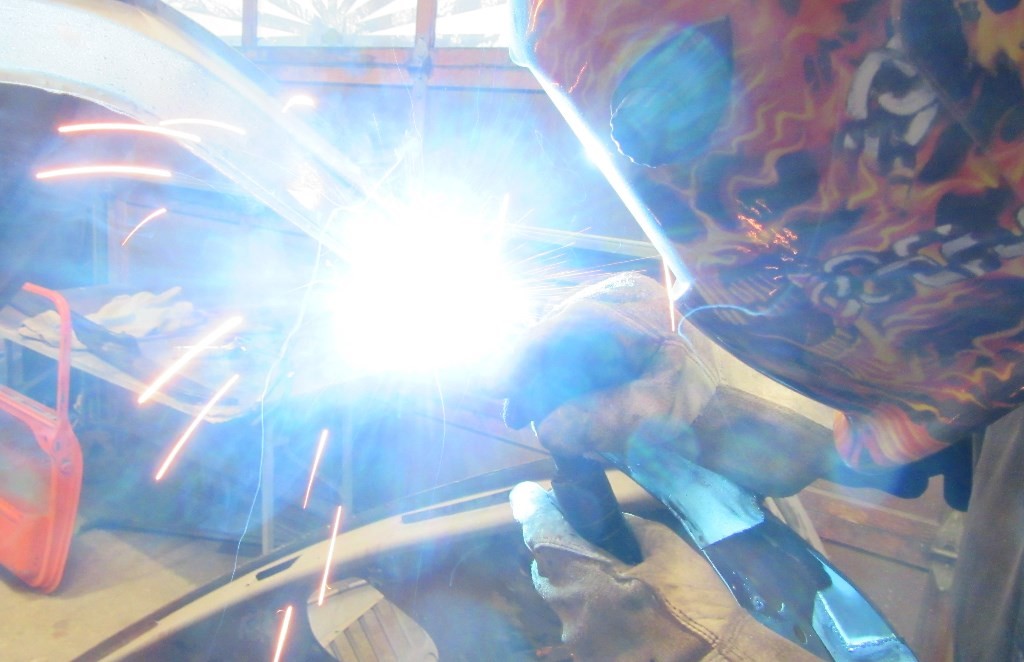
Today's photos from yesterday are entitled - Poof, Bam, Pow...and MAGIC happens!
|
|
Total posts: 9547
Last post: Apr 26, 2024 Member since:Aug 14, 2002
|
Cars in Garage: 0
Photos: 0 WorkBench Posts: 0 |
|
Rick... some of the infill repair sections you are doing are beginning to look "Project Binky"ish. Nice work.
Two questions:
- When will the videos be coming out?
- Once you get the body sorted, what all-wheel drive system are you going to install?
.
"Hang on a minute lads....I've got a great idea."
|
|
Total posts: 6469
Last post: Sep 29, 2022 Member since:Nov 2, 2006
|
Cars in Garage: 4
Photos: 1354 WorkBench Posts: 2 |
|


Liking it...so am I!
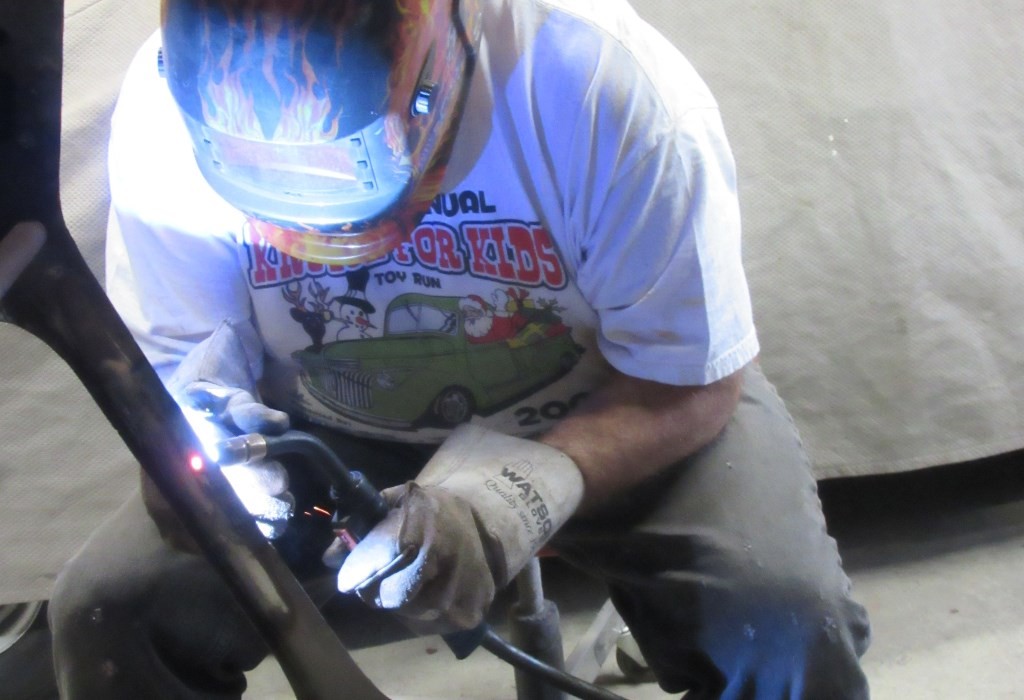
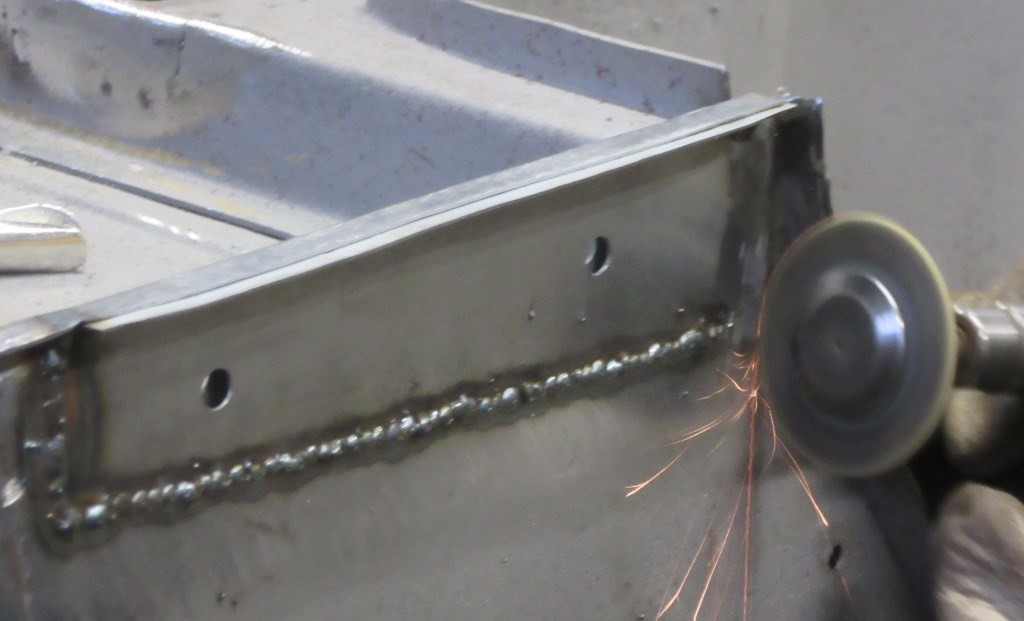
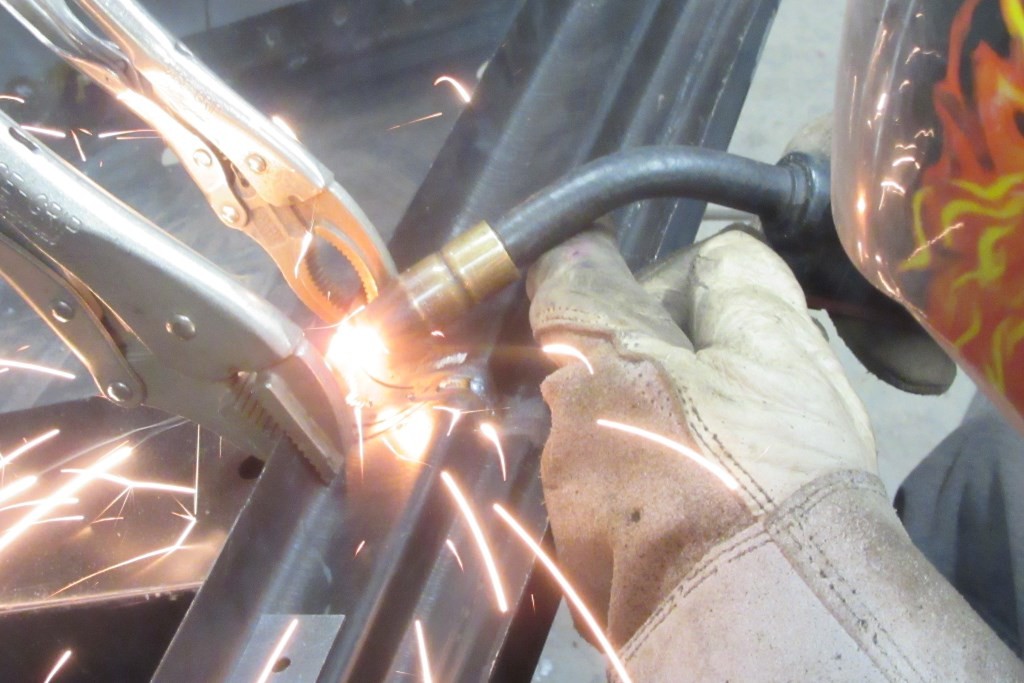
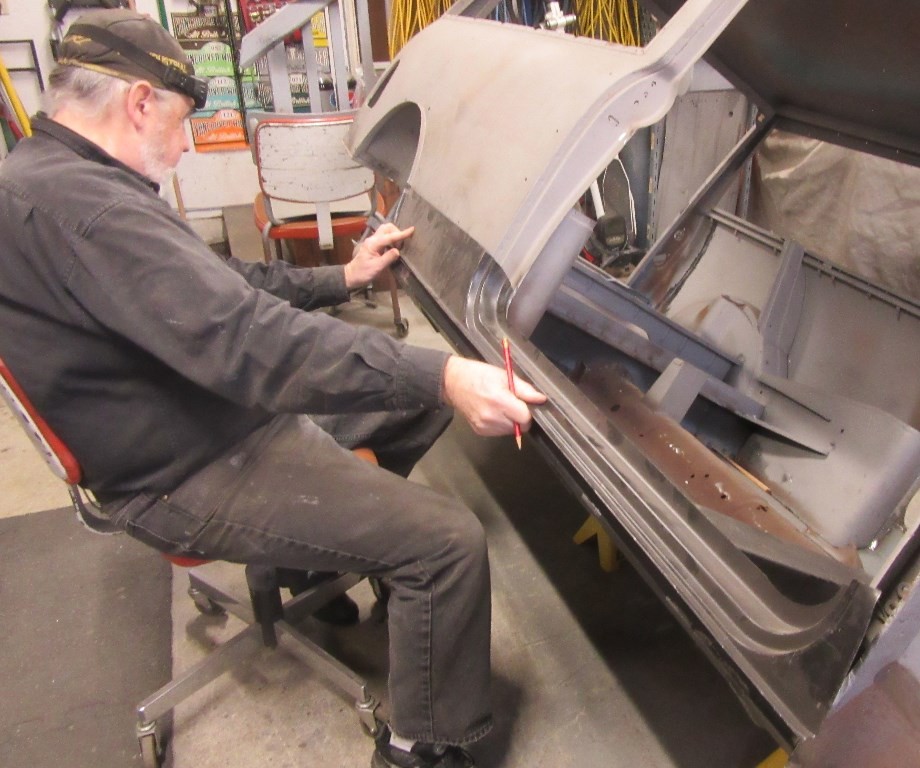
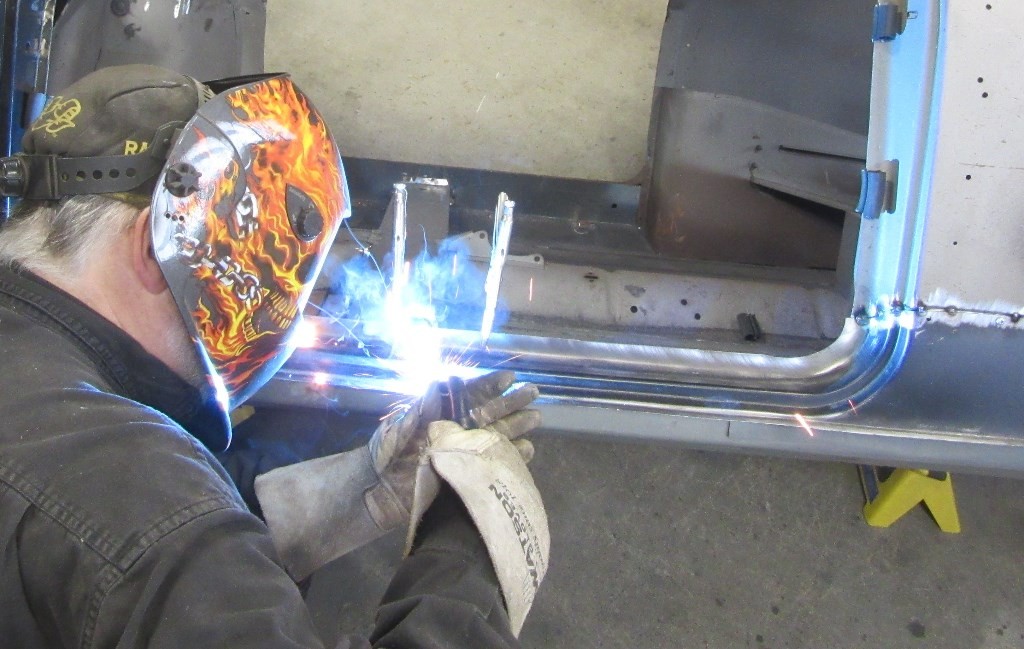
Got after the righthand full length doorstep install today...the Hadrian panel was another 1/8th inch longer than the lefthand piece we shortened.
All prepped, sized, ready for welding...Tremclad in the cavity between the sills (will Waxoyl the cavities after paint). Weld through primer on the bare steel before spot, plug & seam welds tomorrow.
Also melted the lead on the A Pillar welds to see what was underneath and weld as needed, worked on the door (it had S trim at one point)...moving along.
On to fitting the inner & outer A panels after doorstep install.
|
|
Total posts: 9547
Last post: Apr 26, 2024 Member since:Aug 14, 2002
|
Cars in Garage: 0
Photos: 0 WorkBench Posts: 0 |
|

.
"Hang on a minute lads....I've got a great idea."
|
|
Total posts: 2100
Last post: Oct 22, 2023 Member since:May 1, 2007
|
Cars in Garage: 1
Photos: 220 WorkBench Posts: 0 |
|
I keep looking for the Like button! I'm enjoying watching this resurrection build, Rick.
But it's making me feel guilty for letting myself get talked into cutting up the remains of the 67 Elf I picked up a few years back.
|
|
Total posts: 6469
Last post: Sep 29, 2022 Member since:Nov 2, 2006
|
Cars in Garage: 4
Photos: 1354 WorkBench Posts: 2 |
|

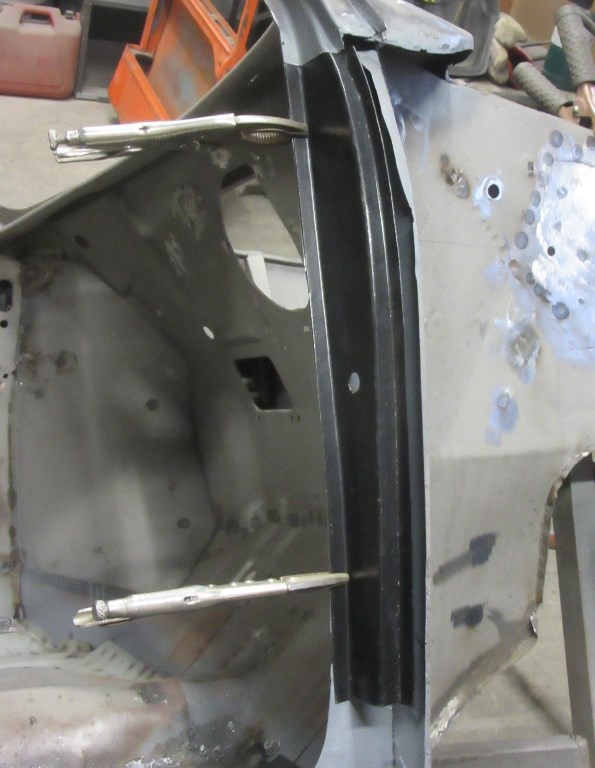
John got on a roll after I left last night and got the a panels welded in...looking more like a Mini!
|
|
Total posts: 6469
Last post: Sep 29, 2022 Member since:Nov 2, 2006
|
Cars in Garage: 4
Photos: 1354 WorkBench Posts: 2 |
|
Lost 3 days (Tues-Thurs) as my steel massaging partner was ill. Back at it yesterday. Slow progress fitting the doorstep, aligning the door, the inner/outer A panels.
Hadrian full length doorstep panel was 1/8" too long. Needed to make a cut and weld up. But doorstep in with seam & spot welds. Where seam welded on the rear quarter the upper steel was flanged to receive the new doorstep.
A panels bolted together to locate the inner, tack weld, unbolt & weld up....
While John was fussing with steel alone, I blasted more bits...found one brass hinge amongst the side door set when the Orange was blasted away. All pairs were there #1/#2. #3/#4, #5/#6, #7/#8. They need a little work - remove broken bolts, check pins etc.


