Generation 1 MINI Coopers
- Convertible R52 (2005-2008) – MINI Cooper & Cooper S
- Hardtop/Hatchback R50 ((2002-2006) - MINI Cooper
- Hardtop/Hatchback R53 (2002-2006) – MINI Cooper S
Generation 2 MINI Coopers
- Clubman R55 3-door (2008 up 2014) – MINI Cooper & Cooper S
- Clubman R55 (2008 up to 07/2012) – MINI Cooper & Cooper S
- Hardtop/Hatchback R56 (2007-2013) – MINI Cooper & Cooper S
- Hatchback R56 (2007 up to 07/2012) – MINI Cooper & Cooper S
- Convertible R57 (2009 up to 07/2012) – MINI Cooper & Cooper S
- Coupe R58 (2012-2015) – MINI Cooper & Cooper S
- Roadster R59 (2012-2015) – MINI Cooper & Cooper S
- Countryman 4-door R60 (2011-present) – MINI Cooper & Cooper S and ALL 4
- Paceman R61 (2013-present – MINI Cooper & Cooper S and ALL 4
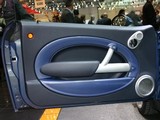
How to Remove Door Panels on a Generation 1 MINI Cooper
MINI Cooper door panels are secured to the door frames with four torx screws and a series of clips.
To remove each screw, use the following tools and instructions:
- Small and large flat-head screwdriver
[wrap the head of the larger one with insulating tape to protect against damage while prying] - T30 Torx screwdriver
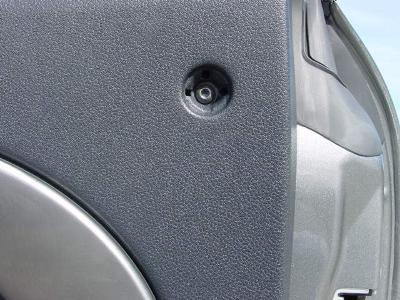
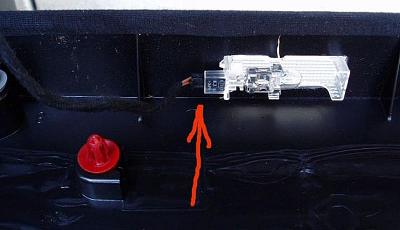
Step 1: Remove the tweeter-door-handle surround
Using the small flat-head screwdriver, pry off the surround by "attacking" it where the two "circles" join.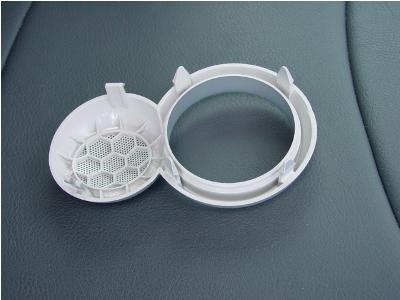
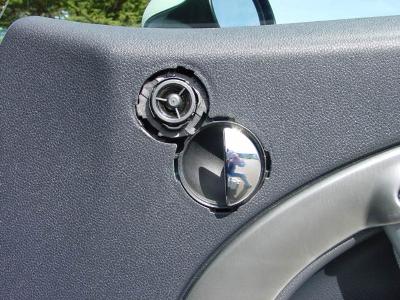
Step 2: Remove the reflector to reveal a hidden Torx screw
Using the small flat-head screwdriver, pry off the two piece reflector, being careful not to damage any of the three clips.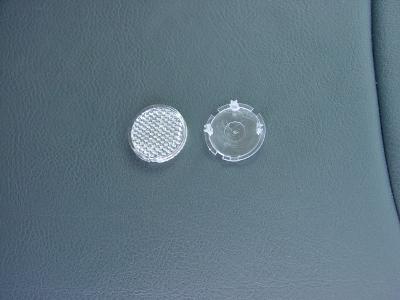
Step 3: Remove the T30 Torx screw in the reflector hole and the 3 T30 Torx screws in the door bezel
***MINIs built from July 2004 have one of the door bezel Torx screws hidden under the bolster on the grab rail:
-
- Protect the grab rail from scratching with a cloth or insulating tape.
- Insert a flat blade tool in from the front of the bolster to depress the tab holding the bolster to the grab rail.
- Slide the bolster forward to expose the Torx screw.
Step 4: Remove the door panel
Using a large flat-head screwdriver and a considerable amount of force, pry off the sides and bottom of the panel, leaving it hanging from the top. Then pull the panel towards you so it bends at the top, and lift it out.
To reinstall the door panels work in reverse order:
- Have the window wound down so you can check the alignment of the top fixing points.
- Make sure the door lock button is placed in its proper hole.
G1 Instructions credited to mini2.com here.
How to Remove Door Panels in a Generation 2 MINI Cooper
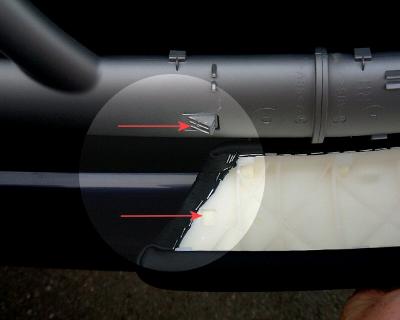
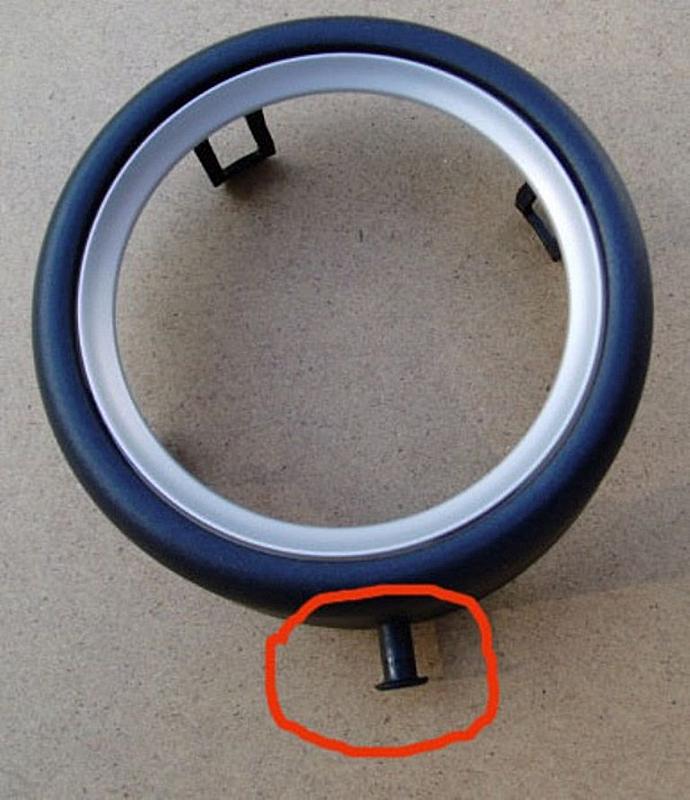
Step 1: Use a flathead screwdriver to remove the plastic pin from the bottom side of the trim ring that surrounds the door opener handle
Step 2: Remove the door arm rest by putting the palms of both hands on the pad and using your finger tips to pry the top side up (to clear the tabs) and towards you then disconnect the light connection with a very small screwdriver
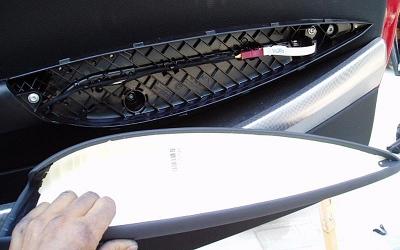
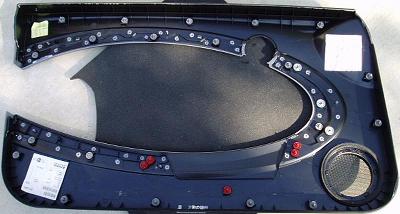
Step 3: The door panels are in two parts, the first part to be removed is in the shape of a "C". It can be removed using hands or using a large flathead screwdriver to pry the panel off of the door. The panel is secured by a series of plastic pin snaps
Step 4: Disconnect the bottom door light in the "C" shaped panel that was removed in step 3
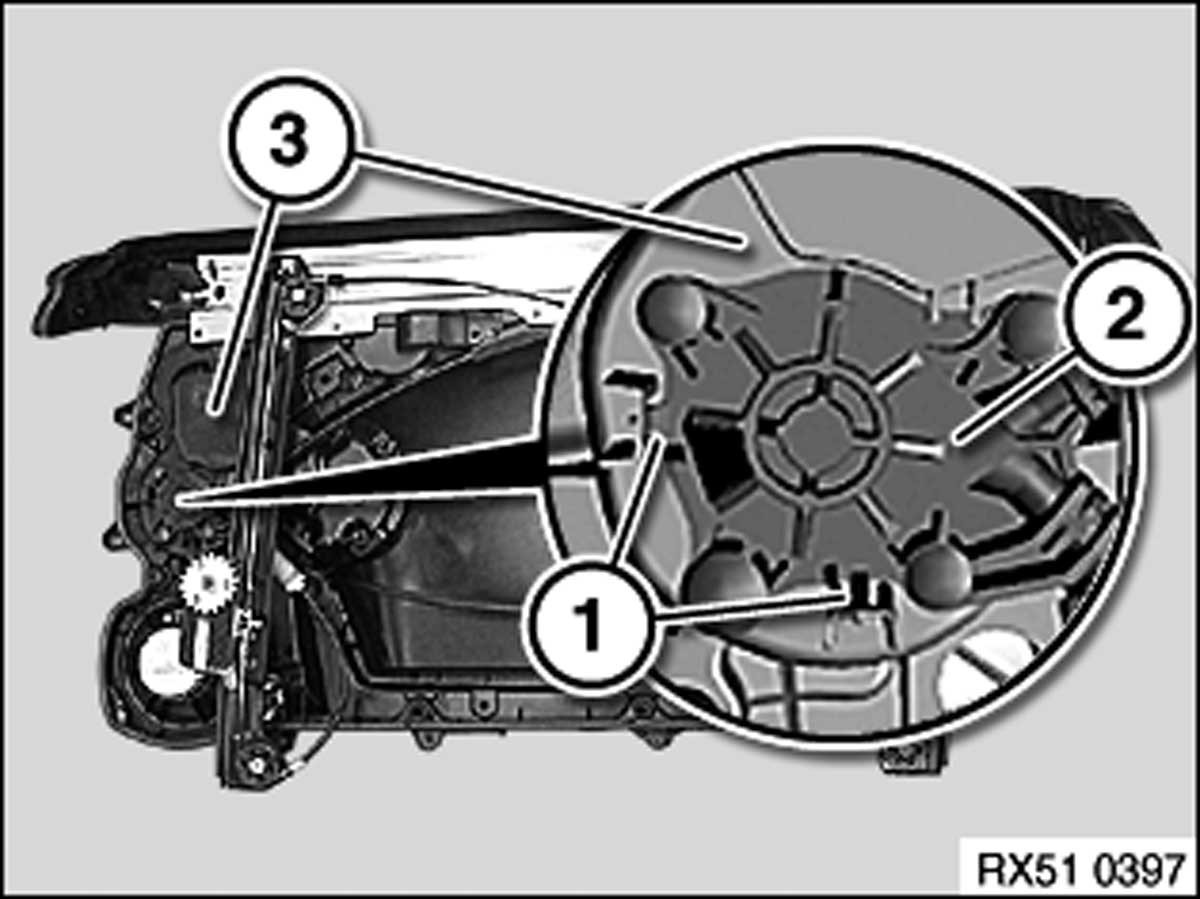
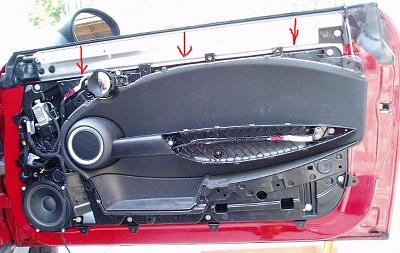
Step 5: Disconnect the three electrical connections as indicated in the image
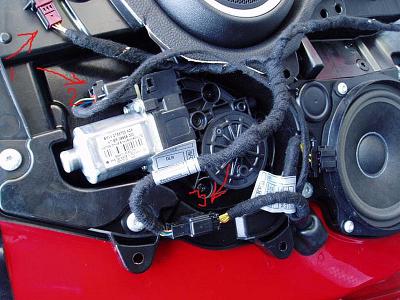
Step 6: Using a Torx wrench, unscrew the speaker (bottom right on door) and disconnect the electrical connection. remove the speaker and put in a safe place. Using a Torx wrench, unscrew the screws as indicated by the red arrows in the image, note, I may have missed a screw so make sure you unscrew all of them.

Step 7: Remove the two round rubber plugs from the bottom side of the door.
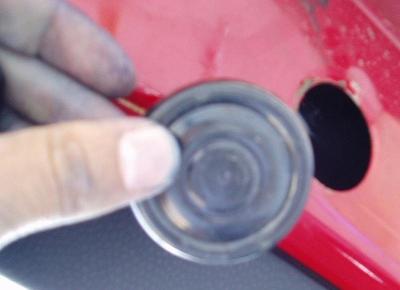
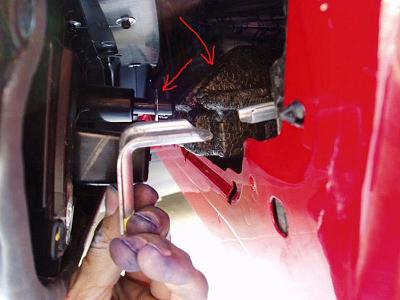
Step 8: Shine a flashlignt into the hole from which you removed the rubber plug and you will see a screw that goes into hole of the bracket in the image. Unscrew this screw and then unscrew the other one.
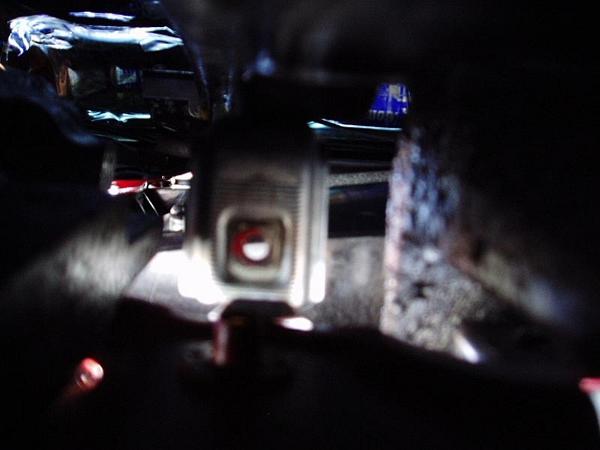
Step 9: Now you should be able to gently pry the bottom of the door panel away from the bottom of the door. At a certian point you will feel some resistance. This is due to a screw that goes through a piece of black styro-foam at the bottom of the door. This screw is held in place by a washer on the other side of the foam. You must pull the washer through the foam. This will effectivley destroy the function of the washer but it can be fixed later during installation with some silicone sealant. The image shows the foam, screw and washer, as well as the bracket that is attached to the door panel that is screwed to the bracket that is attached to the door.
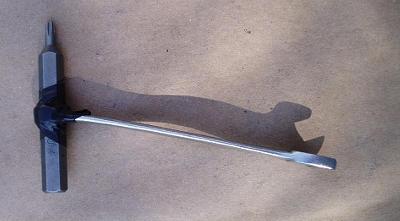
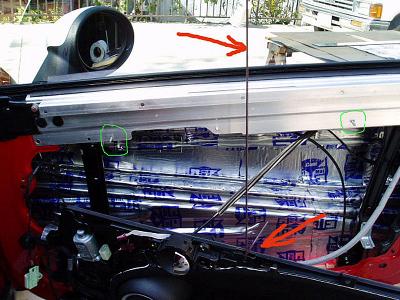
Step 10: You will need a Torx wrench to unscrew the three screws (see third image, two of the screws are circled in green) that hold the top side of the door panel onto the door. Use a standard box end wrench to turn the torx bit and use some electrical tape to keep the bit from sliding up and down in the wrench. You could also use a 1/4" rachet and torx bit if you have one (would be easier).
In order to get at the screws, you will need to lie on your back on the ground and slide your hand up between the bottom of the door panel and the door. Extend your arm and use your finger tips to feel around for the head of the torx screw in the locations indicated by the red arrows in the image. Unscrew the three screws. If you are a big person, get a skinny friend with long arms and small hands to do this for you.
Step 11: Installation is the reverse of removal
G2 Instructions credited to OnionJello on NAM here.