|
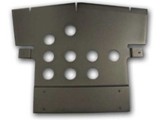
MINI Cooper Skid Plate NMA3041 Installation Instructions Download these instructions in printable PDF format Removal and installation of these components will require the vehicle to be elevated and supported on jackstands. DO NOT ATTEMPT TO WORK UNDER YOUR MINI USING THE FACTORY-SUPPLIED JACK, SERIOUS INJURY OR DEATH CAN RESULT! Tools required: 6mm allen wrench, 10mm socket and ratchet, and a large phillips screw driver.
|
|
|
Removal of factory-supplied components: 1. Unscrew the two phillips head fasteners on the outer edges of the factory skid plate. 2. Completely loosen the three bolts in the front of the skid plate, under the front bumper. 3. Pull the skid plate gently down and towards the back of the vehicle. 4. Carefully remove the two phillips head fasteners and plastic washers for installation on the new skid plate. Installation of new skid plate: 5. Install the two phillips head fasteners and plastic washers in the new skid plate. 6. Apply Loctite to the four allen head bolts. 7. Install the new skid plate in the car by first sliding the new skid plate under the bottom of the front bumper, where the original skid plate fit. 8. Align the new skid plate, and partially screw in the two rearward bolts. Partially screw in the second set of bolts. Screw in the two phillips head fasteners until you feel them lock in place. 9. Tighten the four allen head bolts, then the three bolts in the lower front bumper. 10. Enjoy your new skid plate. |
 |
|
|
|
Let's make sure we're showing you the right parts! Please Select your car type Below:


