Purchase a Classic Mini Front Subframe at Mini Mania Here.
Watch How-To: Classic Mini Front Subframe Assembly Part 2
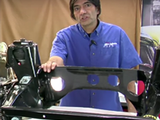
OK Welcome back, this is Jemal again. If you recall a couple of weeks ago we showed you the details on the Classic Mini rear Subframe. We have a customer who has ordered and basically is building a Mini from scratch. He’s got the Mini Body Shell and he's getting the Rear and Front Subframes preassembled, ready to bolt into the shell.
This is a 1976 and later, this is a Mark IV on Subframe - they had Rubber Mounts up here and Rubber Mounts up here in the front. They were attempting to, sort of, isolate a lot of the buzzing and road noise and Engine vibration from the Car and it was pretty successful. These work pretty good, the earlier Cars were noticeable harsher.
In this case we're taking the late Subframe and we're going to assemble it as Stock - 1976 to 1996, would have been pretty much this basic set up: the right size brakes all of those. Let's go over to this side here first because it’s been preassembled with the Stock Components. We have the ‘Standard’ known as the 8.4 inch Disc Brakes. These will only accept 12 or 13 inch Wheels. You take a 10 inch wheel - clunk you're going to hit the Caliper Body.
It’s, of course, very popular with the Minis to keep the 10 inch Wheels. You can build one of these Subframes, then install the early Cooper S Disc Brakes on the same Spindle, if that's what you want to do, to run the smaller Wheels. We even have a kit - (C-AJJ4028) or (C-AJJ4028MS) - that lets you take these big Brakes off, put on the smaller Calipers smaller Rotors, fairly minimal number of parts to change and you can run the small Wheels.
This side here’s fully assembled - upper and lower Ball Joints, it's got the new Disc Brake CV Joint and we've got the rubber Brake Hose. We're going to add the metal - (SPA44)’s - the part that kind of goes around the Subframe to the left front Wheel, as it'll turn out to be. We have a chance to assemble the other side.
Let’s go over here and look at our are setup with the two options. This has the Rubber Stock Cones, and the Stock cast ‘Trumpet’ piece. On the other side we also have a set of Coil Springs and some of the adjustable ‘Trumpets’, known as the Hi-Lo style adjusters. We’ll go ahead and assemble those to the Subframe just as a demonstration of how that style of Coil Spring would go together.
It's kind of a nice chance to show the differences. The Rubber Cones, the standard Rubber Cone type Dry Springs will take a Spring Compressor on the front-there simply isn't room in here without a Compressor pushing these Springs, making them shorter, so you have room to put the Trumpet in and then engage the Upper Arm. The Upper Arm here uses Roller Bearings. It’s pretty stout, very stout Upper A Arm set up. Let's go take a look at the other side.
This side has a, basically, bare Subframe we haven’t installed anything as we want to show a couple of options. We have here a set of the Coil Springs, which are quite popular because they're very easy to install they're less expensive than the Rubber Springs. They allow, I think an improvement in ride they're less ‘progressive’. These Rubber Cones tend to tighten up enormously as you approach a compacted state and, in fact, on the rear Subframe you don’t use a Bump Stop because these are only gonna go so far.
The Mini’s notoriously have that compression where it gets harder and harder until you hit, almost, a really hard stop. The Coil Springs tend to give a more consistent deflection without a lot of increasing progressive rate Spring, like this. Guys that are Racers - our owner Don Racine, having some great success here in recent years, prefers the competition version of these Rubber Springs. They get used to the way the car pitches and slides. The Mini’s are really - if you watch race video - you can see a lot of Four Wheel drifts - a lot of race guys tend to use the hard version. A lot of street guys, we’re not really hammering our Cars too much. My own car has the Springs set so low, that if I put two people in it were going to bottom out.
If you look at the Stock Trumpet you can see that the height difference here, the way it would sit in the Spring, it’s about an inch and you go- ‘well that’s not right!’ It's a vast amount the way the Mini Suspension is set up. A small amount of movement very close to the fulcrum, here's the fulcrum, here's where the Upper Arm pivots here's where the Joint Knuckle comes out. You're an inch and a half or so from the fulcrum on this side which means any amount you would adjust here is going to translate into a much larger amount at the Wheel.
So when you have these adjustable Hi-Lo’s, I mean, a couple of turns of this makes a very noticeable difference to the ride height of the Car. For installation purposes we're going to turn everything all the way down. These Spring’s just set up in place - the Dry type Subframes have sort of a collar that's designed to tightly engage the Rubber Spring. In this case the Coil Spring fits a little more loosely inside that collar and you have a little bit of side to side movement.
But for the most part they locate themselves, within reason. We can see that the Lower Arm already has the Plastic Cup-Joint Knuckle Ball Joint below, that supports the Suspension. You can see that if we can hold these up in place, it’s fairly straight forward to slip it into place, engage the Joint Knuckle-and now you can see that we could actually install the Shaft. We even need to drop it a little bit.
The Rubber Spring- we’re going to have to use the Spring Compressor on here to draw it up. With a longer Trumpet we’ll be about an inch too low to put this in without compressing the Spring. In this case we're putting this Stock like it came off the Factory Assembly Line.
So we've got the Dry Suspension, we’re going to use a Spring Compressor, which I've got here. We’ll see how I do this with with one hand. I might need an assistant to hold it, but I think I can make it work. I've actually had people call me and tell me that, ‘there’s a defect that the Spring doesn't fit into the Frame’ and yeah - they don't go in that way. If you have the Arm in place, some people say you can finagle them, but I've never found a way that lets you take these out with the Lower Arm in place. But in putting it in, if you turn them sideways and then the cavity up there is larger.
Obviously when they go in, the large side goes up against the collar inside the Subframe and here is the threaded end and we're going to reach inside and grab that threaded end and compress the Spring that way, as though with weight from the Car. I'm going to put it in and apply a tiny bit of twist there.
We've got our Spring Compressor Tool and I'll just mention real quick-these are usually provided with two lower Studs, you can see how these go together. This is a two piece thing here. This is for the more common, later metric style. If you have any of these Rubber Cones that are made from the 1980’s onward, they're going to be a metric - I think it's a 10 or 11 millimeter, probably eleven millimeter - 1.5 - so it's slightly bigger than the I think the 7/16ths 20. But if you get one that doesn’t go in - the earlier type or the later type - just figure out which ones which. I’ll hold it in place with one hand it will apply the Spring Compressor down the middle and I should be able to start it into the thread of the Spring which is at the bottom.
We’ll just thread it in there, make sure we have all the way through it like it would be. This just sits on top. There's a big thick collar in here, so no big deal, and essentially just gives you something to hold. So now as we tighten this up, if we can see this in fast motion, we can see that we've got the Compressor Tool threaded through the Spring. And now as we turn this collar here while holding that, it's going to end up tightening up that Spring into the Subframe giving us the room to install the Trumpet and eventually the Upper Arm.
So we can see we've already had some effect on it. Let's take a look at how much room we're going to need. There's our Trumpet, you know it's pretty close. We just need a few more turns to compress that Spring. If you're doing this in the Car, you don't really have to worry about all this because, obviously, the weight of the Car is going to help you to have room to crank on these and put leverage to it. With the whole Subframe sitting on the Crates like this, obviously, we have to be more careful that we don't just pry it off here. So, essentially use a Channel Lock, a large Channel Lock to grab the Tool here and just an extra piece of Pipe and you can see that we are tightening up the Spring Compressor and therefore shortening the Spring.
So now, our trumpet is installed to the Joint Knuckle and with our Arm having the Seals, sort of, slipped on so that we can back them out over the Thrust Washers, you can see now that you can pretty well set stuff in there, reach through to the Trumpet, and engage the bottom collar of our Spring. Then as everything fits in the place the height, of course, allows the Arm to install in its position.
Let’s see if we can convince our Shaft - sometimes these Bearings can be tight, this one here is a pretty tight Bearing - that's pretty good. Everything went into place and the only thing I left out - again trying to make sure this would go through the Bearings - is we want to put a Thrust Washer on this side. I’ll back it out just a tiny bit here with our Punch. At least we know our Spring is compressed enough.
So, here's our inner Thrust Washer - again it has a cut out for grease, for Oil. That's going to face in to provide a nice smooth pivot point. I’m going to slip it on to the Shaft - I should to be able to do so… The Thrust Washer is mostly in… This is what you run into when you just want to go have a beer and think about it.
We sort of muscled this thing to tighten up the Spring Compressor, but usually if you have this in the Car - no issue at all. The Car is not going to turn out from under you, as you're tightening up the Compressor. But we hung on to it, we got some leverage, we compressed the Rubber Cone Spring.
You know and I can confirm, right here, that if you're using new Rubber Cones, you will need a Spring Compressor. I do have the Pin with its Thrust Washers in place, I have it lined up over here where I can, basically, knock it through and have the thread come out this other end.
We've lined up the Trumpet, the Spring is still compressed up into the Subframe, the Arm has a little bit of movement as we go to line up our Joint Knuckle. At some point with weight on the Car, we want to install our Rebound Buffer down here and that sets a limit for the ‘droop’ of the front Suspension.
We may well have to crank that a bit more to lift it into place. Alternatively we could - and if it was my car, I’d probably wait until I got it in the Car put some weight on it and then this is really a no brainer to install, because with weight on the Car this Arm’s going to be lifted up, giving us plenty of room here.
So now the Upper Arm’s in place with all of its pieces. We can, kind of, finagle them now that they're in and we can push that Seal over the Thrust Washer so that it does its proper job. We can tighten up this Upper Arm reasonably. I'm just going to give it a little bit of tightness to make sure that when I position the Seals here, they don't have any chance of slipping.
That pretty much positions that Upper Arm and you can see it's immensely strong, really the upper Ball Joint on the Mini is extremely stout and secure.