Installing Mini Main Studs
On 2" inch main 1275 engines the use of main studs gives a solid improvement over the stock bolts.
On the 1275 Mini there is something to look out for that doesn't arise on an inline engine.
Due to the proximity of the gear box webs at both ends, there is not enough clearance for the nut.
There are a couple of ways to deal with this:
- Leave out the washer and then sink the stud a little deeper in the block.
- Shorten the studs if you have a lathe available.
The following photo's should help show the steps to take.
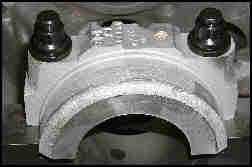 |
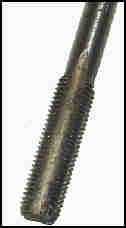
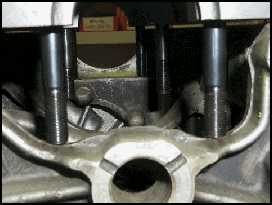
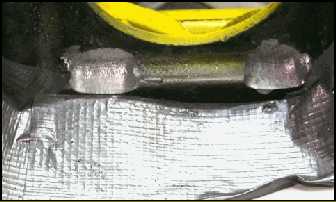
Here is what the studs look like when installed for a Sprite or Midget, which is fine.For a Mini this setup needs to be changed, as outlined in the text |
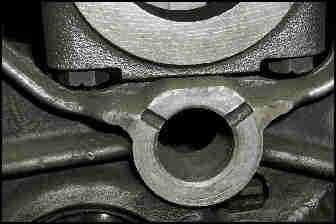 |
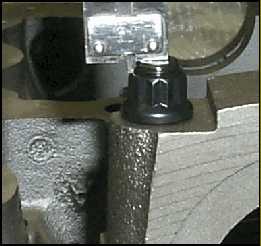
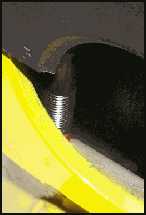
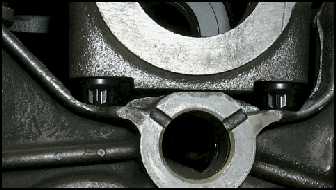
Here, you can see how little room there is.All checking is done without gaskets between the flange faces.When your complete design is done around a 1 3/4" diameter Crank, and then you change to 2" diameter This is what you end up with! |
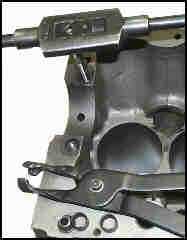 |
First step is to remove the locating rings. The pliers shown are made to pull plug wires off spark plugs, but seem to work well for this application also!Tap all holes right to the bottom. |
 |
Use the correct tap as shown, which, confusingly, iscalled 'bottom' or 'plug' depending on which country you are in! |
 |
On this block, this is how much the stud sticks out through the nut, and is being measured with calipers, (no washer) and needs to be shortened so it is flush with the top of the nut. |
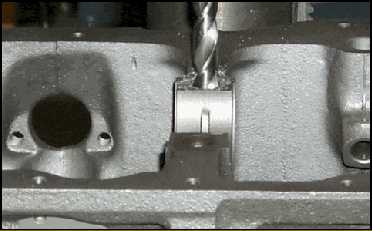 |
If you want to go the route of removing the top threads from the block you really need a drill press (pillar drill in England) or a vertical type mill.Use a 15/32" drill, and you MUST have a stop of some sort set up to control the depth accurately.In actuality only the end mains need to be done. |
 |
This is what you are looking for, studs flush with the top of the block. |
 |
If you have a lathe, then this is the easiest and most accurate way to do this job. |
 |
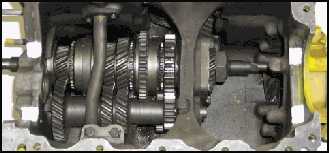
Put the block back on the gearbox and mark the area on the webs which need to be relieved. |
 |
The front web is a little more tricky to get at, but you can mark the inside OK, and then mark the other side later. |
 |
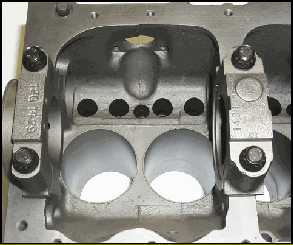
The four areas to be ground are shown painted white. The very best time to do this is obviously when the gearbox is stripped out, but if this is not the case... |
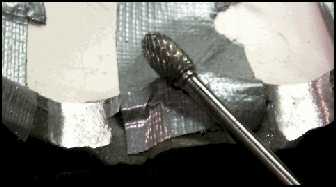 |
...then mask off the box carefully and use a burr to cut these areas, not an emery type drum.You were going to wash the box out again before fitting it anyway, right? |
 |
The front web requires care, if you grind more than is required you can go through the case here.Do not cut in too deep in the corner, just cut a slight taper towards the inside of the box |
 |
Here is the completed job. If you can see clearance, or can put a feeler gauge under the stud/nut then when the gasket is fitted there will be plenty of room. |
What's wrong with the factory bolts? Factory bolts, at the very best, only have 65% of the clamping force of an ARP stud, and consider that the combination of the firing load and inertia at RPM cause loading's that amount to thousands of pounds.
- The last few foot pounds of torque applied to a bolt only twists it up like a torsion bar, and does nothing to increase the clamping load, not to mention possibly damaging the threads in the block.
- The factory use bolts because they are cheaper and quicker to assemble, so best engineering practice is always to replace a bolt with a stud whenever possible.
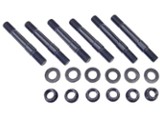
A good quality stud with a nut anchors and locates the main bearing caps much more securely than bolts. This system was used on the Cooper S bottom end, and this stud and nut kit does the same for 1300 & A-Plus blocks. From ARP, includes 6 each studs, nuts & washers.