")
Repair your MINI Cooper Electric Window Motor and Regulator.
(Posted in our forum by a customer - reprinted with permission.)
The reason I am putting this page up is that when I had this problem with my 2002 MINI Cooper S I couldn't find any info on this. I am sharing this so you won't have to learn the hard way.
So your MINI Cooper's electric window doesn't work anymore and you checked the fuses and they are OK.
When you lift the switch you can hear a clicking sound from inside the door. You maybe found some info on the web about the motor being burnt out and maybe trying to pound the door just above the speaker to see if this jars the motor back to working order but nothing.
The following describes how to fix the problem.
I am telling how to do this without photos, as you won't need them.
First get a new MINI Cooper electric window motor. Be sure to specify either driver (Left) or passenger (Right) side.
Depending, you may need a new regulator assembly. It may make sense to get the whole assembly when buying a new motor. It also makes things somewhat easier and you end up with a complete A-1 job. And finally, if you have BMW do this job it will cost much, much more than you are paying for these parts.
I think that when this job is done at BMW they are replacing the entire assembled regulator complete with new motor.
This job takes 1-2 hours.
First you will need the following tools:
- #20 and #30 Torx screw drivers.
- Medium Phillips head screwdriver.
- 10mm socket and ratchet wrench.
- 5mm or 3/16" Allen wrench.
- Door panel pry tool. (get at auto parts store)
- A small precision screw driver
- Stiff putty knife.
Step 1: Disconnect the negative connector on the battery. This is done to deprogram the General Window Control. The GWC keeps track of the window up position. Later we will reprogram this.
Step 2: Now remove the door panel by removing (4) #30 torx screws in the door. The fourth screw is under the clear reflector at the edge of the door. Pry that out with your small screw driver (if this piece separates don't worry it will be OK). Here are more detailed instructions if needed.
Step 3: Pry the panel off with the pry tool.
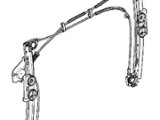
Step 4: Now the glass must be removed. The window is secured with two nylon clamp washers that clamp the glass to the regulator. Reaching into the door cavity, and up, you can feel for them. They are a sprocket like device that are supposed to require BMW special tool 51 3 240. BMW wouldn't sell me one but you can remove them by using your 5mm or 3/16" allen wrench. Feel carefully and you will find the center of the sprocket where the allen will fit into. Loosen these sprockets and remove them. Remove the glass straight up.
Step 5: From the outside of the car, using your fingers, carefully remove the outer door top trim piece.
Step 6: Remove the speaker and 3 phillips head screws on the door handle.
Step 7: Remove two round black seals near the top of the door, one on the left and one on the right.
Step 8: Standing outside of the car and looking down into the door cavity from the top, you can see two white plastic nylon clips that secure the cable assembly to the inside of the door. Carefully remove these clips with a pry tool. If these break you will have to figure something out. If you have a new regulator assembly it doesn't matter.
Step 9: Remove the third cable clip from the inside of the door.
Step 10: Remove three phillips head screws just above the speaker opening that secure the motor to the door.
Step 11: Remove two 10mm bolts from under the bottom of the door.
Step 12: Remove two 10mm bolts from the top of the regulator rails.
Step 13: Carefully remove the regulator assembly and disconnect the electrical cable.
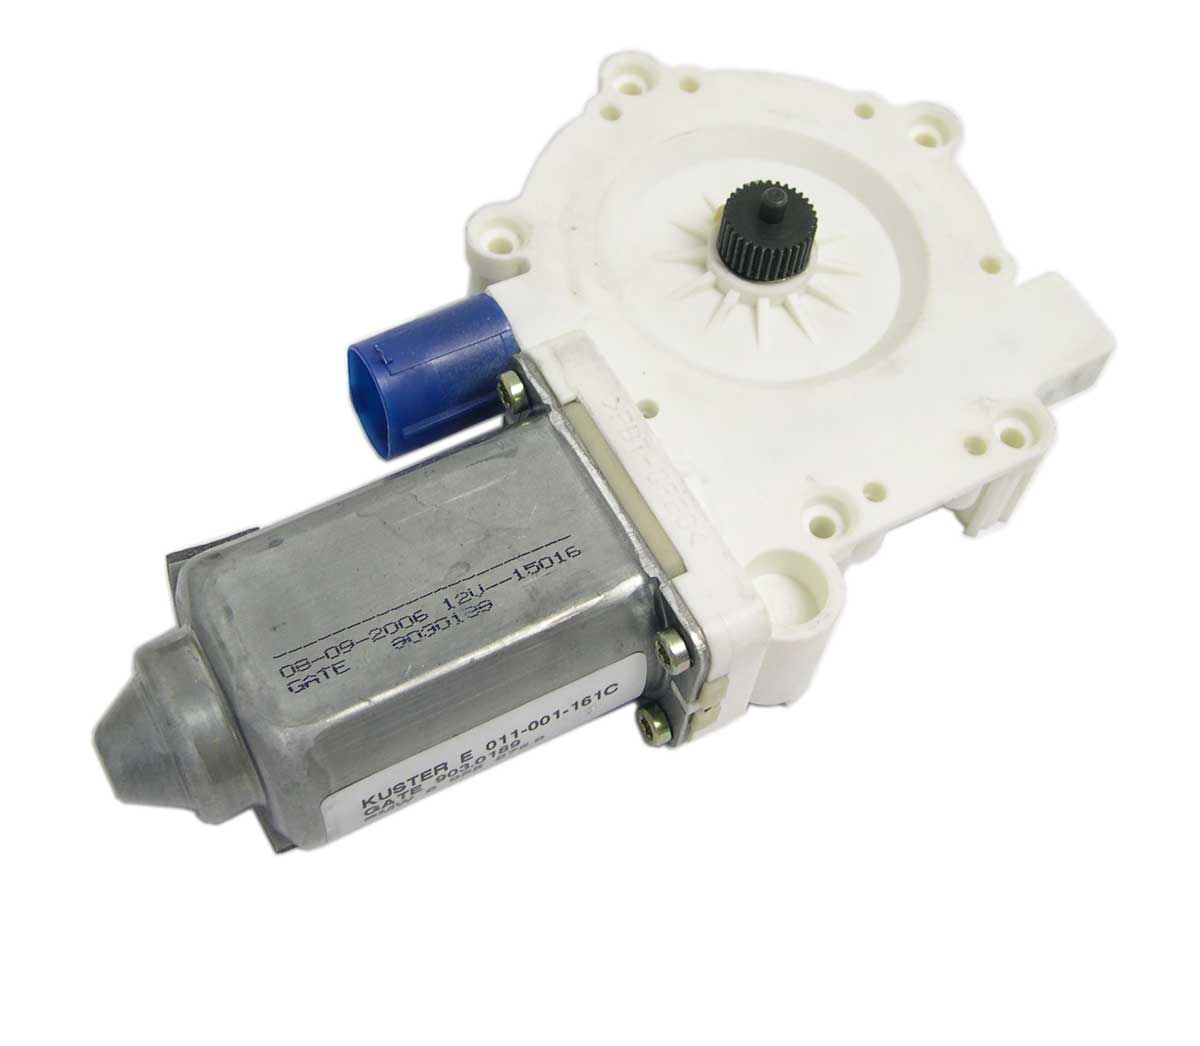
Step 14: Lie it down flat and take note of and make a visual reference of the motor in relation to the cable mechanism. Or just take a photo.
Step 15: Remove (1) #20 Torx screw that attaches the motor assembly to the rail.
Step 16: Remove the motor assembly from the rail. To replace the motor, just *LOOSEN* only, about 1/8 inch, four #20 Torx screws that mount the motor to the cable assembly.
Step 17: Pry the two parts apart enough to open a 1/8 inch space. Place your putty knife between the motor and the cable assembly to hold down and prevent the cable reel from coming apart when you separate the two pieces. (if this comes apart you might need a new regulator assembly.)
Step 18: Completely remove the four screws and separate the motor from the cable assembly.
Step 19: Using your visual reference if needed, assemble the new motor to the cable mechanism.
Step 20: Attach the motor assembly to the rail.
Step 21: Place assembly into the door cavity taking this time to reattach the electrical cable to the motor.
Step 22: Using a 10mm socket hand tighten the two top rail screws.
Step 23: Using a 10mm socket hand tighten the two bottom rail screws.
Step 24: Connect and put the speaker back in.
Step 25: Secure the motor to the door with (3) phillip head screws.
Step 26: Looking down from the top and reaching into the door cavity from the side, insert the plastic cable tie clips into the inside of the door. Insert the third cable tie clip into the inside of the door.
Step 27: Place the glass back into the door and hand tighten the sprocket window clamps.
Step 28: Replace the top outside trim piece (compare with other door).
Step 29: Attach the battery negative connector.
Step 30: With the door open raise the window completely.
Step 31: With the sprocket clamps hand tight, you may now adjust the window left or right and up or down as needed.
Step 32: With the door slightly closed and ajar in the first click position, the window should be square and touching the rubber seal gently (use a piece of paper to feel the pressure). To adjust this, move the bottom of the rails in or out to tilt the window as needed. Too tight and there is stress on the window. Too loose and you hear the wind when you are driving and maybe even water gets in.
Step 33: Compare with the other door. Take your time, and when you are satisfied and happy with the window adjustments, use your allen wrench to tighten the clamps good and snug, but not too much (about 10 foot pounds).
Step 34: Fully tighten the (4) 10mm bolts that secure the rails. Replace the rubber seals that cover the 10mm screws. Replace the door handle.
Step 35: Put the door panel back on and replace the reflector.
Step 36: To finish off, with the door closed, lower and raise the window completely, and when fully raised, hold the switch in the up position for 10 seconds. This reprograms the GWC.
Step 37: When you shut the door completely with the window fully raised, the motor raises the window about a 1/4" just after the door shuts. When you open the door, it lowers it about a 1/4".
Step 38: To reset your clock back to a 12 hour clock, depress both bottons on the clock simultaneously and hold for 5 seconds.
Update from Neville. B.
"Hi Clarke, excellent article on the replacement of mini window regulator - very helpful and well written. there is one thing that may be worth pointing out [and that you may not be aware of] and that is, if the window motor dies when the window is in the "up" position then it is very hard to get the window fastening bolts out [the ones with the notches around the outside] the problem is that there is a double skin on the top part of the door which only allows these bolts to be undone a few turns before they collide with it. I had to dismantle the armature from the motor so i could push the window down a few cm's to allow for their removal." cheers Neville. B.
Update from Kevin, as he found this article applied to his 03 MINI
I believe this was not the case with the 02 MINI
"I used your instructions on replacing the window motor in my 03 mini. It went pretty well except for one part. See the high lighted part below? I found that these clips don't need to be removed, they can be opened from the bottom. By no means am I complaining. Your info helped big time, just thought I'd share my findings with you."
Thank you very much Kevin
Standing outside of the car and looking down into the door cavity from the top, you can see two white plastic nylon clips that secure the cable assembly to the inside of the door. Carefully remove these clips with a pry tool. If these break you will have to figure something out. If you have a new regulator assembly it doesn't matter
From Joe Chiolo
Clark: Thanks for taking the time to develop procedures to remove and replace a Mini Cooper power window motor. Here's a few builds: Neville. B.'s comment was most helpful since the window was frozen in the up position making glass removal virtually impossible. I would add that to remove the armature/worm gear, remove the four torx screws holding the motor cover onto the drive gear body and turn the worm gear (CC I think) to unwind it from the body. Once this is done, the window may be moved up or down to any level desired. Access to these four screws is via the lower speaker cut-out. It is not necessary to remove the rear window guide since the motor itself is attached to the front guide. With everything else removed, simply maneuver the front guide/drive assembly out of the door through the bottom center access hole in the door. Finally, if one of the barbed pins that secure the plastic cable retaining clips to the door frame snaps off, liquid nails makes for a quick, easy and effective fix. Very nice of you to take the time and make such an extraordinary effort to document this procedure. Good health ..... joe chiolo
From J.R.'s AUTOBODY inc.
Hello Clarke. My name is Kristy. My Dad, Joe owns an auto body and repair shop in upstate New York. We are writing you to thank you for writing this article and publishing it online. Without this article, we would have let our customer down by informing him we could not repair the window. We wanted to let you know how useful this article is. The MINI dealer did not even attempt to help MINI owners as you did. We even contacted our glass repair company for advice, to no avail. Once again, thank you for passing your well written and helpful article on to the rest of us who are well in need! Kristy and Joe
Any comments or corrections to this article please email me,