Classic Mini (1959-1968) External Hinges: Positions and Fasteners.
For a number of years, external hinges were utilized on Minis, particularly on the vans and pickups, beginning with the very first cars off the assembly line and continuing with little change for many years after that. They can also be found on roll-up window doors, which are used on many Australian-built Minis as well as certain South African-built Minis, among other places.
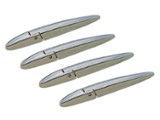
Hinge Positions You will most likely find a variety of different markings on the back (door) side of the hinges to indicate where they are located on the vehicle.
Because each hinge was made up of two components, one numbering scheme was 1/2 for upper right, 3/4 for upper left, 5/6 for lower right, and 7/8 for lower left. Another numbering system was 1/2 for upper right, 3/4 for upper left, 5/6 for lower right, and 7/8 for lower left.
Another approach assigned the letters RU, LU, RL, and LL to the hinges, which stood for Right Upper, Left Upper, Right Lower, and Left Lower, respectively.
A third numbering scheme was as follows: 18 represented the upper right, 19 represented the upper left, 20 represented the lower right, and 21 represented the lower left.
The latest version of the hinges now have LHT, (left hand top), LHB (left hand bottom), RHT, RHB. Please note- left hand is determined as you site in the car. If either the second or third numbering system described above is utilized, and the hinges are to be disassembled in order to replace the bushings and pins, it is critical that the two parts of each hinge remain together during the process. There may be additional methods in which hinges are marked, or some hinges may be discovered that are not marked in any way. When removing and reinstalling hinges, be sure to take note of their positions and markings, or mark them yourself if required, before proceeding.
Hinge Fasteners The placement of the various studs and bolts is not crucial, but more a matter of convenience during assembly. It is critical, however, that the distance pieces (thick, tapered washers) are appropriately positioned and that the hinges are installed in the proper locations (as discussed above). Remember to check that the threading in the hinge holes is deep enough to accommodate the studs and bolts being used, and keep in mind that some reproduction hinges and nut/bolt/stud kits are now being issued with the holes and fasteners measured in metric instead of imperial measurements. The original bolt/stud pattern was as follows: The two outer holes (front most, and rear most) in all four hinges took studs. The upper hinges took a third stud in the second from the front hole; i.e., the front section of the upper hinges were fastened to the body's A-panels by two studs. The one remaining hole in the upper hinges (second from the rear) and the two remaining holes in the lower hinges (the middle two of the four holes) took bolts. The lower hinge bolts used flat washers and lock washers. The studs used flat washers and lock washers and nuts. The upper hinges used flat washers, lock washers and nuts on the front two studs. The rearmost stud and the bolt in the second from the rear hole used the distance piece against the door with its thickness and taper set to compensate for the curve in that part of the door skin. A lock washer and the called for nut or bolt were used.
Your E-Mail and/or password are incorrect. Please try again.
Passwords are case-sentive.
If you continue to have problems click on the Help Icon for additional options.
Login with your E-Mail Address. If you would like your login information reset, click on the button below to request your login information to be resent.
Let's make sure we're showing you the right parts! Please Select your car type Below: