

Download These Instructions in PDF Format for Printing
Instructions for accessing the handbrake handle or emergency brake handle for replacement (also referred to as the 'parking brake'). These instructions also apply to the boot or cover replacement for the handbrake handle.
Please use caution as Handbrake boot and console can be damaged when excessive force is applied. Mini Mania is not responsible for any damages incurred during the installation of this part. Mini Mania recommends professional installation.
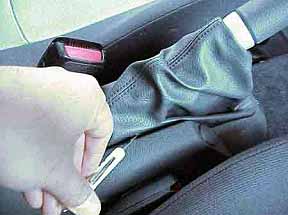
1. Take a firm grip on the collar of the handbrake tip just below the release button.
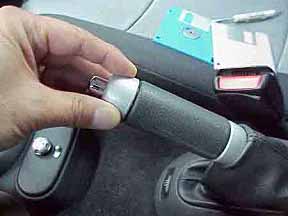
2. Gently wiggle and pull until it releases. Remove this item and set aside.
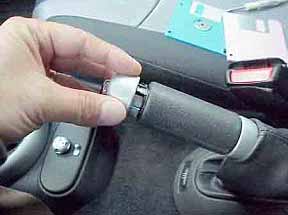
3. Using a small screwdriver, gently lift the tab until it clears the slot. Pull on the Grip and slide towards the Release Button.
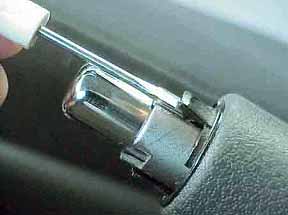
4. Insert a small screwdriver between the boot and the Handbrake Console.
5. Gently pull the screwdriver handle away from the handbrake while pushing down on the rim of the boot so the tip forces the boot rim down and away from the console. Some of the clips are 'U' shaped and requires the 'downward' movement before releasing.
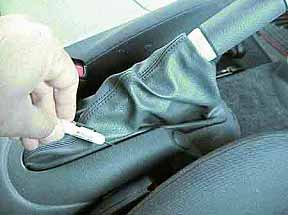
6. Repeat step 5 until all tabs are released from the console. There are 3 tabs on each side.
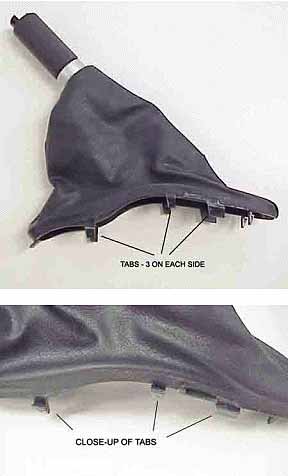
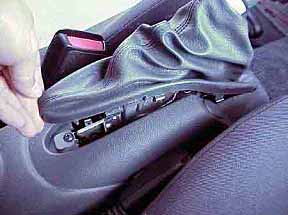
7. Gently lift the boot assembly from the Rear and lift up and out over the handbrake handle.
8. Once the boot and grip assembly is removed, turn the boot inside out to expose the part of the grip covered by the boot. You will note the grip is secured to the boot with a plastic cable tie. Cut the cable tie and this will release the handbrake grip.
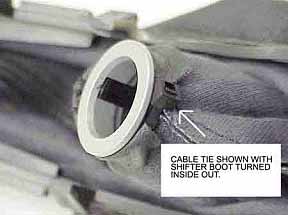
9. Insert the new grip and secure with a similar cable tie.
10. Assemble in reverse as shown above.
NOTE: The Chromed Brake Handle does not use a 'clip' to secure it self to the handbrake assembly. You will need to use electrical tape (or similar) to increase the diameter of the handbrake assembly for a 'friction fit' of the new handle. This will require some 'trial and error' to determine the correct amount of tape to produce the right diameter for a proper fit.
ENJOY!


