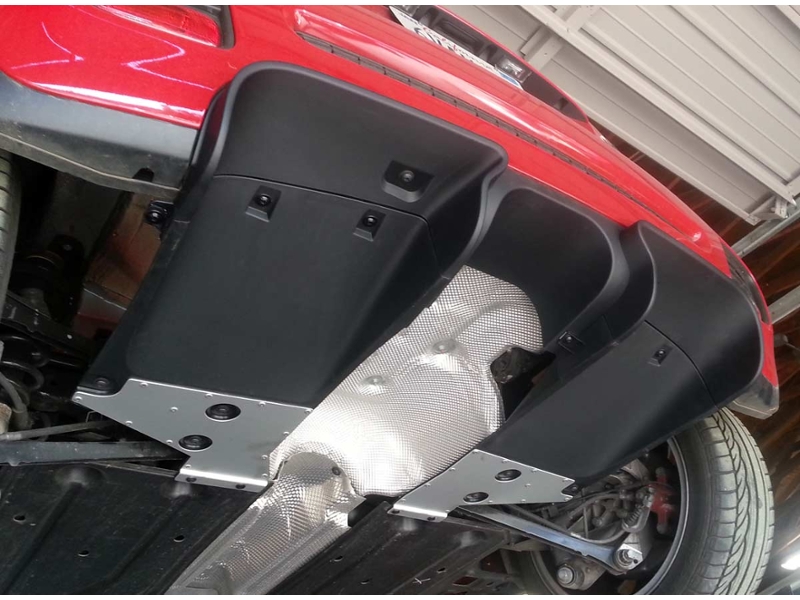
MINI Factory Rear Diffuser from the Gen 2 GP model! - Only fits Minis with the JCW Rear Bumper.
The Rear Diffuser is an aerodynamic feature designed to reduce 'lift' at speed in order to improve high speed stability. This also improves grip in high speed turns.
Fits the following Cooper S models with the JCW Rear Bumper (as shown in the photos):
2007-2013 R56 MINI Cooper S Hardtop
2009-2015 R57 MINI Cooper S Convertible
2012-2015 R58 MINI Cooper S Coupe
2012-2015 R59 MINI Cooper S Roadster
The Rear Diffuser is found on most professional race cars that use the 'ground effects' design. By designing a flat underbody with a rear diffuser, a low pressure area is created under the car causing the car to be pulled down to the ground increasing down-force.
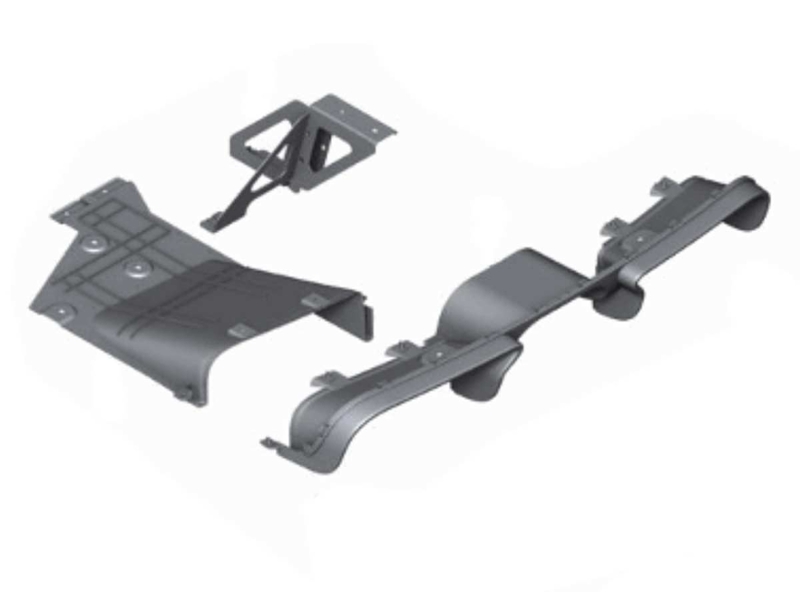
Kit includes:
- Rear Diffuser Outlet
- Right and left Ducts
- Right and Left Brackets
- Factory Fasteners
Includes all FACTORY hardware for installation. Once installed it looks outstanding.
ONLY FITS if you have the factory JCW rear bumper installed as shown in the photos. It will NOT fit on the standard bumper unless you do some DIY trimming and fitting which will likely be very challenging. It CAN fit on the base Cooper IF you have a "S" exhaust and have the JCW rear bumper.
Imported from Germany. We try to keep this kit in stock.
Sorry - no factory instructions available - but it goes like this:
Before you begin, be aware the brackets have a 'range' of positions when installed (you will see when you install), and may need adjusting for proper alignment of the ducts. We recommend you install everything 'loosely' until you confirm the alignment - then go back at tighten everything up.
1. Remove stock rear diffuser piece from the bottom of the rear bumper.
2. Use Torx Screw and Clip Nut (2 each included) to attach center diffuser to body.
3. Attach Brackets to under body using existing hardware at muffler hanger locations. Notice the orientation of the 3 screw holes on the duct to orient the brackets. (It may take a couple trial and error attempts to dial in the bracket position for proper alignment.)
4. Attach enclosed clip nuts (x4 - 2 per side) to the underbody paneling where it meets the ducting.
5. Install the right and left side ducting. Use the enclosed fillister screws (x4) to attach to the underbody paneling into the Clip Nuts installed earlier. The screws for attachment of the duct to the rear diffuser outlet is already on the ducts.
Loading...
Loading...
Loading...
Loading...
Loading...


