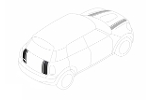
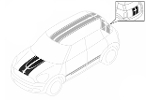
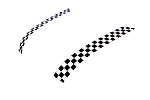
How to Install Stripes to Your MINI Cooper Stripes in 8 Simple Steps
Note: These instructions applies to MINI Cooper Bonnet Stripes, MINI Cooper Racing Stripes and MINI Cooper Hood Stripes.
Installing stripes to your MINI Cooper is actually very easy; you just have to be careful and methodical. Below are some easy-to-follow steps you need to take.
1. Clean the surface thoroughly. Some people use dish detergent to strip the wax but that may not be necessary.
2. Perform a 'dry fit' of the stripes. Use painters tape to outline the position of the stripes so you can repeat the position precisely. (It sometimes helps to determine the centerline and measure from it so the stripes are symmetrical.)
3. Mix a solution of water in a spray bottle with a couple drops of dish soap.
4. Once the position has been marked with painters tape, and the surface is clean of any foreign matter (bugs, tree sap, etc...), spray the solution on the surface LIBERALLY.
5. Carefully peel off the backing from the stripes without touching the backside surface, and spray the solution LIBERALLY.
6. Position the stripes based on the outline you created with painters tape. The solution should allow you to move the stripes until it is positioned in it's exact location.
7. Use a squeegee or similar (plastic/rubber squeegee or a credit card wrapped in 100% cotton fabric or handkerchief), working from the center out to work out all the bubbles.
8. Allow to dry 24 hours before getting it wet.
Sometimes, you still end up with bubbles. Small ones may disappear as the solution evaporates. If they don't, you can use a sharp needle to poke a small hole to let the air escape.
Please note, once you remove the backing, the stripes cannot be returned for a refund. We recommend professional installation, but it can be done at home.
And if you have any questions or concerns, contact a near by body shop to see if they can help or do the installation for you.


